Updated on 2023-02-07
views
5min read
Although part screen capture on Windows may sound simplistic and something easily achievable using Windows native tools. But if you are trying to capture a partial screenshot to use in a professional environment like an office presentation, explainer image, or instructional image, you might be looking for some editing options with the screen capture program. And that’s where native Windows methods to capture partial screenshot becomes inadequate.
Learn how to capture part of the screen on Windows 7, 8, 10, and 11 using the best third-party program on the internet. Also, discover step-by-step instructions with screenshots on how to capture part of a screen on Windows 10. Plus, discover four other tools to take a partial screenshot on Windows quickly and efficiently.
Part 1: Best Way to Capture Part of Screen on Windows 7/8/10/11 With High Quality
To save you time, we are introducing the best tool to capture part of the screen on Windows first. And that is the Eassiy Screen Recorder Ultimate.
1. Eassiy Screen Recorder Ultimate
Eassiy Screen Recorder Ultimate comes laden with magical tools to do any job related to capturing screenshots and recording screens on Windows and Mac devices. You can take a full-screen screenshot, capture part of a screen, crop an active window, or take a scrolling long-form and endless screenshot. It does not end there. Eassiy Screen Recorder Ultimate includes screen recording features that allow you to video record the screen, gameplays, and PowerPoint presentations and create online tutorials.
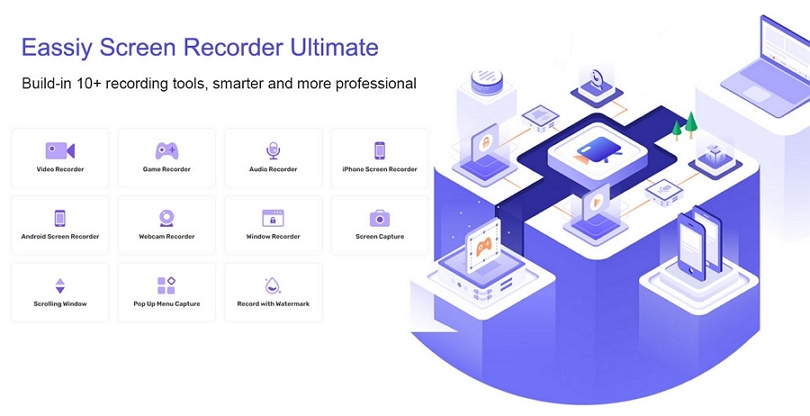
But stressing solely on the screenshot features of Eassiy. Besides giving you control over the type of screenshot you want to capture, i.e., part screen or full-size, Eassiy Screen Recorder Ultimate presents the most comprehensive set of editing tools. The editing tools let you draw shapes and highlight something on the captured image. Of course, you will also find options to use custom-made watermarks and stamps to personalize the image for professional use. But above all, Eassiy Screen Recorder Ultimate presents a simple user interface that makes it possible even for the least tech-literate to use the program efficiently. Eassiy Screen Recorder Ultimate also includes options for video capturing along with these powerful tools:
Key Features:
- Take part screen capture, full-size, endless long-form, or any other type of screenshot with a single click.
- It comes laden with numerous editing tools like highlighter, marker, arrow, custom-style arrows, and text (in multiple font styles).
- You can use stamps and watermarks to personalize the screenshot and make it suitable for a professional environment.
- You can save the part screen or full-screen image in multiple file extensions like .jpg , .jpeg , .jfif , .pjpeg , .pjp, and more.
- Record a small clip and turn it into a GIF.
- Video capturing features are available with sound and webcam. (Other advanced options for video capturing are also available).
- Clean and simple interface will impress you!
- Not heavy on physical resources, even works efficiently on low-end PCs.
How to Capture Part of the screen on PC?
Step 1. Download and Install Eassiy Screen Recorder Ultimate on the PC. Open the program.

Step 2. Choose Video Recorder. Click the camera icon at the top-right corner. Drag the cross cursor to capture the part of the screen on Windows.
Alternatively, you can capture part of a PC screen with hotkeys by clicking the three-bar icon at the upper-right corner > Choose Preferences > change the desired Settings > then click OK to save the Settings.
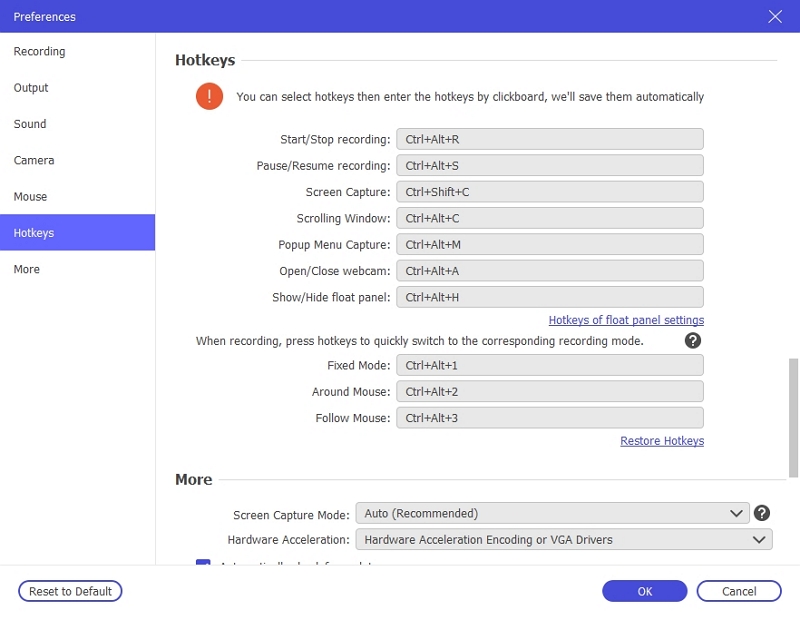
Once you change settings, just use the relevant hotkey to capture part of your PC screen or keep scrolling to take a long screenshot.
Step 3. Edit the partial screen capture as you wish. Then save or export the image to other social channels.
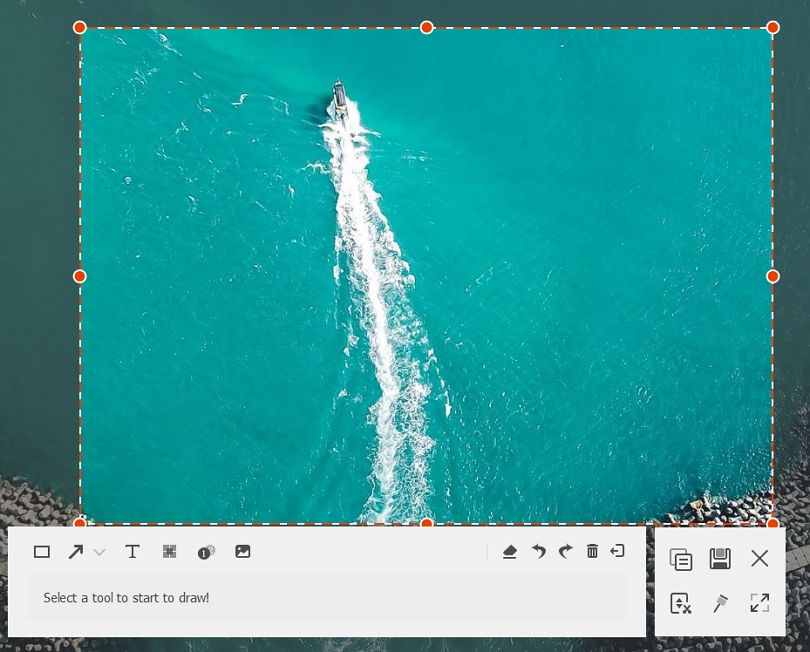
And that’s a quick demonstration of how to take a partial screen capture on Windows using Eassiy Screen Recorder Ultimate; follow on to learn how to take a full-size screenshot on Windows using the Eassiy program.
Part 2: Capture Part of the Screen Using a Free Tool
1. Snipping Tool
The snipping tool, a feature introduced in Windows 7, is also available on Windows 8, 8.1, 10, and 11. However, the new version of the Snipping tool is more powerful and provides multiple modes to capture part of the screen on Windows quickly and easily. You can also edit the part of the screen capture image using the built-in highlighter and marker. Plus, you can use erase, blur, and other editing options to modify the image. However, there is no option to add text. You can scrabble on the image. But unless you have experience writing using a paintbrush, it will be complex to write something. What's great about the Snipping tool is you can activate it using the default keyboard shortcuts, i.e., Windows logo+Shift+S.

Key Features:
- Take screenshots in four modes: rectangular, free-form, active window, or full-size.
- Delay the capture time by 1 second, 3 seconds, or 10 seconds.
- Edit the image using highlighter and marker.
- Save and share the image with others quickly.
Pros:
- Native function on Windows computers, so no need to download any tool.
- You can activate using shortcut keys, i.e., Windows logo+Shift+S.
- Some editing options.
Cons:
- No sophisticated edition options like Eassiy.
- You cannot capture a full-size screenshot using the Snipping tool.
- You can add texts.
2. OBS Studio
OBS Studio is a prominent name in the screen recording realm. And for a reason: it is a free, cross-platform, open-source software that comes laden with video recording features. Be that as it may, OBS Studio lacks critical editing features. Even when it comes to taking a screenshot, OBS Studio falls short compared to Eassiy Screen Recorder Ultimate in terms of modes of taking a screenshot. For instance, the Eassiy Screen Recorder Ultimate allows the users to take a full-screen or long-form scrolling screenshot, which OBS Studio doesn’t. Plus, OBS Studio is complex to use. The interface will test your patience, given the range of screen recording options for live streaming. However, the substantial thing about OBS Studio is it is completely free to use.
Key Features:
- Multiple modes of screen recording and capture features.
- Numerous options to stream in real-time.
- Theater mode shows how others will see the stream.
- Record in 1080p up to 60fps.
Pros:
- Free and open-source.
- Suitable for editing the images.
Cons:
- Lacks advanced image-editing features like Eassiy.
- A tool intended for live streaming.
3. FreeCam
FreeCam is another substantial program to capture part of a screen on Windows. You can download and use the tool entirely free. Although free and good for taking all types of screenshots, FreeCam is suitable to capture screenshots and video captures for personal use. That is to say, FreeCam lacks essential features to personalize and modify the image with the free version. And in case you are wondering, the pro version of FreeCam is US$ 227/year (even after having a “Free” in its official name).
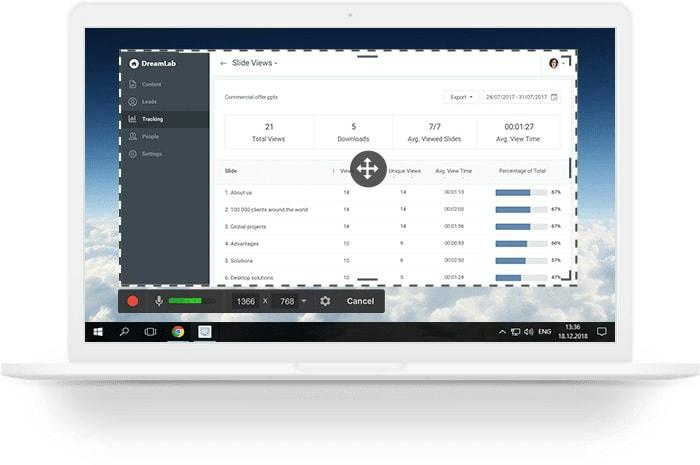
Key Features:
- Take full-size or capture part of a screen.
- Record the screen.
- Use editing tools with the pro version.
Pros:
- Simple and clean interface.
- No watermarks on the part screen capture on Windows 10.
- Lightweight application.
Cons:
- You can customize the Settings — like setup hotkeys with the free version.
- Edition tools are available only in the Pro version of FreeCam.
- Not cost-effective — the Pro version lacks crucial options and costs more than the Eassiy Screen Recorder Ultimate.
4. Movavi
Movavi Screen Recorder comes in two different versions. The free version leaves a watermark on every partial screen capture you take with the program, and the the Paid version that costs more compared to other competitors screen recording tools. If you don't already know, Movavi is a video editing software. And its screen recording software is just a side-product. So, Movavi is a suitable option for anyone looking for a video editing tool and screen capture software.
Key Features:
- Take screenshots in four modes: rectangular, free-form, active window, or full-size.
- Draw on the images and personalize them using the custom-made watermarks.
- You can also show the keystrokes in the video recordings made via Movavi.
- Capture the screen with webcam overlay.
Pros:
- The clean and simple interface allows anyone to use Movavi Screen Recorder easily.
- The free version allows you to take screenshots in any mode.
- The free version allows you to record the screen without any time constraints.
Cons:
- All the screenshots and video recordings taken via the free version of Movavi Screen Recorder contain watermarks.
- The Pro version of Movavi is not cost-effective, given it is suitable for video editors looking for sophisticated editing tools.
Conclusion
Hopefully, you have learned how to capture part of the screen on Windows using this guide. As mentioned earlier, taking a screenshot should be simple and quick. Plus, the tool that you use to take the capture part of the screen should include editing options to modify the partial screenshot and personalize it. As evident, not many tools have the capability and are feature-rich enough to meet the requirements of every user. But then again, there are some tools like Eassiy Screen Recorder Ultimate, which not only are comprehensive and allow you to take multiple types of captures quickly and easily, but also include tons of editing tools and output options.


