Updated on 2024-01-06
views
5min read
People perceive visual information faster than auditory or textual details. And marketers, teachers, and business professionals understand this. It is why emojis, GIFs, screenshots, and videos are their primary source of distributing information to the customers. But the question is, how can you create awesome-looking lectures, presentations, and video lessons? Well, you can use screencast software on Mac to record the screen and share the information visually. But it does not mean anywhere screencast software for Mac is right for the job.
The screencast Mac tool should have necessary recording features like full-screen recording, custom recording, and screen recording with webcam. Plus, it should have elementary editing features like annotation tools, audio management, and more. Read on to discover the best screencast software for MacBook.
Part 1: Screencast Mac With The Best Screencast App for Mac - Eassiy
Eassiy Screen Recorder Ultimate is an intuitive and powerful Mac screencast tool that offers a wealth of video recording and editing options in a relatively simple user interface. To start, Eassiy’s modern interface aligns all the options in a straightforward manner that makes it simple to use by professionals and hobbyists alike. You can record the entire screen with a webcam overlay and internal and external audio simultaneously. There is also an option to record only a part of the screen. Or an individual window by locking it.
But it does not end there. Eassiy Screen Recorder Ultimate packs a wide variety of editing tools, both to be used during the live recording as well as after recording and saving it. Tools like a highlighter, marker, text editor, arrows (multiple styles), etc., make the editing process easy and quick. There is also an option to create custom stamps and watermarks and brand the recording for professional use.
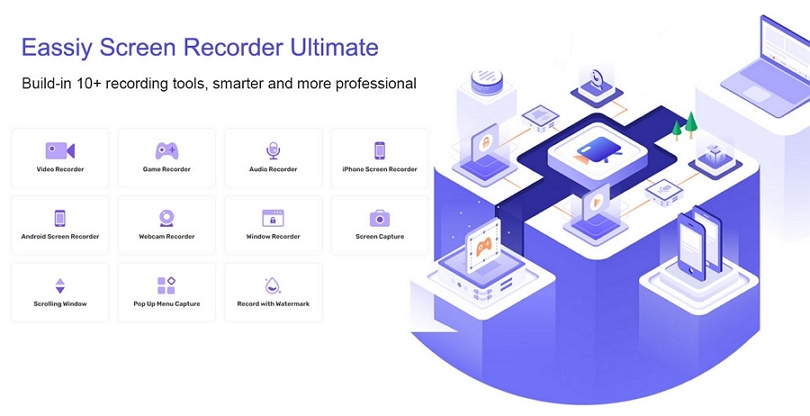
Coming to saving options, Eassiy Screen Recorder Ultimate allows you to save the recording in any format, including MP4, MOV, WMV, FLV, and AVI. Or you can share the file to social channels like Facebook, YouTube, Vimeo, and more directly.
Key Features:
- Screencast Mac: full-screen recording, custom recording, an individual window, or application recording. Supports also record iPhone/Android phone screen.
- Webcam overlay: use different shapes like oval, rectangular, and other shapes for webcam overlay.
- Smart Recording: Create schedule tasks or set auto-stop recording to record videos any time, any where.
- Limit Background interferences: use audio editing tools to level up the external or internal sound, clean the audio, and limit white noises.
- Personalize the screencast on Mac: use custom-themed watermarks and stamps to brand the recording.
- Real-time annotation: draw over the recordings during live recording or post-production.
- Take a screenshot: take a screenshot while screen recording, scrolling screenshot, and more.
- Lock Recording window or application: record a specific app or window only.
How to Screencast Mac using Eassiy Screen Recorder Ultimate?
Step 1. Download and Install Eassiy Screen Recorder Ultimate for Mac. Launch the program. Choose Video Recorder.

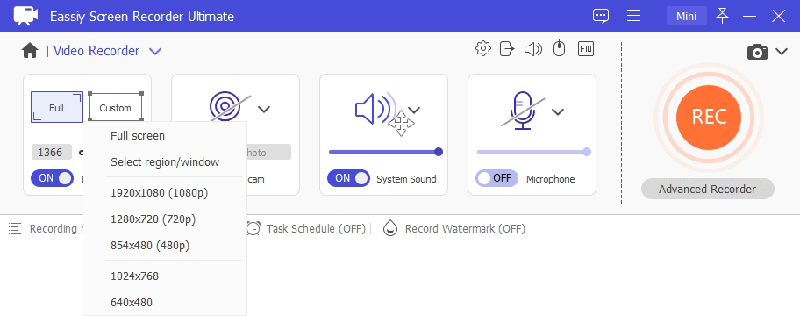
Step 2. Adjust Recording Parameters.
Customize the recording area. Define the aspect ratio and quality. And other necessary parameters. Turn on the webcam if needed. And click on the Rec button.
Step 3. Once you start the recording, you can annotate using shapes, arrows, or other drawing tools. You can also capture live screenshots during recording.
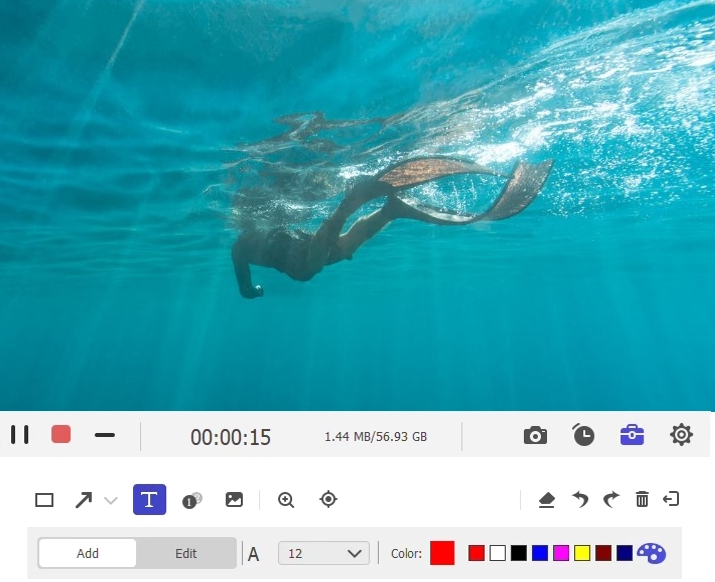
Step 4. Pause or stop recording as needed. All the recorded videos and screenshots will be available in the Recording History folder.
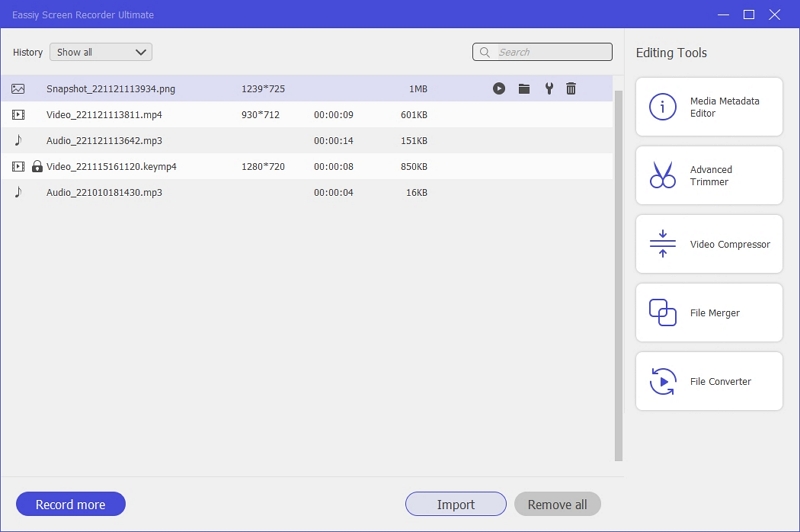
There you go! That’s how simple it is to record using the Eassiy Screen Recorder Ultimate. You can also use other recordings and videos saved on your computer and edit them using the plethora of editing tools.
Part 2: Screencast Mac with Screencast o Matic Online
Screen-O-Matic is a simple, free screencast recorder for Mac and Windows users. One of the best things about Screen-O-Matic is it allows you to download the tool and screencast Mac without even signing up. The videos do not have any watermarks either. Nonetheless, the free version of Screen-O-Matic Mac doesn’t let you record in high-quality like Eassiy Screen Recorder Ultimate.
Coming to the Screen-O-Matic premium plan gives you access to a ton of resources. From editing to a stock library of more than 500,000 video, image, and audio resources, making Screen-O-Matic is one of the best tools to record and edit screen recordings. Besides that, Screen-O-Matic presents a simple and easy-to-use interface that makes it straightforward for anyone to screencast Mac and edit the videos efficiently.
Key Features:
- Record the screen with a webcam.
- Choose from readymade transitions and make the recording seem professional.
- Add voiceover, music, sound effects, and the internal sound in the screen recording.
- Add texts, images, and videos, and blur certain areas of the video.
Pros:
- The built-in library makes it simple to manage the recordings.
- Highlight the aspects in the video using Zoom in/Zoom out.
- Use the built-in stock content like audio, video, and images to enhance your video.
- Add animations, subtitles, and more.
Cons:
- The free version does not allow you to record videos in high-definition.
- The premium version is not cost-effective, given you can purchase Eassiy for way less and get more features.
How to use Screen-O-Matic for Mac Screencast?
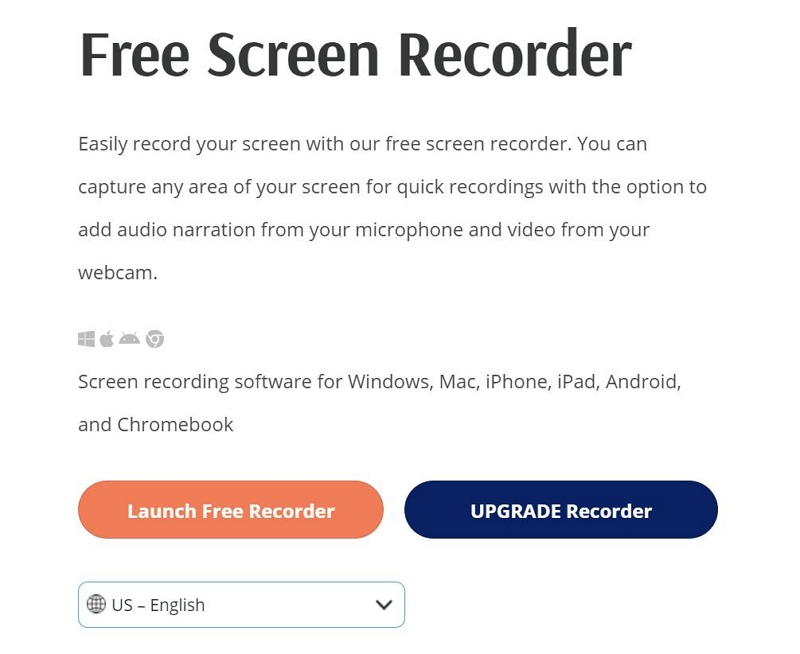
Step 1. Go to the official Screen-O-Matic site.
Click on Record for free. On the next screen, choose Launch Free Recorder. This will download the required application.
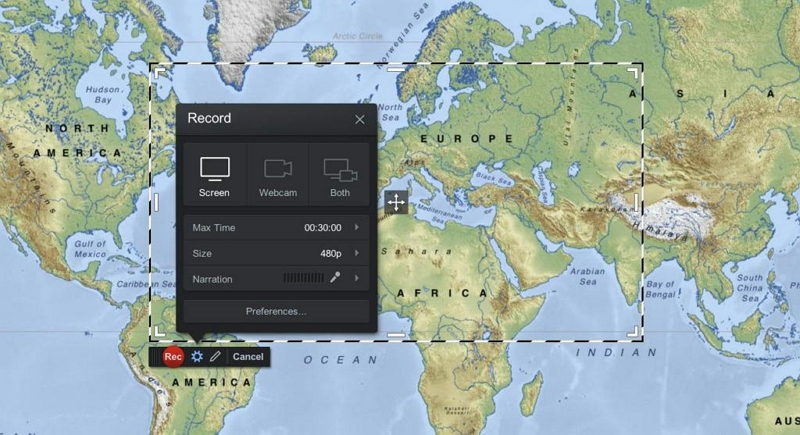
Step 2. Click on the Rec button to start recording.
Choose the recording area. And specify the other parameters like webcam and more.
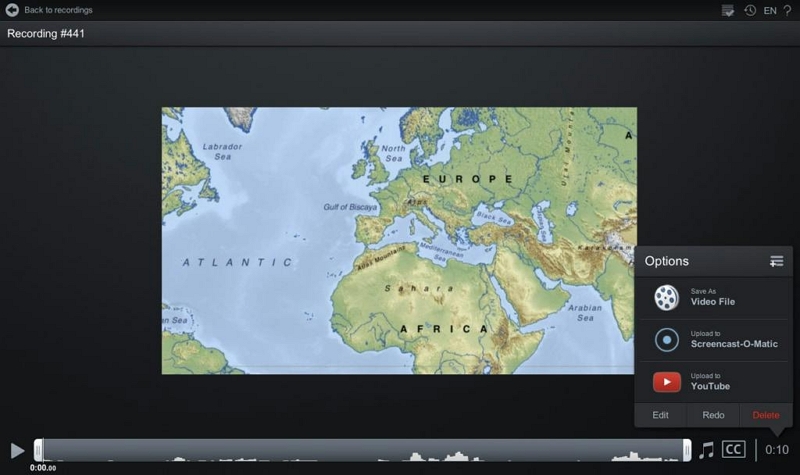
Step 3. Save the recording or upload it to YouTube.
The screen-O-Matic Mac tool is not as powerful as Eassiy Screen Recorder Ultimate, given it does not have editing resources. So, you will have to invest in other video editing tools to make your video suitable for professional use.
Part 3: Screencast Mac With Quicktime Free
QuickTime Player is the native multimedia player on Mac devices. Supporting almost all major file formats, QuickTime Player includes screencast and editing tools in its repository too. You can record the Mac screen, full screen, or partial screen and save it in the format of your choice. There are a few editing options that allow you to annotate the video during post-production.

Key Features:
- Trim, rearrange, rotate, and other basic editing features are available.
- You can share the video directly to social channels like YouTube, Facebook, and Vimeo.
- Play video, audio, and image content.
- Record the mac screen.
Pros:
- Native Apple tool, so there is no need to download any tool.
- QuickTime encodes and transcodes digital files into different formats.
- Use a URL to stream media content.
- You can use the Keyboard shortcut to trigger the QuickTime recording tool, i.e., Shift+Command+5.
Cons:
- Not a plethora of editing tools to make your videos suitable for professional use.
- You cannot annotate during the live stream.
- No long-scrolling screenshots.
Here’s how to screencast Mac using QuickTime Player:
Step 1. Go to Finder from the dock. Choose Applications. Within Applications, choose QuickTime Player.
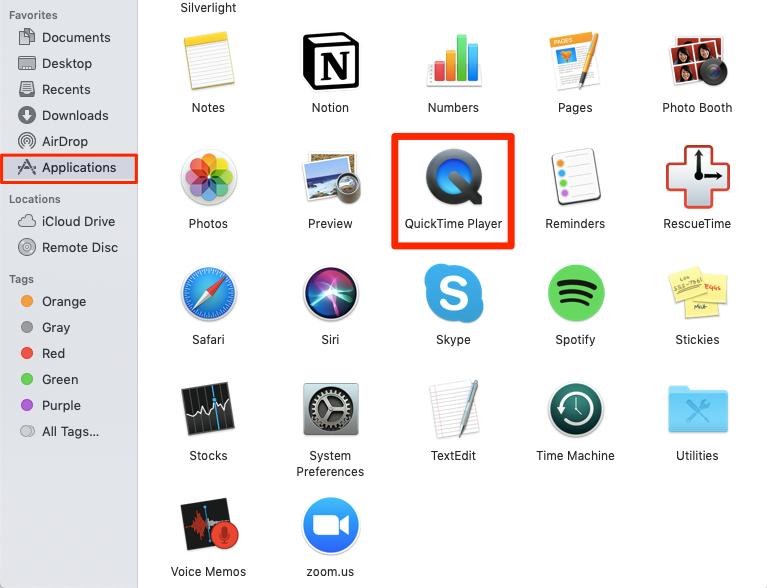
Step 2. Under the File menu, choose New Screen Recording.
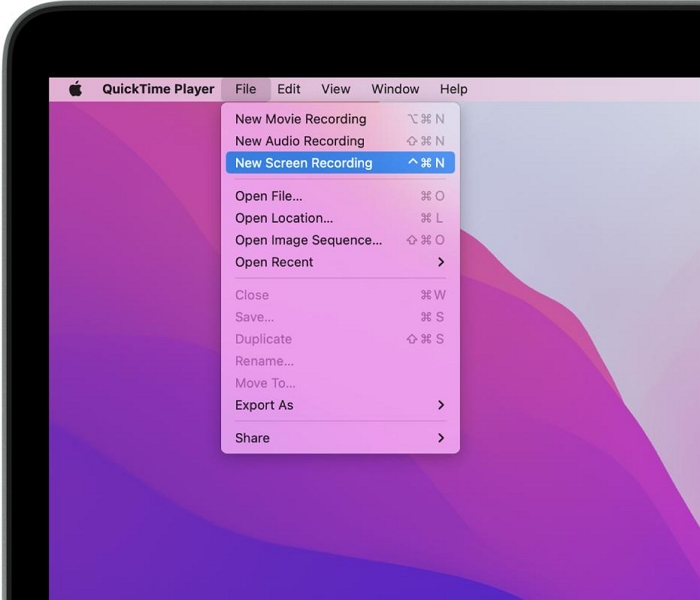
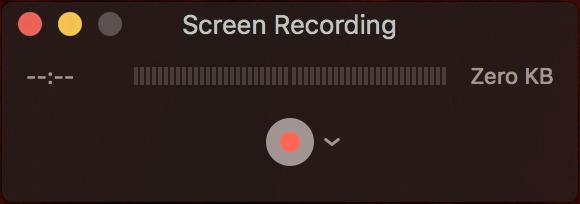
Step 3. You will see the Screen Recording menu. You can start the recording by clicking on the red dot button. However, to enable other parameters like sound, click on the down arrow.
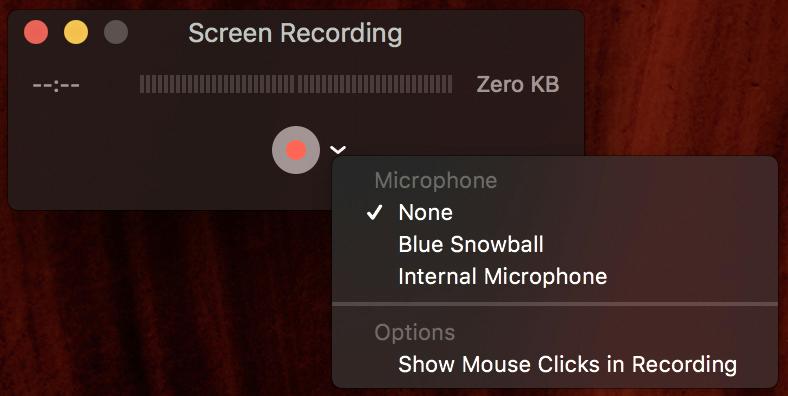
Step 4. Click on the down arrow button. Choose the options like including internal sound and more.
Step 5. Specify the recording area. Click on the red button to start the recording.
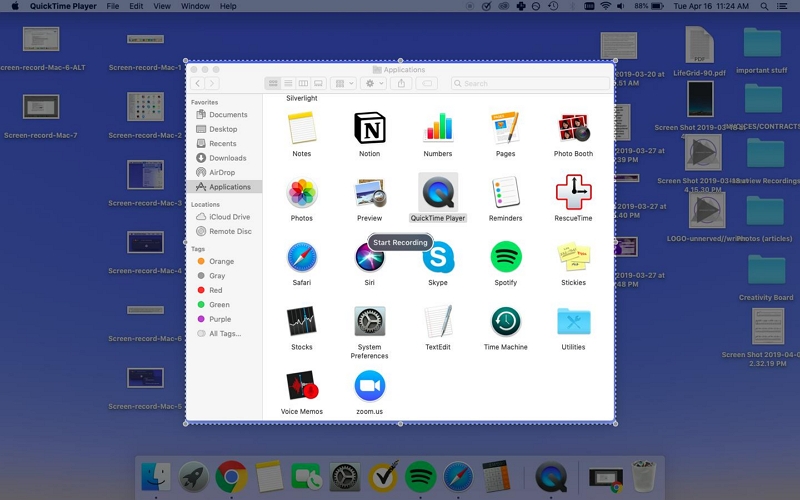
Step 6. Click on the Stop button to stop the screen recording with audio.

Step 7. Click on File. And choose Save.
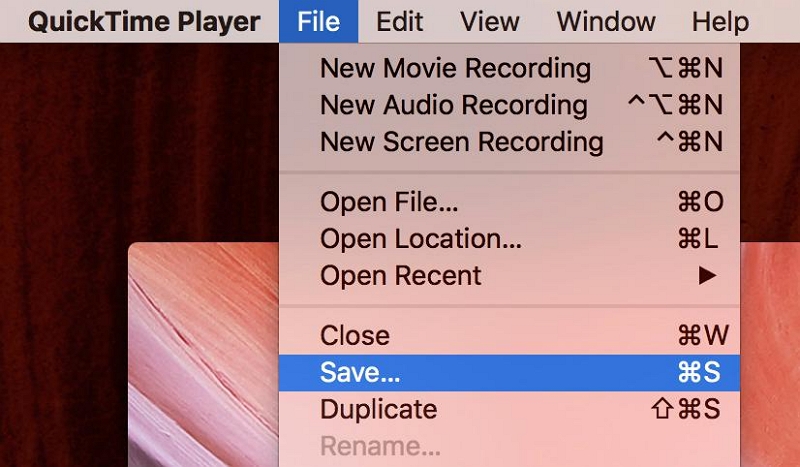
There you go! Recording with QuickTime Player is simple. But as evident, there aren’t many options to edit the screen recording. That is why we mentioned Eassiy Screen Recorder Ultimate as an alternative.
Part 4: FAQs
1. How do I Screencast in QuickTime?
You can trigger the QuickTime Player using the Shift+Command+5 shortcut keys. And choose the recording area. Turn on the microphone sound if needed. And click on the Record button to start screencast on Mac with QuickTime Player.
2. How do I Screencast my Mac to my TV?
To screencast Mac on Apple TV, ensure that both the devices are on the same network. And click on the Screen Mirroring icon via the Control Center.
Choose Apple TV.
You can adjust the screen size and other parameters via the Control Center itself. When the connection is successful, you will see the AirPlay icon to be blue. If the connection is unsuccessful, then the AirPlay icon will be white.
3. What is Screencast-O-Matic?
Screen-O-Matic is a screencasting and video editing tool that allows you to screencast Mac. You can use the editing tools with the professional version of Screen-O-Matic.
Conclusion
Mac screencast should not be difficult. Yet, there are hundreds of tools that can make a simple job like screencasting mac troublesome for the users. And that’s where these three applications shine. Making Mac screencast simple, all Eassiy Screen Recorder Ultimate, Screen-O-Matic, and QuickTime Player are substantial.
However, there is a significant difference between these three tools too. For instance, Screen-O-Matic and QuickTime Player lack the necessary tools to edit the screen recordings, making them unsuitable for a professional environment. At the same time, Eassiy Screen Recorder Ultimate includes all the necessary tools to record any video, like business presentations and software demos. Plus, it has the much-required annotation tool to highlight important sections and make your video stand out!


