Updated on 2024-01-06
26 views
5min read
Do you want to create awesome-looking tutorials, software demos, training videos, lectures, presentations, or video lessons? But you are not sure how to screen record on the MacBook with audio? Scroll down to find the best tools to screen record on Mac with audio. These tools include all the elementary and advanced recording and editing features. So, these screen recording tools will help you capture the Mac screen with audio in the desired manner. Plus, they include all the editing tools to outshine your videos when used in a professional environment.
Part 1: Screen Record Mac With Audio Using The Best Tool
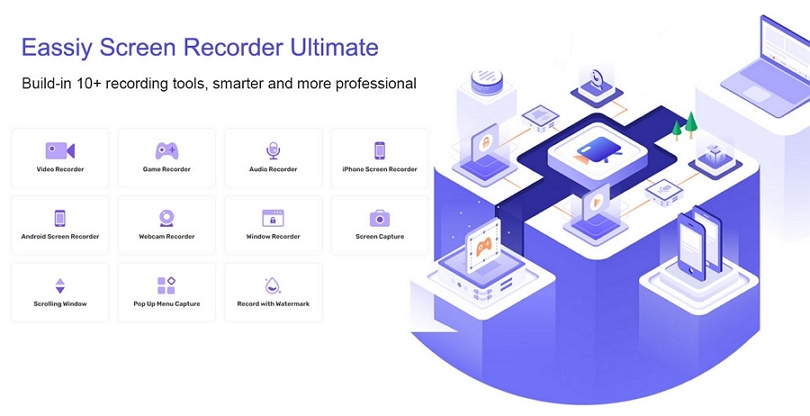
Eassiy Screen Recorder Ultimate is the most advanced screen recording tool for Mac out there. Be it creating video tutorials, software demos, or gameplay videos — there are dedicated themes within the Eassiy Screen Recorder Ultimate that can help you create awesome-looking videos efficiently. You can record the screen, define a specific area for recording, as well as record the screen with a webcam overlay. Plus, the audio management allows you to include both internal and external audio. Not only this, there are dedicated features to limit background interferences and enhance audio quality.
But the characteristic that ranks Eassiy Screen Recorder Ultimate high in the list is its clean and simple user interface. Above all, the pricing structure of Eassiy Screen Recorder Ultimate makes the software cost-effective, given it presents the industry-level features at a very reasonable license cost.
Key Features:
- Record the screen: full screen, partial screen, window recording, iPhone screen and Android phone screen.
- You can Video Record the screen with webcam overlay.
- Take a screenshot while recording the screen.
- Real-time annotation tools include shapes, highlighter, text, and other drawing tools.
- Capture long-form scrolling screenshots to include anything present in the bottom fold.
- Brand and personalize the screen recordings using stamps and watermarks.
- Schedule recording for live streaming, serials, sport events etc.
- Auto-stop recording according to ending time, file size or recording length
- Personalize keyboard shortcut and use your personal hotkey to capture a screenshot anytime with a single click.
- Capture a small video and convert it into GIF.
- Move the recording area around/follow the mouse during live recording.
How to Screen Record With an Audio Mac using Eassiy?
One of the best things about Eassiy Screen Recorder Ultimate is its simple and self-explanatory user interface, which makes it straightforward for users of any skill level to quickly screen records on Mac with audio and edit them for professional use.
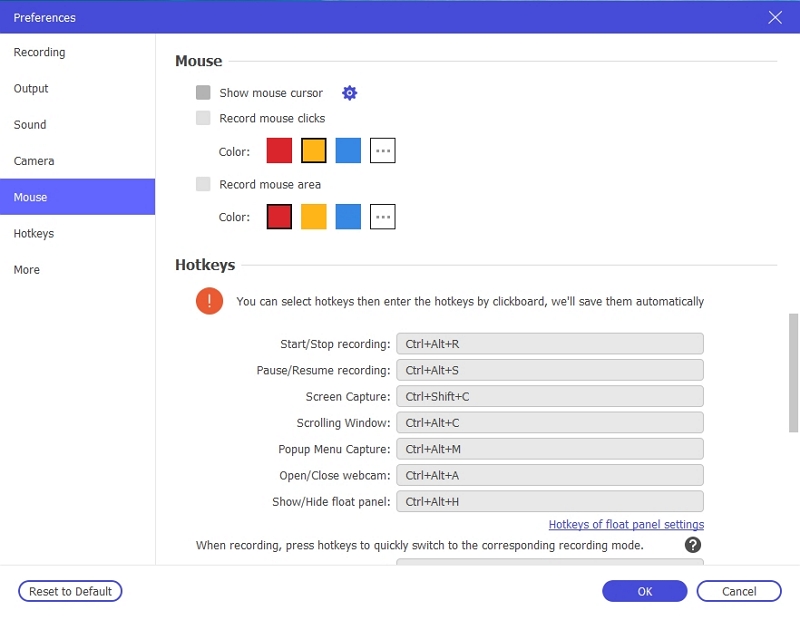
Step 1. Download and Install Eassiy Screen Recorder Ultimate on Mac. Launch the tool. Customize the Settings. On the main screen, click on the three dots at the right corner. Choose Preferences. And change the desired settings like mouse color, hotkeys, and other parameters.
Step 2. On the main interface, choose Video Recorder on the main screen.

Step 3. Adjust Recording Parameters.
- Define the aspect ratio and quality.
- Turn on the toggle next to ‘System Sound’ and ‘Microphone’. Then adjust the volume using the relevant button.
- Turn on the webcam if needed.
- And click on the Rec button.

Step 4: Use the real-time drawing tools to highlight the important points in your video.
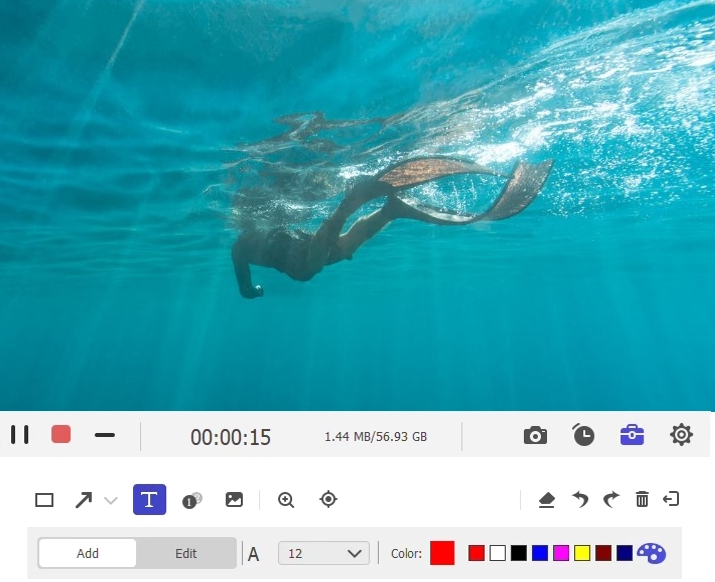
Step 5. Pause or stop recording as needed.
Step 6. You can save the recordings or share on social channels like Facebook, YouTube, or more platforms. You can access the recorded videos and screenshots at any time via the Recording History folder.
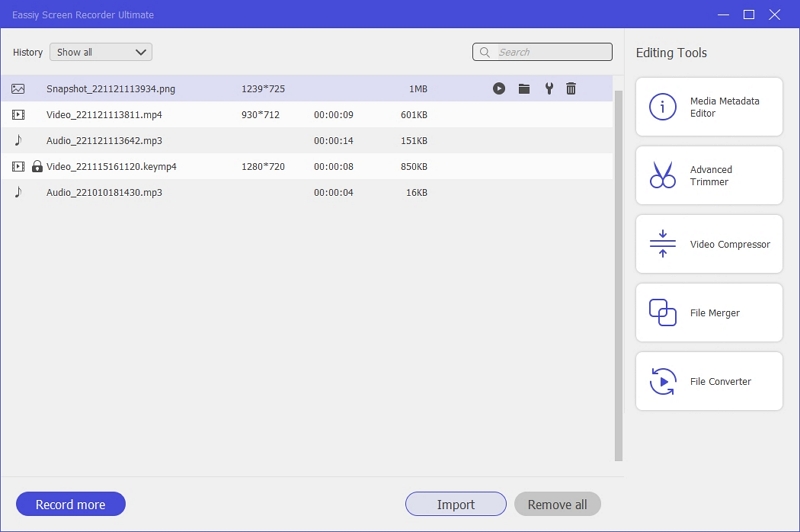
As mentioned earlier, there is no easier way than Eassiy Screen Recorder Ultimate to record the Mac with audio.
Part 2: Screen Record With Audio Mac using Free Tool - QuickTime
QuickTime Player is a built-in multimedia player that's compatible with all Apple devices. Besides being an excellent multimedia player, QuickTime Player also allows you to screen record the MacBook with audio.
Key Features of QuickTime Player:
- View images, audio, and videos.
- Edit a movie.
- Record your Mac screen.
- Capture your iPhone, iPad or iPod touch screen.
Stepwise Guide to Screen Record on Mac with Audio using QuickTime Player:
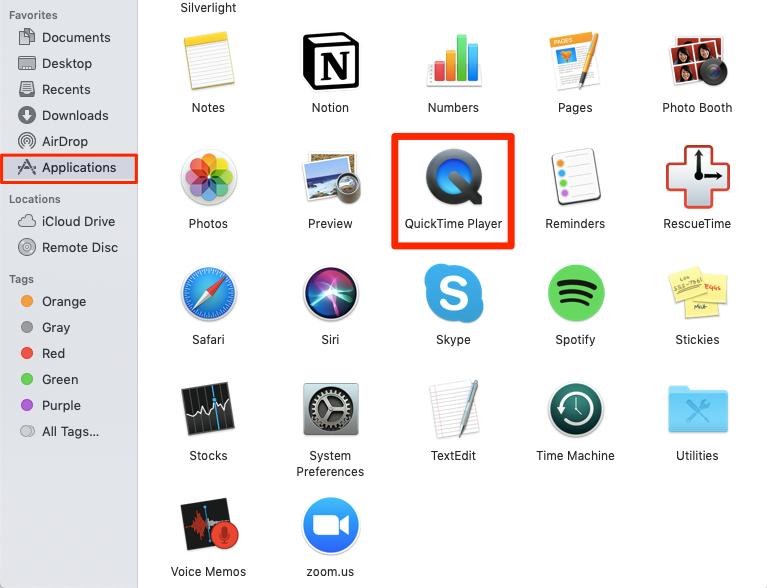
Step 1. Go to Finder. Click on Applications. And from the right pane, choose QuickTime Player.
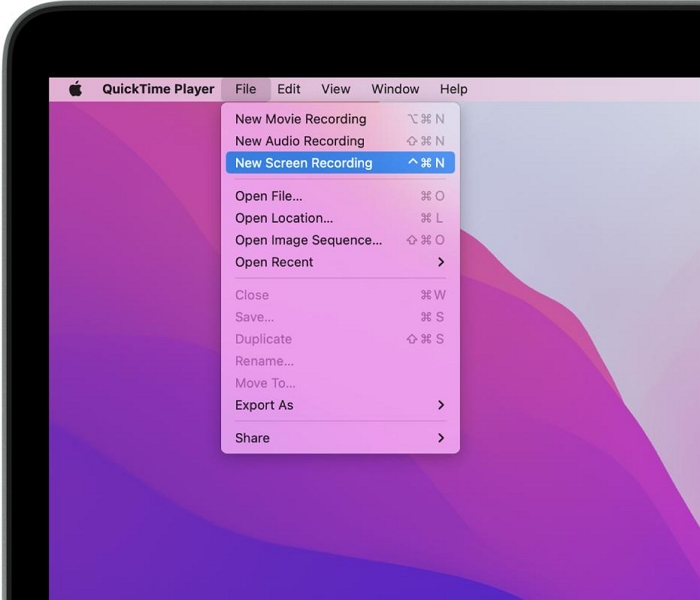
Step 2. At the top part of the page, click on File > Select New Screen Recording from the drop-down menu list.
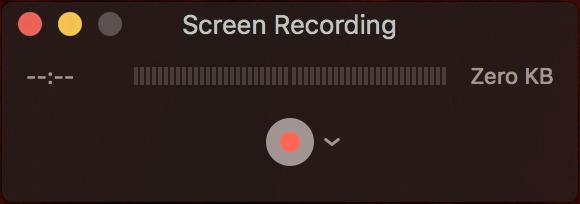
Step 3. A screen recording menu will appear.
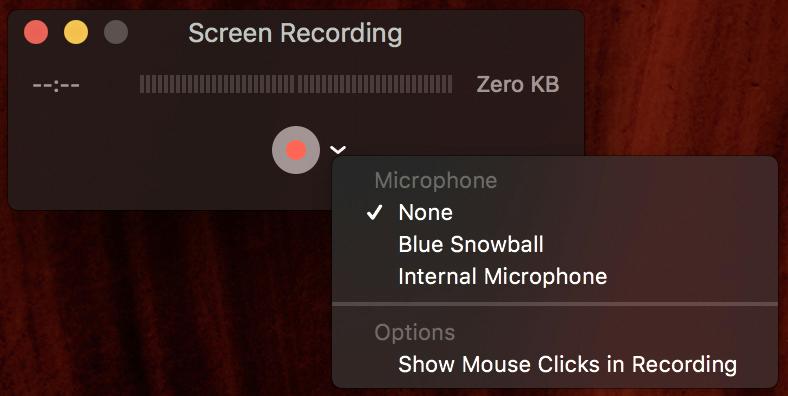
Step 4. Click on the down arrow button to change the settings. You can select the options like internal sound and more.
Step 5. Choose the recording area. And click on the red button to start the recording.
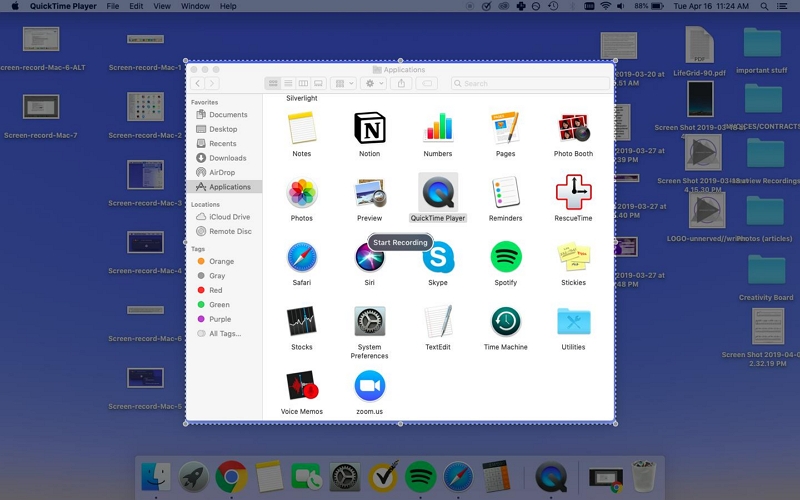
Step 6. Hit the Stop button to end the screen recording with audio task.

Step 7. Navigate to the top bar and click on ‘File’ and select ‘Save’ from the drop-down list.
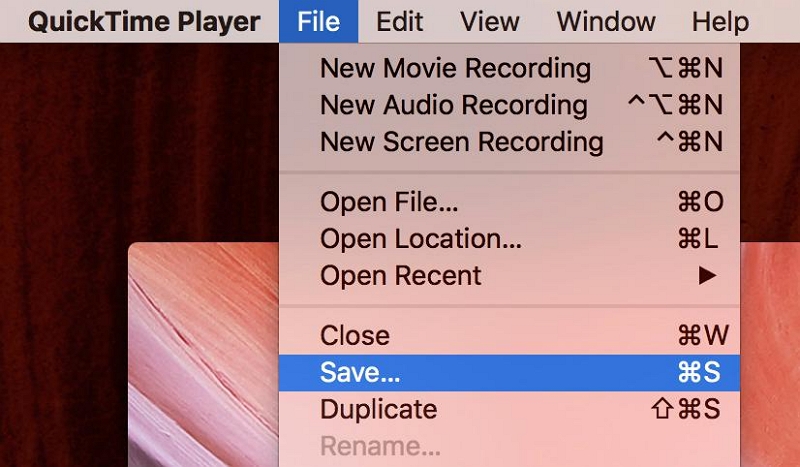
Compared to Eassiy Screen Recorder Ultimate, QuickTime Player falls short when it comes to the screen recording features. For instance, Eassiy Screen Recorder Ultimate allows you to annotate during live recording and post-production. Plus, the level of customization like audio management and other necessary functions are missing in QuickTime Player.
Part 3: Screen Record on Mac With Audio Using Shortcut Key
The keyboard shortcut key on Mac simply triggers the QuickTime Player directly. So, do not expect anything new. It is just that you can open the screen recording feature quickly using the keyboard shortcut. And that keyboard shortcut is Shift+Command+5.
Here’s how to screen record on MacBook using the Keyboard Shortcut:
Step 1. Press Shift+Command+5 together.

Step 2. You will find some screen options to manage the recording beforehand. To record your Mac computer screen, click Record Entire Screen. However, if you're looking to specify an area to record, click on the Record Selected Portion icon (dotted).

Step 3. Click on Record to begin the screen recording. Drag and specify the region to record.

Step 4. Now, hit the Record button to start the screen recording.

Step 5. Simultaneously click on Command+Shift+Esc on your PC keyboard to end the recording. Type in the name of the recording and save it. By default, the screen recording will be saved to the desktop. But you can save the destination tag as needed
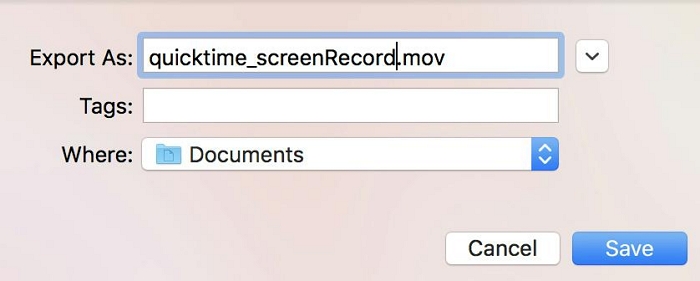
Again, as mentioned, there aren’t any specific features or options when you trigger the screen recording using Keyboard shortcut.
Part 4: Screen Record on Mac With Audio Using Online Tool
Screen Capture
Screen Capture comes from the famous Movavi. Yes, known for its excellent lineup of video editing tools for mobile and computers, Movavi introduced its ScreenCapture to allow the user to capture screen recordings efficiently.
But although Screen Capture's name may indicate that the online tool is free — it is far from reality. In actuality, Screen Capture doesn’t even permit 1 minute of free recording. It will leave a watermark on all the videos captured with the free version. In comparison, Eassiy Screen Recorder Ultimate allows users to record up to three minutes completely free. So, it is better to opt for Screen Capture if you are considering the premium version, given it includes all the necessary editing and storing features required for personal screen recording needs.
Key Features:
- Free screen recorder with no download
- Record with webcam and microphone sound.
- High privacy of recording process
- There is also an offline downloadable tool.
Here’s how to screen record Mac with audio using Screen Capture:
Step 1. Go to the official Screen Capture site. Click on Start Recording.
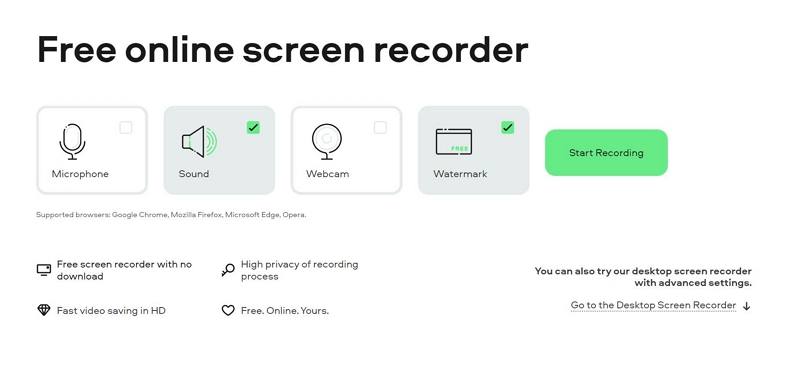
Step 2. A pop-up window will launch. Press the Rec button to start the recording.
- Opt for Microphone if needed.
- Similar settings can be adjusted for the webcam.

Step 3. Press stop and download the recording.
Screen Capture is a simple application. So, using it is not troublesome. However, it is more suitable for quick-and-dirty work, given there are no advanced editing and recording features accessible.
Conclusion
Now you know how to record the Mac screen with audio. So, start creating captivating videos to engage the audience. As mentioned, there are multiple ways to record the screen on Mac with audio. The tools include in the list stand out from the internet and meet the needs of any user, given the guide includes a professional, free, and Apple native tool. If you need to screen record with audio on Mac and create personal content, then the native tools or Screen Capture are suitable for you. However, if you are looking for software that you can use to create awesome-looking content for professional use, Foneaw Screen Recorder is the tool for you.


