Updated on 2023-02-07
views
5min read
If you have ever wanted to record your iPhone's screen to share it with others, you will be happy to learn all that in very simple steps. Screen recording is very important when creating how-to videos or tutorials or you want to show off a new game to your friends. Whichever the reason for screen recording, you will be surprised about what your iPhone can do for you. With iPhone screen recording, taking screenshots has become a thing of the past. Recording your iPhone screen is not hard, as it takes only a few steps. In our handy guide, we shall take you through a step-by-step guide on how to set up screen records on your iPhone. Let's hit the ground running!
Part 1: How to Set Screen Record on iPhone Via Settings App - Apple's Official Method
iOS features a convenient Control Center function that allows you to record whatever you do on the screen. This is great when you want to record gameplay, walk your viewers through some tutorial or demonstrate a bug. In the past, it cost an arm and a leg to screen Record on your iPhone. However, since the rollout of iOS 11, Apple devised a way to do that very conveniently. In the guide below, we explain to you how to set screen records via the settings app step-by-step. With this Apple's official method, you will not need to have third-party apps to screen Record on your iPhone.
Here’s How to Use the Native Screen Recorder on iPhone:
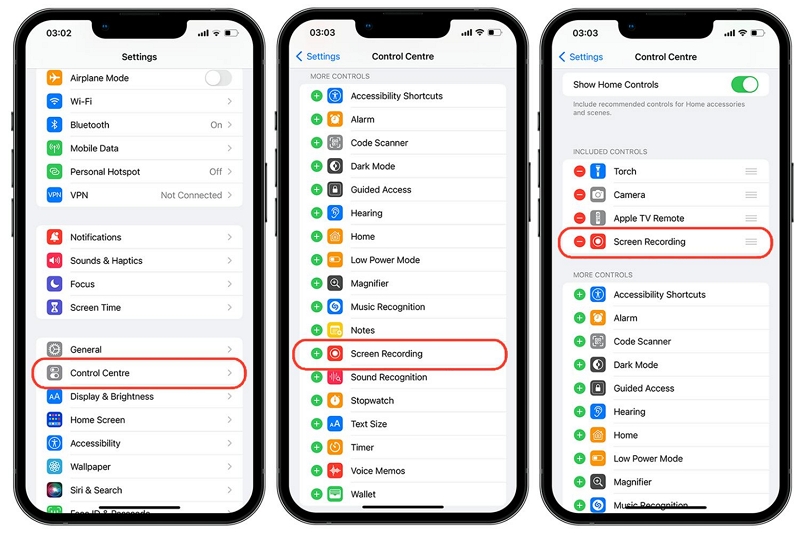
Step 1: Open the Settings app to find the 'Control Center.'
- You will need to enable this screen recorder tool before using it. To do that, open the Settings app and locate the Control Center.
- Upon getting to the Control Center section, you will find several toggles. The Included Controls section shows all the options you have added to the Control Center.
- Leave that and proceed to the More Controls section.
- In the More Controls section, you will find the Screen Recording option.
- Tap the green plus icon on its left to include it.
Step 2: Start the iPhone Screen Recording.
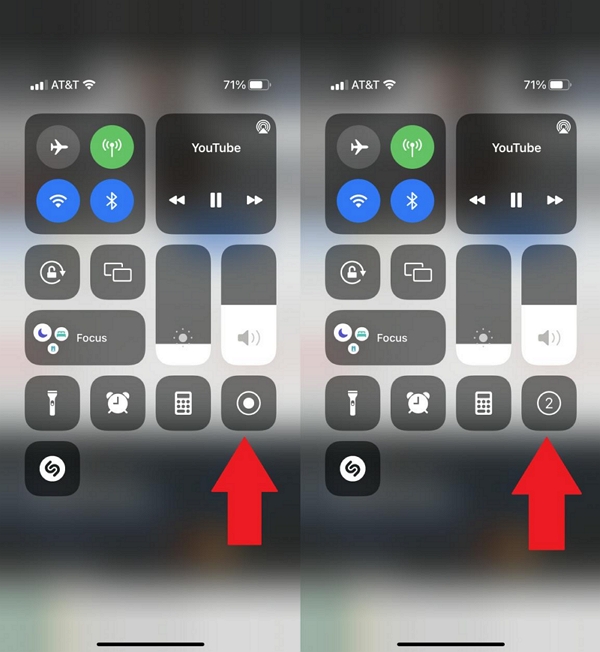
- Swipe down from the right to access the Control Center.
- Choose the Screen Recording button to start the countdown. The timer will wait for 3 seconds before starting the iPhone screen recording. You can prepare for the recording during this time.
- Go through the recording process and record everything that you want to include in the iPhone screen recording.
Note: To include the Microphone sound in the iPhone screen recording, you must press the Record button long. This will trigger the Microphone option. Click on the Microphone icon to include your sound from the microphone.
And click on Start Recording.
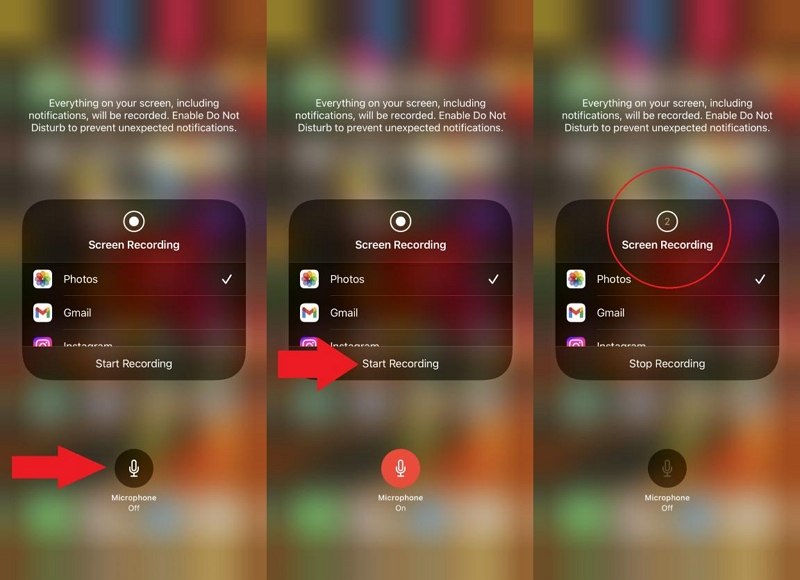
Step 3. End the iPhone Screen Recording.
Once the iPhone recording is initiated, you will see a red timer on the top-left corner of the iPhone. Click on the timer to stop the iPhone screen recording. The recorded video should be saved to your iPhone Photos app afterward.
How to edit screen recordings on iPhone?
You can edit your screen recording in many ways with several available options. To edit your recordings, open the Photos app and tap on the screen recording. Once here, hit that edit option at the top right to see the options below.
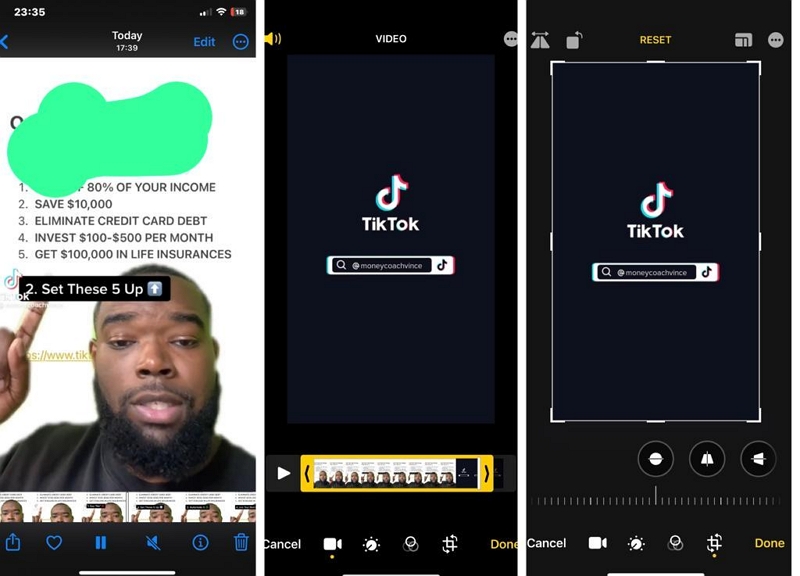
- Trim recording- this editing option is found in the edit panel and is used to cut your recording short. It comes in handy when you feel that a part of the recording is unnecessary.
- Filters- it is also possible to add filters to the screen recording and generate a different hue scheme for the recording. The Photos app is rich in filter options.
- Adjust- there are instances when you feel unsatisfied with some recording details. Several options in the Adjust panel exist under the Edit section. It is possible to manage aspects like contrast, brightness, and saturation.
- Crop- if you want to concentrate on a certain area of your recording instead of the whole screen, it is easy to drop the recording. That way, the user can easily resize the video clip as they want.
Part 2: Set Up Screen Record on iPhone Without Built-in Screen Record setup.
Even though the native screen recording on iOS works just fine, it is pretty basic in its function. All you can do is record the iPhone screen with or without sound. So, you will have to look for third-party applications that include advanced screen recording functions like Record It!
Record It is one of the best applications that sit on your iPhone screen and allows you to record the screen with a single tap. It supports iOS 11 and above versions. Besides screen recording the iPhone, you can include facecam reactions. Additionally, you will find advanced editing tools to curate your screen recordings professionally. This screen recording app allows users to live stream games via Face Cam. Using the app, the user can record demo videos, reaction videos, training videos, and a whole lot more. One amazing feature of this screen recording app is that it allows users to easily add commentary to their gameplay and other videos.
How to use Record It! Screen Recorder?
Step 1. Download and Install the Record It! Screen Recorder from the App Store.
- Create an account on Record It!
- After registering yourself, open the Record It application.
- Click on the Red button to start recording the iPhone screen.
Step 2. Click on the Facecam button to include the facecam footage in the screen recording.
- You can include text or use the highlighter to annotate the screen recording.
- Click on the floating icon to end the iPhone screen recording.
Step 3. After you end the recording, Record It! will allow you to Preview the screen recording.
- You can use the editing tools to edit the screen recording.
- Or use the social share buttons to share the iPhone screen recording to other social media channels.
Bonus: How to Screen Record iPhone Without Built-in Screen Recorder on Computer
Eassiy Screen Recorder Ultimate is the ultimate tool to record iPhone screens conveniently. From 4K recording, high-quality audio, and advanced audio management features to video editing tools, social sharing options, and cool features, it is the one tool to meet all your screen recording needs. That is to say, be it recording gameplay, recording video tutorials, creating business presentations, or creating online lessons, Eassiy Screen Recorder will fulfill all your needs.
Focusing on its audio features, Eassiy Screen Recorder allows you to include both internal and external sound in the screen recording, as well as you can choose to include the internal and external audio channels from the computer. Additionally, there are advanced features like limiting background interferences and enhancing microphone sound. But above all, Eassiy is intuitive and simple, meaning it is straightforward for a beginner to use the tool and record their iPhone screen.
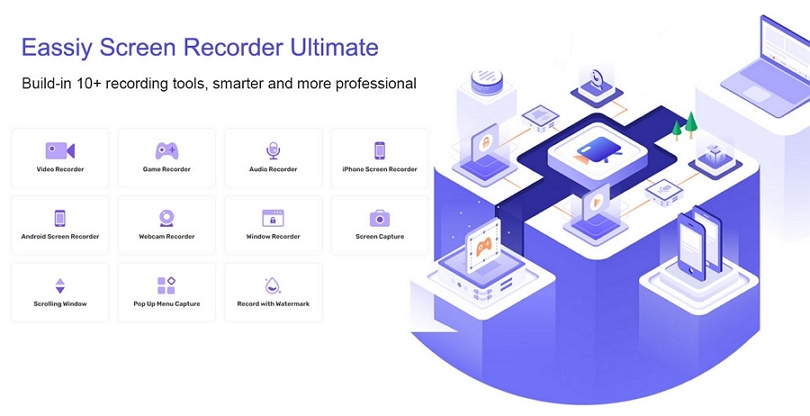
Key Features:
- No tool on the iPhone needs to be downloaded to record its screen. Eassiy allows you to mirror your iPhone and record the screen in high-definition.
- You can record the iPhone screen in up to 4K quality.
- Incorporate both internal and external sound in the iPhone screen recording. You can also include sound channels from the computer.
- Advanced audio management features to limit background interferences and enhance microphone sound.
- You can edit the iPhone screen recording using the trim tools, auto-split, audio control, and more such options.
- You can trim a small video from the iPhone screen recording and turn it into GIF.
- You can annotate the recordings using arrows, pencils, highlighter, and text.
- You can share the iPhone screen recording on social media channels like YouTube, Facebook, and WhatsApp.
How to Screen Record FaceTime from PC using Eassiy Screen Recorder?
Step 1. Download and Install the Eassiy program on the computer.
Step 2. Launch the installed program and click on the Phone icon from the main screen.

Select the iOS Recorder option on the next screen.
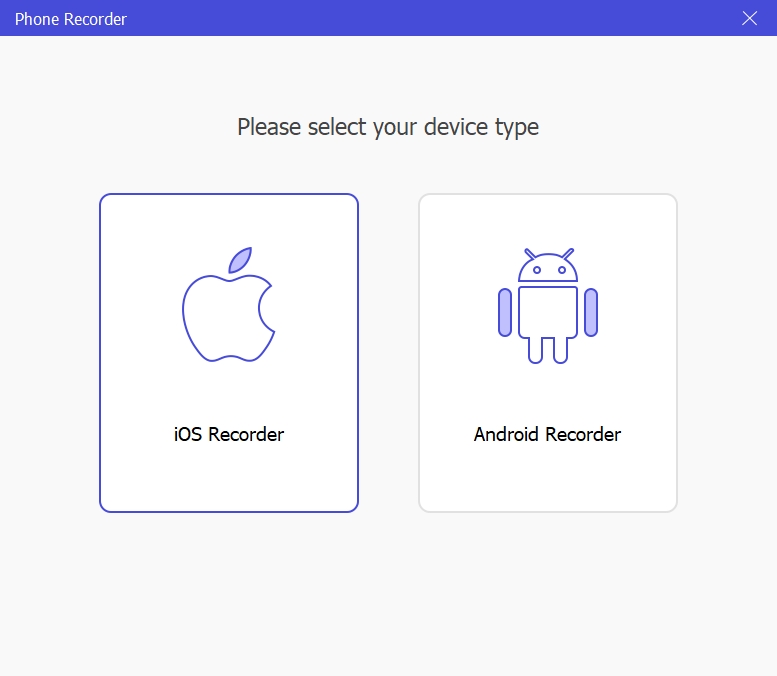
Step 3. Mirror your iPhone screen to the computer to record the iPhone screen.
Select USB-Connection and connect your iPhone to the computer. Then, follow the on-screen instruction to to establish the connection between the computer and iPhone.
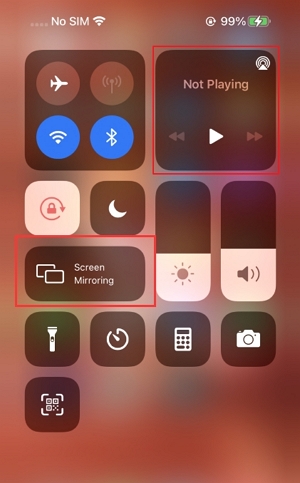
Step 4. Optimize the iPhone recording Settings.
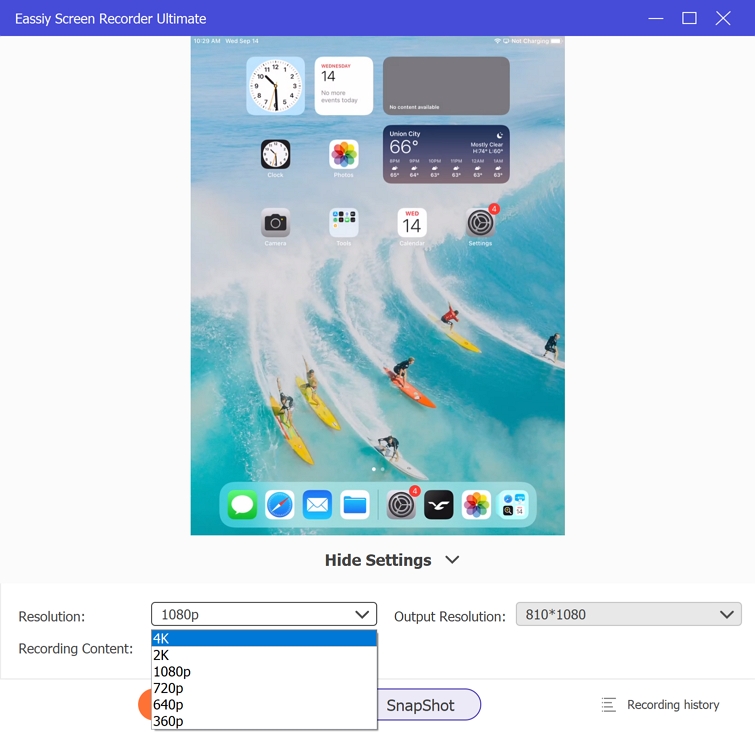
Now, apply screen recording settings. Click Resolution and select the resolution a which you want to record your iPhone screen.
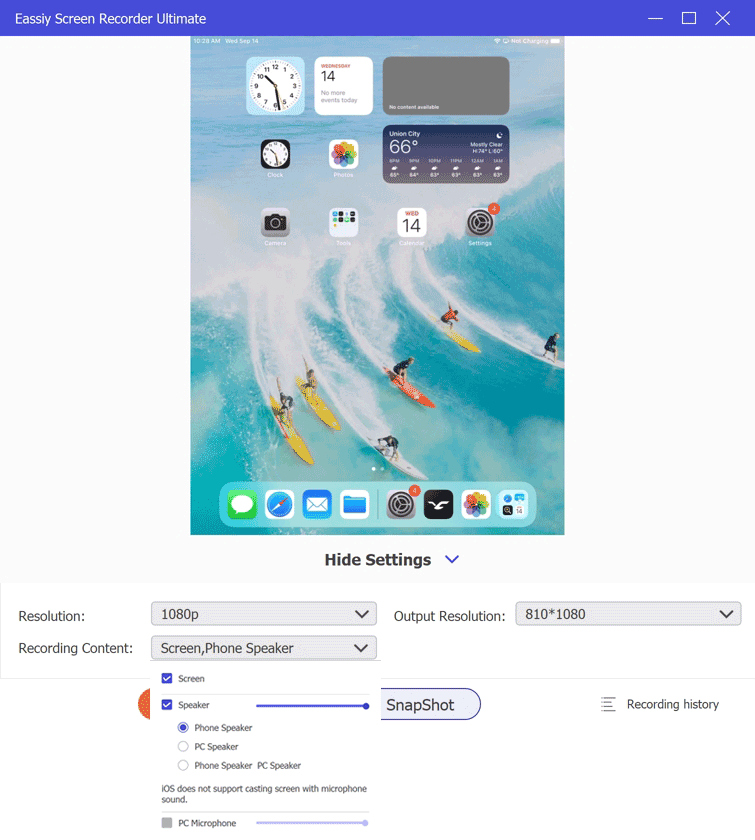
Then, click Recording Content and select whether you want to record the iPhone with internal or external audio.
Step 5. Start the iPhone screen recording.
Click on the Record button to start recording the iPhone screen.
Step 6: Click the Stop button to end the facetime recording. After that, save the recorded video to your PC’s local storage.
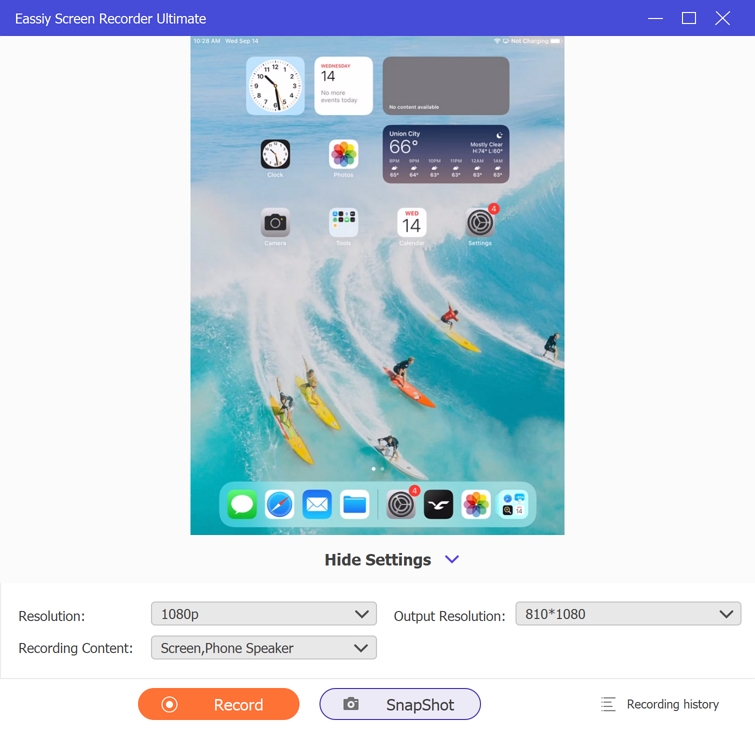
That’s how simple it is to record an iPhone screen with Eassiy Screen Recorder. You can also use the editing tools accessible within the Eassiy program to compress, convert, cut, and do lots more on the recorded video.
Conclusion
There you go! You now have everything that you need to record your iPhone screen like a pro. Having known the handy tricks of recording your iPhone screen, you can use the tricks with your Apple iPhone devices too. However, make sure you employ the technique that suits your requirements. While the built-in screen recorder allows you to perform basic screen recording operations, advanced software like Eassiy Screen Recorder provides you with the ideal tools you need to record an iPhone screen with high-quality seamlessly.


