Updated on 2023-02-07
22 views
5min read
Over the years, FaceTime has evolved from a video-calling tool for friends and family. And FaceTime is now used even in professional environments. Today, managers call their coworkers to discuss the progress of the work, teachers call their students to share key details about a project, and so on. Of course, many people need to remember the key ideas discussed during the FaceTime calls. And for that reason, it is best to learn how to record FaceTime calls on iPhone. Scroll down to learn three ways to record FaceTime on iPhone.
Part 1: How to Record FaceTime with Sound on iPhone Using Built-in Recorder?
The most straightforward method to record a Facetime call is to use the built-in Screen Recording function on iPhone. Available on all iPhones running iOS 11 or later versions, the native screen recorder is hidden by default. You have to customize the Control Center options to access.
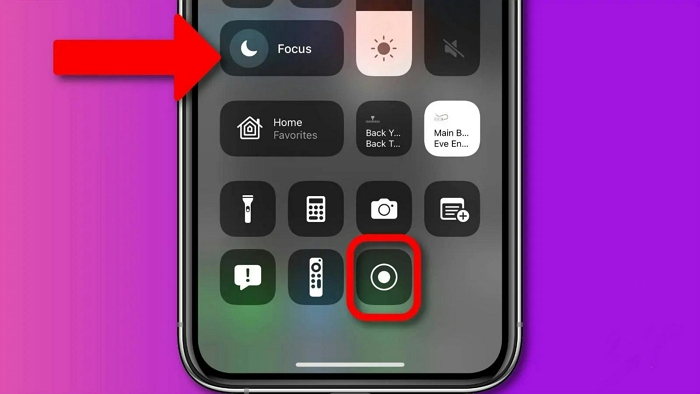
Focusing on the recording features in the native screen recorder, you will not find any advanced functions accessible. You can record the on-screen activities with audio. However, there’s a significant drawback to using the built-in screen recorder on iPhone. And that is, you have to compromise the internal storage space, as all the recordings are saved on the iPhone itself.
Here’s How to Record FaceTime With Sound on iPhone Using the Built-in Screen Recorder:
You must customize the top-level menu to access the Screen Recording function on your iPhone. So, first, let’s learn how to access the Screen Recording function and include it in the Control Center options.
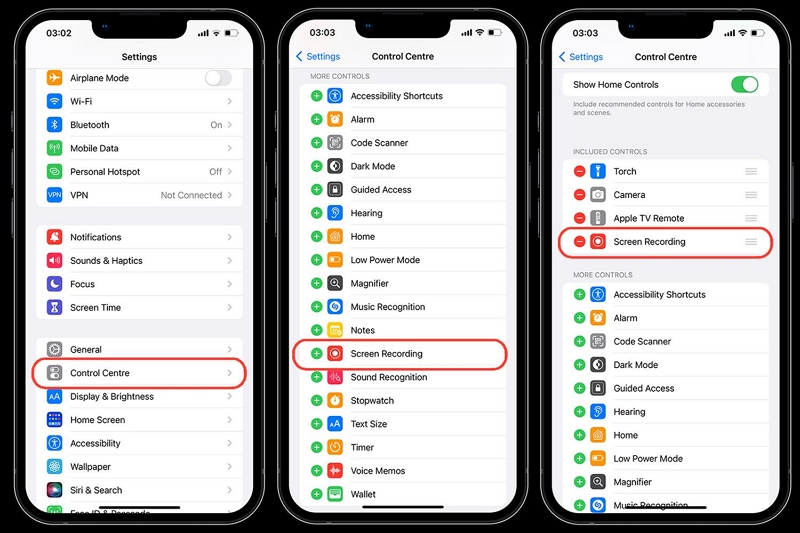
Step 1. Add Screen Recording to Control Center.
- Open the Settings menu on the iPhone.
- Click on Control Center (in the third group).
- Within Control Center, ensure to enable the option assigned to Access Within Apps options.
- Scroll down to the MORE CONTROLS section.
- Click on the + icon assigned to the Screen Recording function.
You will now see the Screen Recording function within the INCLUDED CONTROLS menu.
Step 2. Record FaceTime on iPhone.
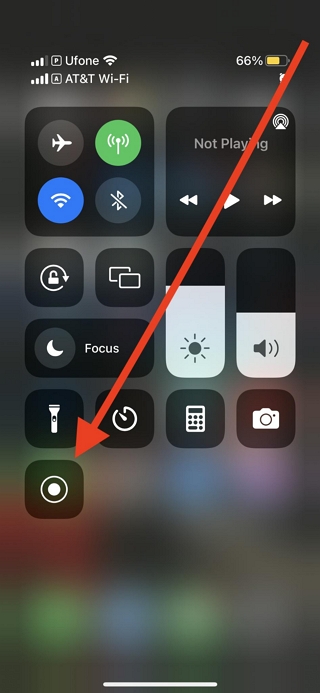
- Swipe down from the top-right corner of the screen to access the Control Center.
- Click on the Record button to start the countdown timer for starting the recording on iPhone.
After starting the screen recording, call the person via FaceTime. Go through the entire conversation that you want to record.
You can also reverse this process. For instance, if you are already on the FaceTime call and want to screen record the conversation, simply swipe down from the top-right corner of the screen and click on the Record button to start recording the screen.
Note: Ensure not to turn on the Microphone as it will cause distortion when making a call to someone via FaceTime. Additionally, the iPhone speakers will be lowered, so you cannot hear the other person properly.
Step 3. End the FaceTime recording on iPhone.
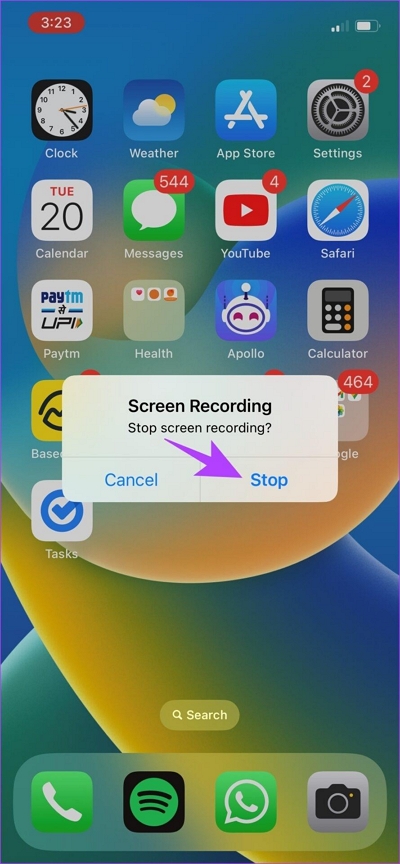
- After the FaceTime conversation is made, click on the Timer at the top-left corner of the screen.
- Once you click on the Timer, you will see two options: Cancel and Stop.
- Click on Stop to end the FaceTime recording on your iPhone.
That’s how simple it is to record FaceTime call with the built-in Screen Recording function on iPhone. After recording FaceTime on your iPhone, navigate to the Photos app to find the recordings.
As mentioned, ensure to Turn off the Microphone as it might distort sound and you cannot hear the other person during the FaceTime call. (Note: iPhone lowers the speaker when you Turn On the microphone option).
Pros of Using the Built-in Screen Recorder to Record FaceTime on iPhone:
- You can record FaceTime calls conveniently without downloading any tool.
- You can record FaceTime on your iPhone without the other person knowing about it.
- Simple steps to start and end the FaceTime recording on iPhone.
Cons of Using the Built-in Screen Recorder to Record FaceTime on iPhone:
- There are no advanced tools like live annotation to draw on the screen. This might be necessary if you want to stress something particular.
- All the FaceTime recordings are saved on the iPhone itself. This consumes a lot of space, and you will have to sacrifice precious space for storing the FaceTime recordings on your iPhone.
- The Photos app has no advanced editing options to make your recordings seem professional.
Part 2: How to Record Facetime with Audio on iPhone with Third-Party App
Given the shortcomings of the native Screen Recording function on iPhone, it is best to explore some third-party alternatives to record the iPhone screen. Allowing you to record the iPhone screen in 360p to 1080p quality, video quality up to 24Mbps, and frame rate up to 60fps, XRecorder allows you to customize the FaceTime recording on iPhone. Moreover, where the native Screen Recording on iPhone does not allow to customize the countdown timer, XRecorder permits you to increase/decrease the timer as per your preference. The flexible timer will enable you to record FaceTime calls conveniently.
Here’s How to Record FaceTime With Audio on iPhone With Third-Party App:
- Download XRecorder from the App Store.
- Open the application.
- Click on Record. As soon as you click on Record, you will see an Air bubble on the screen.
- Start the FaceTime call.
- And click on the Air bubble.
- Click on the Video option from the list of options on the Air bubble.
- To stop recording Facetime on your iPhone, click on the Air bubble and click on the Red stop button.
That’s how simple it is to record with FaceTime on iPhone with XRecorder. Instead of recording FaceTime on your iPhone after starting the call, you can customize the Countdown Timer and click on Start to initiate recording once the countdown gets over. This will allow you to record FaceTime on your iPhone without intervention during the call.
Pros of Using the Built-in Screen Recorder to Record FaceTime on iPhone:
- Capture the FaceTime calls in any resolution, customizable frame rate, and video quality.
- Customizable Timer allows you to record FaceTime calls automatically.
- A dedicated video editor allows you to remove unwanted parts, clean audio, and change the speed.
- Live Stream, your FaceTime, calls on YouTube, Facebook, and other social media platforms.
Cons of Using the Built-in Screen Recorder to Record FaceTime on iPhone:
- XRecorder consumes a lot of battery and physical resources.
- The frame rate and video quality of the FaceTime recording may drop.
- All the FaceTime recordings are saved to the iPhone’s internal storage, so you will have to dedicate a lot of storage.
Part 3. How to Record Facetime with Audio on iPhone With PC
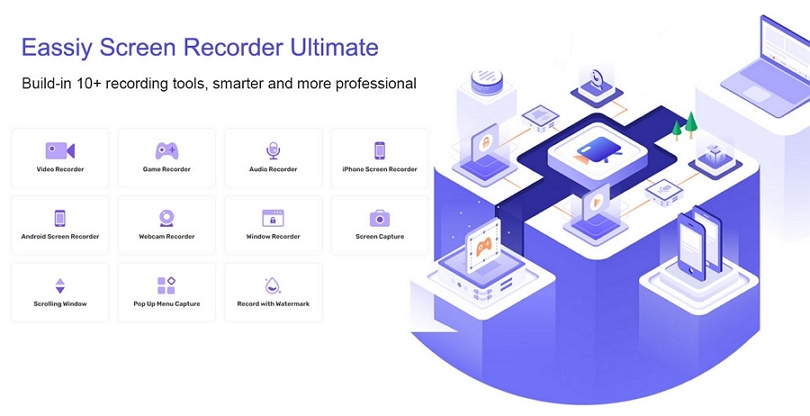
Another substantial option for recording FaceTime on iPhone is Eassiy Screen Recorder Ultimate. Unlike the other two methods in this guide, Eassiy allows you to mirror the iPhone screen on the computer and record its content conveniently.
Eassiy Screen Recorder Ultimate
Eassiy Screen Recorder Ultimate allows you to record FaceTime calls on iPhone or any other on-screen activities from the computer. Like the other two methods for recording FaceTime on iPhone mentioned here, Eassiy lets you capture the iPhone screen in ultra-high-definition (up to 4K) and export the output in up to 1080p resolution. But what’s substantial about Eassiy is its cutting-edge audio management system. It allows you to limit background interferences and enhance audio channels for crystal-clear sound.
After recording FaceTime on iPhone via computer, the clips are saved to the computer. This means you can save a lot of space on your iPhone device. Plus, the editing suite available in Eassiy allows you to curate your FaceTime recordings professionally. Above all, Eassiy is simplistic to use. Thanks to its modern and self-explanatory user interface, even beginners can use the tool without going through any learning curve.
Key Features:
- Mirror your iPhone and record FaceTime calls in high definition. Eassiy allows you to capture the iPhone’s on-screen activities in 4K, recording up to 60fps.
- Besides capturing the internal sound (the FaceTime interaction), you can include other audio from the computer’s microphone.
- Advanced audio management features to limit background interference and enhance microphone sound.
- Edit the FaceTime recording using a trimmer, auto-split, and more such functions.
- Use annotation tools (like arrows, pencils, text, and more) to stress essential points and highlight something important in the screen recording.
- Supports all recent versions of iPhone, including iOS 14, 12, or 13.
- Intuitive and self-explanatory interface.
- Save the clips to the computer and save storage space on iPhone.
- Share the recorded and edited FaceTime recordings on social channels like Facebook, YouTube, and more.
How to Screen Record FaceTime from PC using Eassiy Screen Recorder?
Step 1. Download the Eassiy program on the computer.
For recording FaceTime on iPhone, you do not have to install any tool on the iPhone itself. However, you must download Eassiy on the computer.
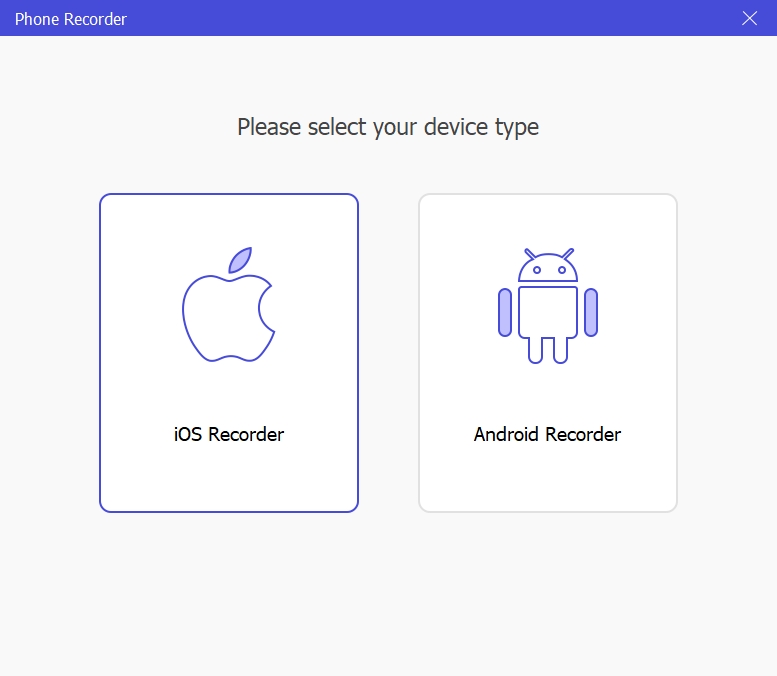
Step 2: Launch Eassiy. On the main interface, click on Phone. On the next screen, you will see two options; click on iOS Recorder.
Step 3. Mirror your iPhone screen to computer for recording FaceTime.
- Ensure to connect both iPhone and computer with the same Wifi network.
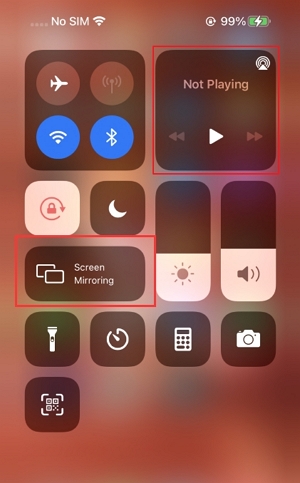
- Click on the Screen Mirroring on the iPhone screen and select Eassiy from the list of options. This will mirror the iPhone screen to the computer.
After connecting both iPhone and computer to the same WiFi network, you will see the iPhone screen on the computer. Choose the recording quality (4K). Additionally, choose the Recording content, i.e., the audio channels.
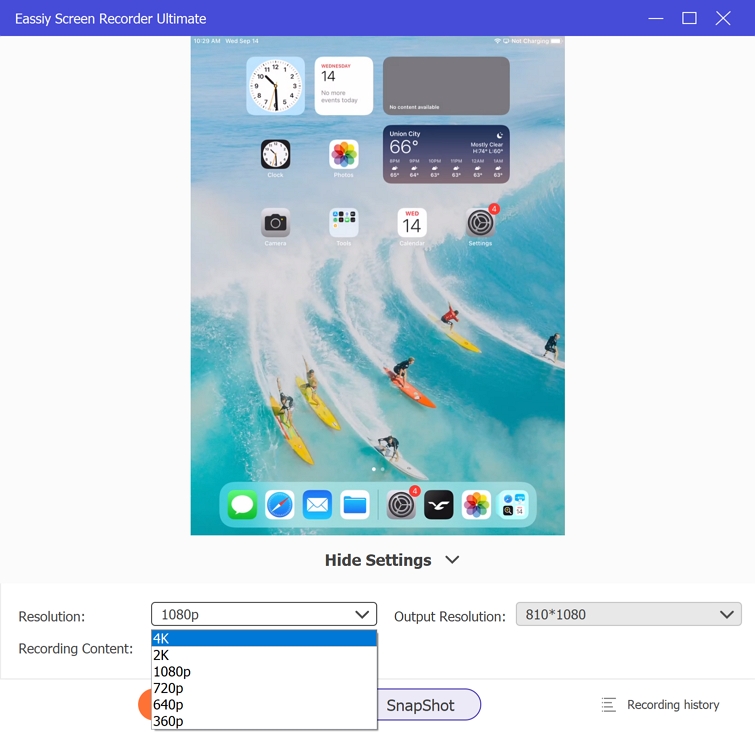
Note: For Recording Content, choose the Phone speaker if you only want to capture the FaceTime conversation. Plus, choose Microphone (PC) if you want to add your voice or music from the computer microphone.
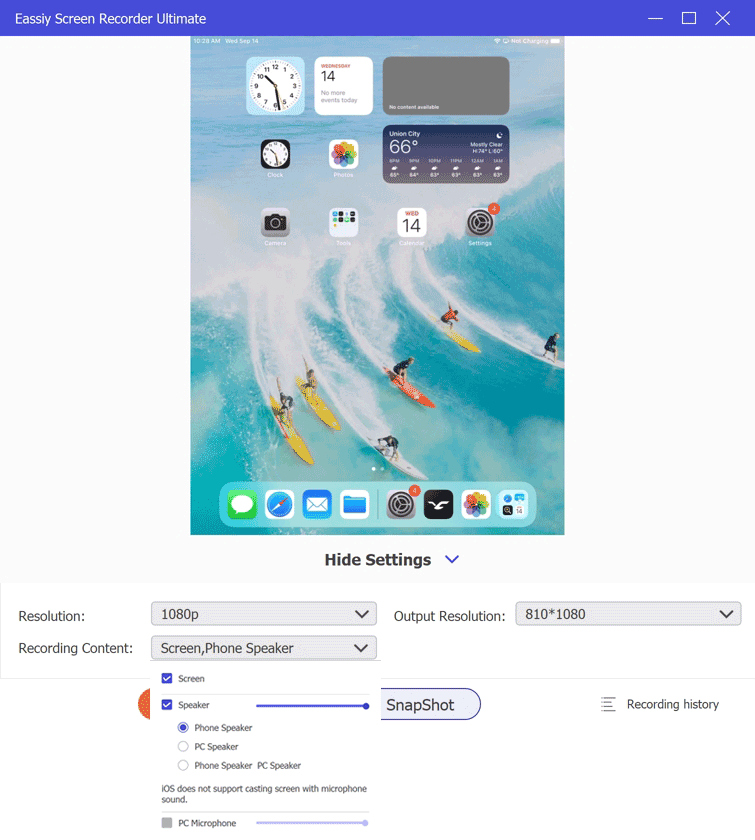
Step 3. Start recording FaceTime on iPhone.
- Click on Record button to start recording FaceTime on iPhone.
- Click on the Stop or Pause button to end the FaceTime recording.
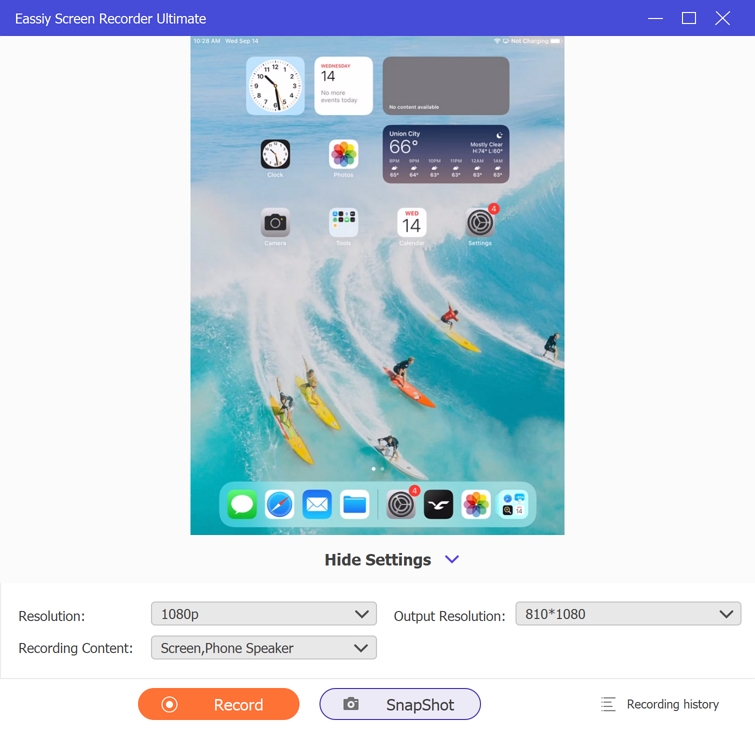
You can access the FaceTime call recording from the Recording History panel in Eassiy. Everything is saved to the computer, which means you can save a lot of space on the iPhone. Plus, you can use the editing tools in Eassiy to professionally-curate your FaceTime recordings. After editing, you can choose to save the FaceTime recordings on the computer in any format or share it on social channels.
Pros of Eassiy Screen Recorder To Record FaceTime on iPhone:
- You can capture the iPhone screen activities and FaceTime calls in up to 4K resolution.
- You can include microphone sound from the PC besides recording FaceTime conversation on the iPhone.
- All the FaceTime recordings are saved to the computer, saving space on the iPhone internal storage.
Eassiy also allows you to record the computer screen, Android screen. It includes a lot of dedicated tools to record different types of videos, like Game Recorder for recording gameplays, Audio Recorder for only recording audio. As well as, you will find advanced recording tools like Follow Mouse Recorder and Around Mouse Recorder. And live annotation tools to draw shapes on the recordings and make tutorials, instructional videos, and so on.
Cons of Using the Built-in Screen Recorder To Record FaceTime on iPhone:
- You will have to purchase the Premium to record FaceTime calls for more than 3 minutes.
FAQs
1. Can I Secretly Record Facetime on my iPhone?
Yes. You can use Eassiy and record the FaceTime calls without a hint of doubt to the other participants.
2. What is the best way to record Facetime on iPhone?
Eassiy Screen Recorder Ultimate. It allows you to record FaceTime calls via computer and save everything on the computer itself, saving internal space on the iPhone. Plus, it does not effects performance or consumes a lot of data, so you can talk to others seamlessly.
Conclusion
That’s three of the best ways for recording FaceTime on an iPhone. The first method, the native Screen Recording function on iPhone, is the most straightforward. However, it lacks advanced recording and editing tools, and you’ll end up with a normal-looking clip with no option to curate it professionally.
At the same time, XRecorder has advanced features and even allows you to customize the video quality, bit rate, and frame rate. Remember, the advanced editing options will enable you to apply effects and add music or audio effects, and there are no recording limits. However, it saves all the FaceTime recordings on iPhone and consumes internal storage space.
Whereas the best option, according to us, the Eassiy Screen Recorder is the best way to go. It allows you to mirror the iPhone screen to the computer. So you can expect full performance and no battery drain while recording FaceTime on iPhone. Plus, it saves a lot of internal storage space on the iPhone.


