Updated on 2023-02-07
22 views
5min read
Screen recording on iPhone is as easy as taking a walk in the park. As we all know, the built-in screen recorder on iPhone allows us to record iPhone activities quickly and easily. But unfortunately, not everyone are familiar with how it works, talkless of how to even use it to record iPhone screen with or without sound.
With that said, if you're looking to screen record iPhone with/without sound, and you don't know how to go about it, worry less. This guide will walk you through the detailed steps to carry out the operation within a few clicks. Also, we’ll introduce you to a special technique that you can use to screen record iPhone from PC without occupying your phone storage. Keep reading to find out more.
Part 1: How Do I Screen Record on Any iPhone With High Quality?
All iPhones with iOS 11 or later versions have a built-in screen recorder. The screen recorder remains hidden in the Control Center options under Settings. You can also edit screen recordings using the editing tools in the Photos app, like trim, apply effects, and more.
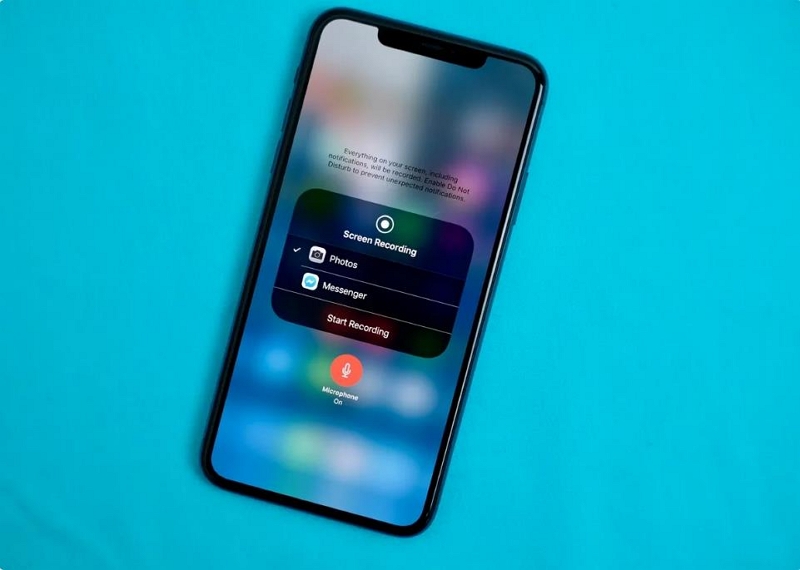
Overall, you will not find advanced screen recording options in the iPhone’s built-in screen recorder. However, you do not have to install any additional apps to record the screen with microphone sound. Additionally, iPhone’s screen recorder is simple, and users can quickly figure out how to screen record on iPhone using the tool.
Key Features:
- Record the screen in HD quality.
- Include both internal and microphone sound in the screen recording.
- Edit the videos using the Photos app.
- Share the recorded videos.
- Save your recorded clips in multiple formats, including HEVC, MP4, QuickTime, H.264, and MPEG-4.
How to Screen Record on iPhone Screen Recorder?
As hinted earlier, you must first enable the Screen Recorder function from the Control Center options to use it. So, let’s learn how to enable the built-in screen recorder first and then how to screen record iPhone.
Step 1. Open Settings.
- Under Settings, find the Control Center option.
- Scroll down to the More Controls section and click on the (+) sign next to Screen Recorder.
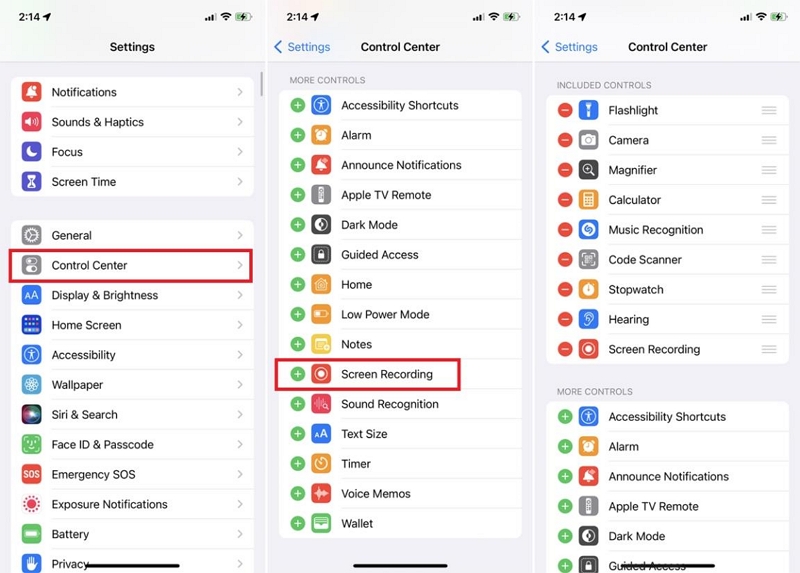
Step 2. Once you enable the Screen Recorder from Settings,
- Scroll up to access the Control Center options and choose Screen Recorder icon.
- Once you click on the Screen Recorder option, the countdown timer will start. The countdown center allows you to prepare for the screen recording. There is no customization option to increase/decrease the countdown, so ensure to close the control center before the countdown timer ends.
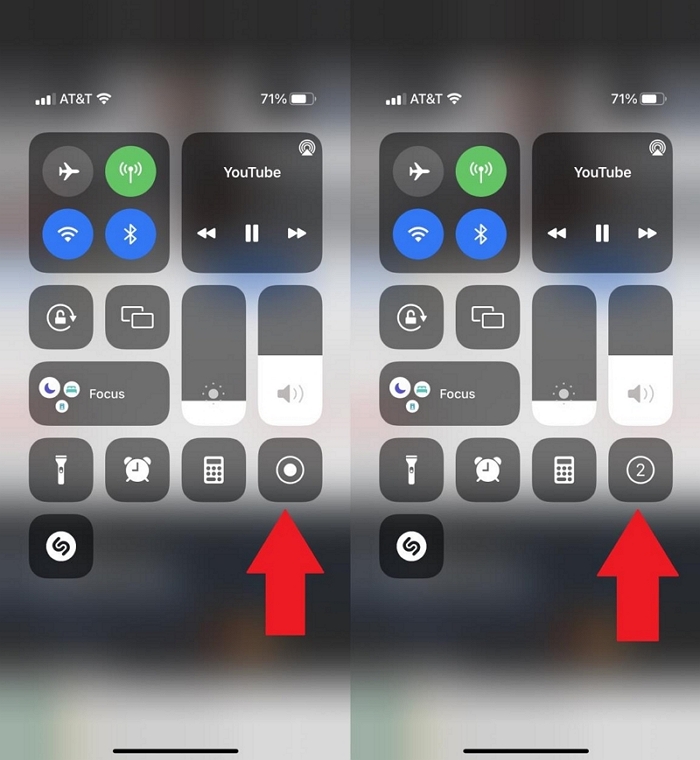
Note: The Screen Recorder option lets you capture internal sound and the iPhone's screen. And if you want to include microphone sound:
- Tap and hold the Screen Recorder icon. You will see a notification panel with the Microphone option. Click on the Microphone, and ensure it says "ON."
- And click on Start Recording to start the countdown timer. (Tap on an empty area on your screen to return to the control center).
- Once you enable the Microphone option, all your future screen recordings will include microphone sound. (To disable it, follow the above steps and ensure the message under the Microphone says "Off."
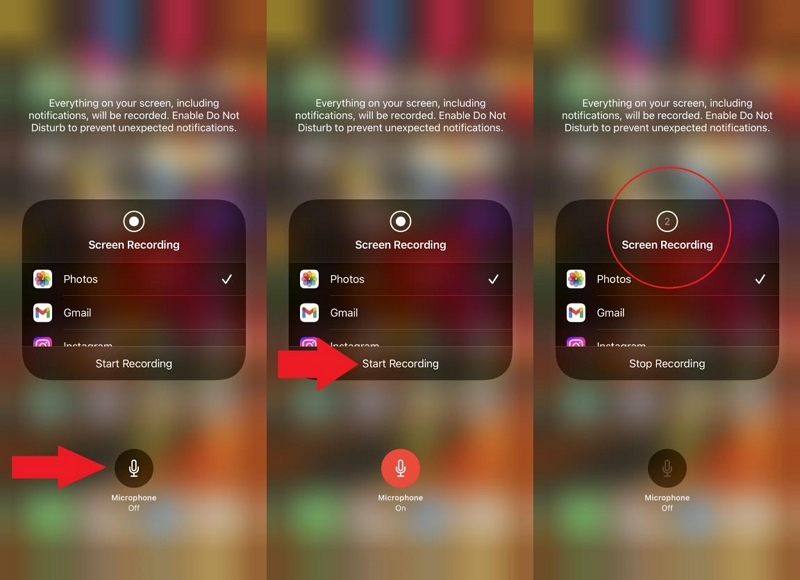
Step 3. After starting the iPhone screen recording, walk through the recording process.
- A red icon with a timer will appear on the top-left corner of the iPhone screen.
- Click on the Timer to stop the recording.
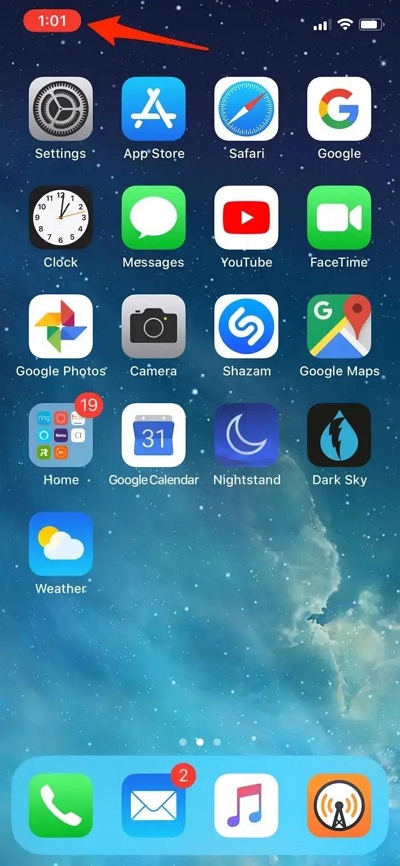
By default, screen recordings are saved in the Photos application. You can use the Photos editor to edit the screen recording tool. For instance, you can trim your videos and remove unwanted parts and apply filter effects to transform your dull-looking videos to seem like Hollywood-produced clips. But besides that, the iPhone screen recorder has nothing to offer.
Part 2: How to Record iPhone With/Without Internal & External Audio?
You can also record your iPhone screen via the Mac screen. This option still does not give the needed flexibility to create a professional-looking, given it lacks the essential webcam-overview feature. However, there are some benefits, like high-resolution quality and clear audio. Follow on to learn how to record your iPhone via the Mac built-in screen recorder.
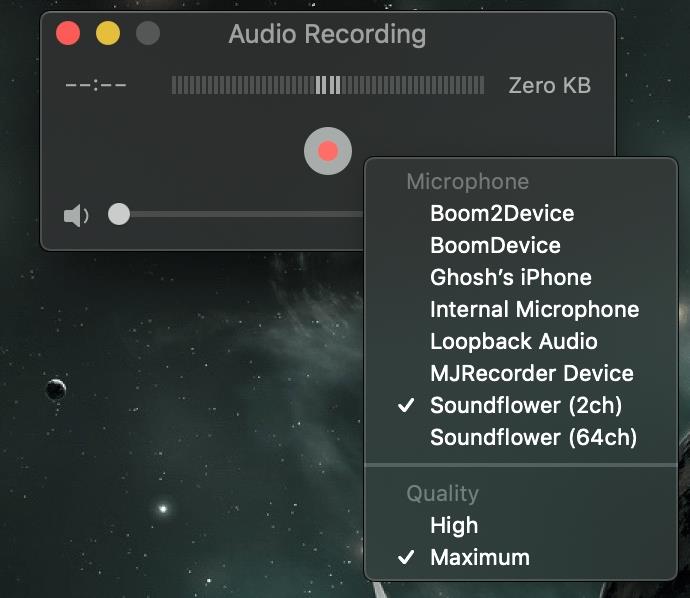
In addition, you can use advanced features like showing mouse clicks and getting your hands on the editing options available in QuickTime Player. Plus, the lightning cable is all you need to record the iPhone screen via Mac's screen recorder.
Here's how to screen record iPhone via Mac's built-in screen recorder:
Step 1. Connect the iPhone to your Mac device using the lightning cable.
- Open QuickTime Player.
- Click File. And from the drop-down menu options, choose New Movie Recording.
- On the QuickTime recording panel, click on the down arrow (next to the recording button ).
- Choose the connected iPhone and external audio source (like the microphone of a Mac or iPhone).
- Additionally, choose the resolution of the screen recording (like High or maximum).
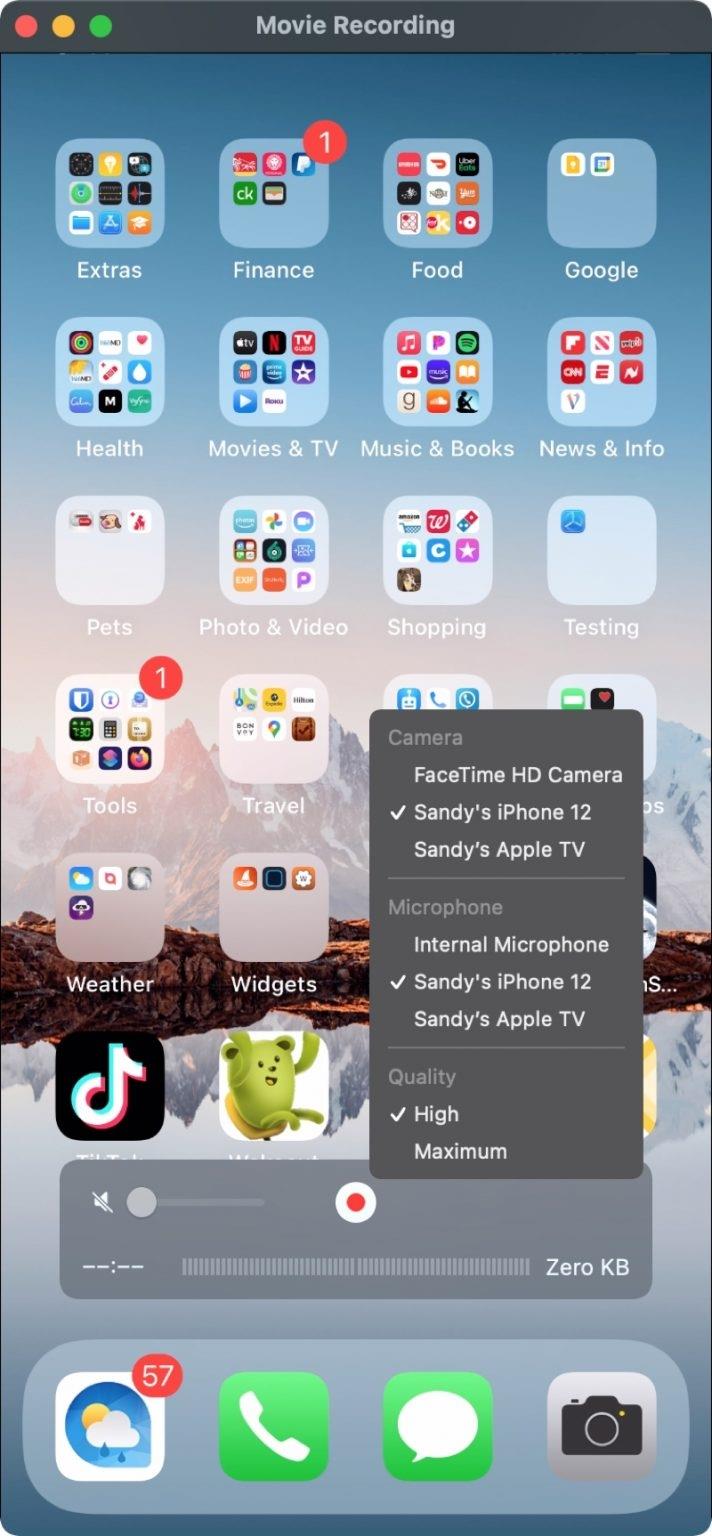
Step 2. Click on the red record button to start recording your iPhone.
- You can also include the mouse cursor (or make it invisible).
- Walk through the recording process, and click on the Stop Recording option to end the screen recording on your iPhone.
- Once you end the recording, QuickTime will ask you to assign a destination folder and type in a new name for the file.
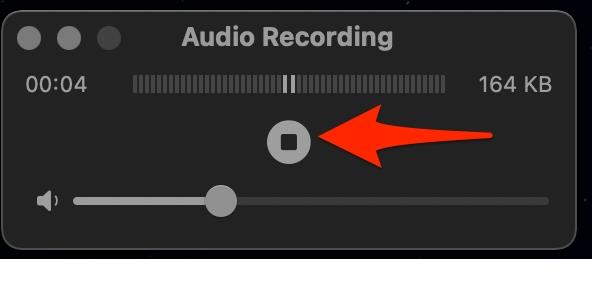
That's how to use QuickTime Player to screen record your iPhone with external and internal audio and advanced features like High-resolution or maximum quality. Equally important to note, this method works if you have a Mac device. Unfortunately, Windows users cannot use this method.
For that reason, we have included another tool to record your iPhone screen via Windows or Mac. And using our tool, i.e., Eassiy iPhone Screen Recorder, you can screen record your iPhone more flexibly using advanced recording tools. Follow on to learn how to screen record the iPhone from a PC.
Part 3: How to Screen Record iPhone 14/13/12 from PC
Eassiy iPhone Screen Recorder is the ultimate tool to create high-definition mobile demos, how-to's, video lessons, or just about anything professional; the possibilities are endless.
Unlike the built-in screen recorder, Eassiy does not limit your options to internal and external sound but presents advanced functions, including webcam overview (via the computer), annotation tools, and video editing tools to create a video in the way you want. For instance, if you're going to guide your viewers through a process on your iDevice, you can use advanced mouse-cursor (any size and color) options and make them look creative. Similarly, if you want to create online video lessons on your iPhone, you can use the annotation tools (like arrows, pencils, text, and more) to stress essential points and highlight something clearly. You can use voiceover when making gameplay videos or suggesting changes, and so on.
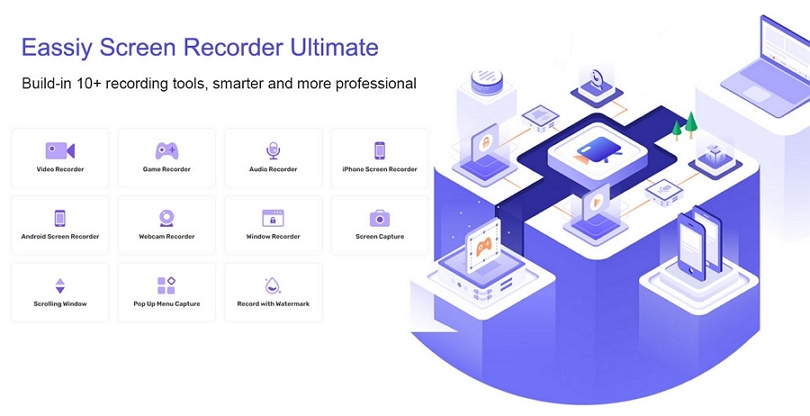
And besides everything else, Eassiy iPhone Screen Recorder is simple and intuitive. You do not have to go through a learning curve to figure things out. Instead, Eassiy's self-explanatory nature will guide you through the entire process as you go and help you create professional-looking videos right from the start. The video editor gives you all the essential options like trimming unwanted sections, auto-split (for intuitively separating long videos), white noise elimination, and more.
Key Features:
- Mirror your iPhone and record the screen in high-definition. Eassiy supports 4K recording up to 60fps.
- You can include microphone sound in the phone recording.
- Use advanced audio management features to limit background interference and enhance microphone sound.
- Edit the recording using a trimmer, auto-split, and more such functions.
- You can also record the computer screens and use advanced recording functions to make video lessons, online tutorials, etc.
- Use annotation tools (like arrows, pencils, text, and more) to stress essential points and highlight something important in the screen recording.
- Supports all recent versions of iPhone. So, regardless of whether it is iOS 14, 12, or 13, you can still record the iPhone screen.
- Intuitive and self-explanatory interface.
How to Screen Record iPhone from PC using Eassiy Screen Recorder?
Step 1. Setup Eassiy Screen Recorder on your Computer
After you download and install the Eassiy Screen Recorder on your PC, launch it and set it up. Then, from the main interface, select Phone from the left side.

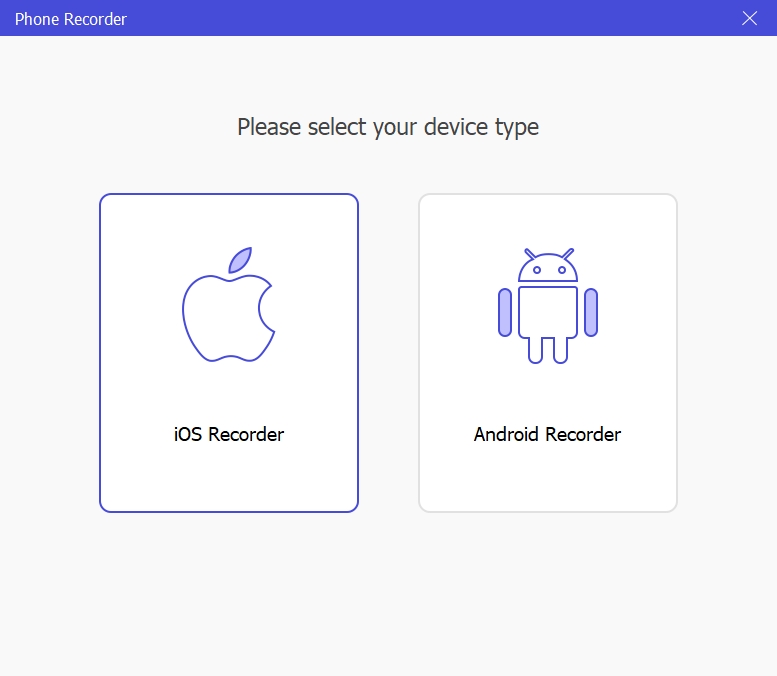
Step 2. Select iOS
Select iOS and connect your iPhone to the PC using a compatible USB cable.
Step 3. Establish Connection
Complete the on-screen instruction as shown in your PC screen to setup screen mirroring on your iPhone. Doing this will enable Eassiy to establish a connection between your iPhone and the computer.
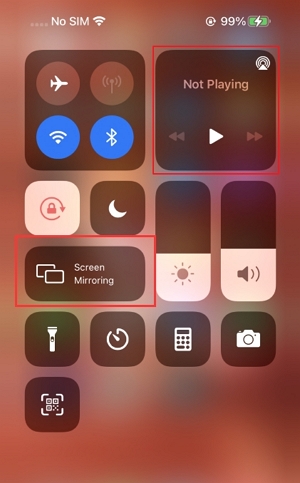
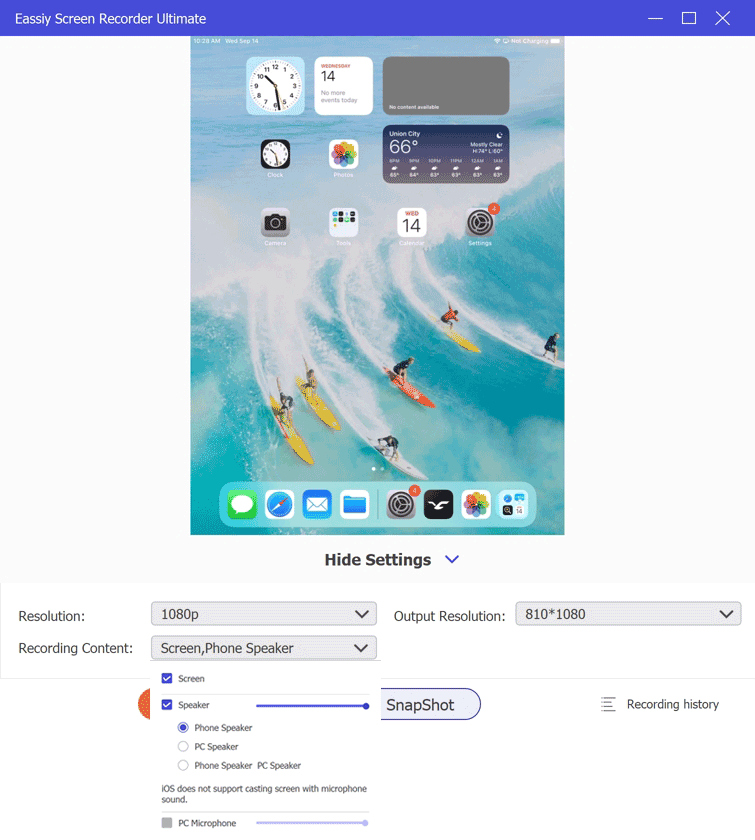
After you've successfully established the connection, your iPhone screen will automatically appear on your PC. Navigate to Resolution and choose the resolution for your recording.
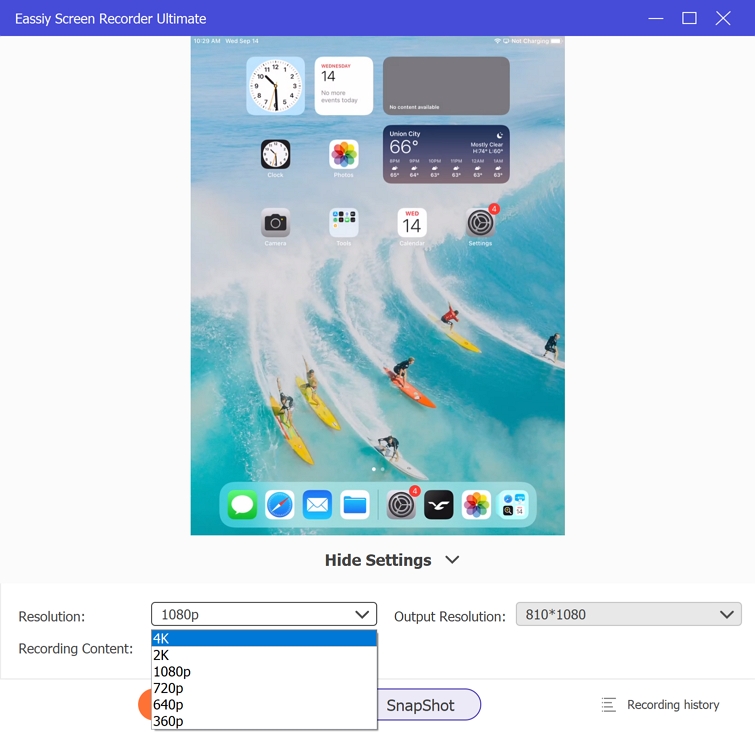
Also, click the drop-down icon next to Recording Content to select whether you want to record your iPhone screen with the pho e internal sound, the PC’s internal sound, or voice over.
Step 3. Start Recording the iPhone screen.
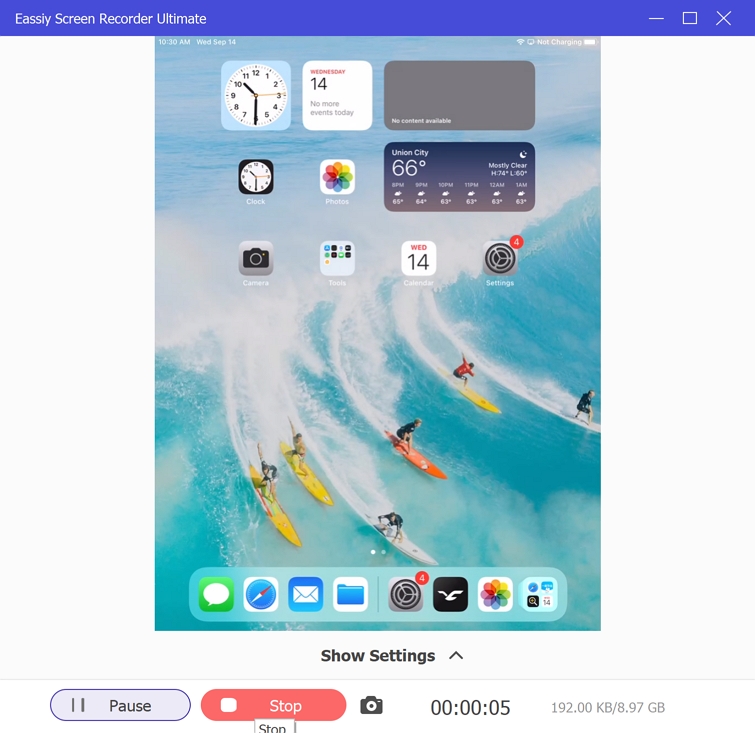
Click the Record button to start recording activities in your iPhone screen. The Camera icon displayed next to the Record button can be used to take screenshot during this process.
Step 4. Stop the recording.
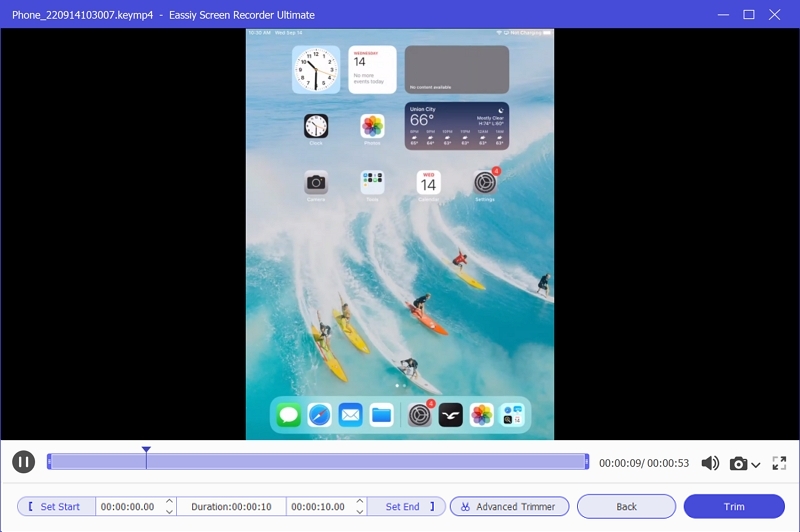
After you complete screen recording iPhone, efit the video output using the advanced annotation tools and others. You can even trim the video if preferable. Then, use the Save button to save the video to your PC local storage.
FAQs
1. Can I Screen Record A Video on iPhone?
Yes. You can use either of the three methods and screen record the iPhone conveniently. However, if you are looking for the best method, as clearly indicated, Eassiy iPhone Screen Recorder is the way to go, given it comes with advanced recording, annotation, and editing tools.
2. How long can you screen record on your iPhone?
Although Apple has not made official statements about the screen recording time limits, many users have reported that the recording stops after 3-4 hours when using the iPhone screen recorder.
So, if you aim to record longer videos, choose Eassiy iPhone (Premium); it allows you to record day-long videos non-stop and comes with intuitive options like auto-split to chop down long videos into small clips automatically. Better yet, Eassiy does not consume physical resources.
3. Does iPhone Screen Record Sounds?
Yes. You can include both internal and external sound, whether you use the iPhone's built-in screen recorder, Mac's built-in screen recorder, or Eassiy. Once again, our tool is the best if you want an advanced audio management system.
Conclusion
iPhone Screen Recorder is a valuable tool; given it's in-built, you can refrain from using third-party tools. However, it is suitable for only recording amateur and decent-looking videos. So, if you are a professional or use a screen recorder more often, it is best to choose professional options like Eassiy iPhone Screen Recorder.
We do not boast about our screen recorder for things, given it is the only iPhone screen recorder that incorporates recording, drawing, editing, and sharing options under one roof. Additionally, unlike iPhone's built-in screen recorder, Eassiy allows you to mark your videos with custom-made logos and watermarks to protect your work on social sites like YouTube, Facebook, or Vimeo. All in all, Eassiy's iPhone Recorder ensures that all your recording needs are met.


