Updated on 2023-02-07
23 views
5min read
It’s obvious many companies today have switched to working remotely due to the current coronavirus outbreak, and unsurprisingly, this has increased the need for many workers to hop from one zoom meeting to another, which can be very stressful. If you’re finding it difficult to keep up with your zoom meeting schedule, don't panic. You can now record your zoom calls to watch the later. This even save you stress and allow you to focus on other important things.
To help you out, we've created this complete guide to walk you through four efficient ways that you can record Zoom meetings on iPhone, computer, and cloud with or without permission. So, don't hesitate stick with us to find out more.
Part 1. 2 Ways to Record Zoom Meetings on Computer Without Permission
Some third-party applications like Eassiy allow you to record the Zoom meeting even if the host hasn’t shared the recording permission with the participants. Unlike many other applications, Eassiy works for both iPhone and computer. So, regardless of the device you use to record the Zoom meetings, you can use Eassiy to record the screen. Let’s briefly learn both methods and how to record Zoom meetings on iPhone and computer using Eassiy Screen Recorder Ultimate.
Method 1: Only Record Zoom Meetings without Any Distraction
Eassiy Screen Recorder Ultimate has multiple recording modes: full-screen, partial-screen, or application-specific. You can use the application-specific option to record the Zoom tab in high-definition (1080p) without distractions. That is to say, even if you minimize the meeting tab and carry on some other work, Eassiy will only record the Zoom tab in the background and exclude other activities in the screen recording.
Now, if that’s clear, here’s what you can do with Eassiy Screen Recorder while recording the Zoom screen. Firstly, you can use annotation tools in the screen recording using arrows, text editor, airbrush, and more.
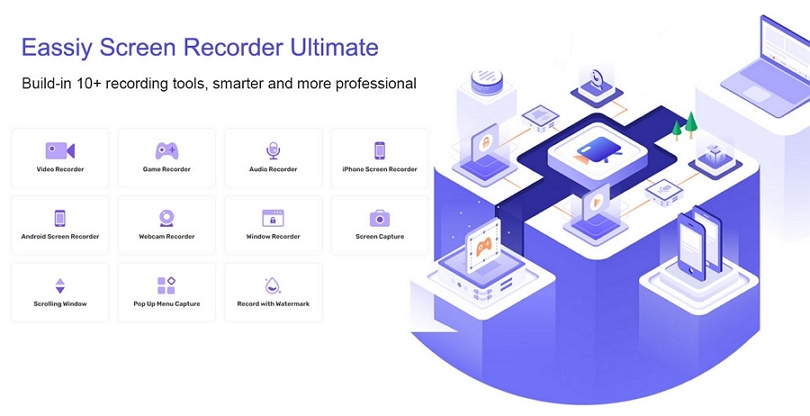
Second, you can include internal sound (Zoom meeting’s host and participants’ conversation) in the screen recording. Eassiy Zoom Recorder allows you to manage the audio levels, too, i.e., increase/decrease the internal and external sound.
In addition, you can use the built-in video editing suite in Eassiy to trim and remove unwanted parts from the Zoom meeting recording. Other editing tools like Auto-split allow you to intuitively separate the long-Zoom recordings into small parts. These editing tools are essential as they will enable you to record and share important points discussed in the Zoom meeting with others conveniently.
The Pros: Why Use Eassiy to Record Zoom Meetings via the Computer:
- No Host Permission is Required. Eassiy allows you to capture the Zoom meeting regardless of whether you have the host's permission or not.
- Record without Interruptions. Lock the Zoom tab and let Eassiy record without any interruptions. You can do other tasks like taking notes or even minimizing the Zoom tab, as Eassiy will only record the selected Zoom tab and exclude everything else.
- Add Webcam Overlay. You can include a webcam overlay when you record the Zoom meeting on the computer.
- Use Microphone Sound. Record the Zoom meeting with internal and microphone sound to speak while recording, even if the host has muted you. So, this feature will help you conveniently share your thoughts about a topic or idea during the Zoom meeting.
- No Limits. Long Zoom meetings and not productive enough to gather all information at once? Use Eassiy and record Zoom sessions to revisit them.
- Edit the Zoom Recording. Use Trim and Auto-split to remove the unwanted parts from the Zoom meeting recordings.
- Take Screenshots during Live Recording. Eassiy comes with advanced screenshot functionalities like endlessly long or panoramic screenshots on Windows.
- Create Custom Hotkeys. Sharing the screen and cannot minimize the screen to open Eassiy and record Zoom? No problem. Create custom-keyboards shortcuts to start, end, take screenshots, and record the Zoom meeting using hotkeys.
The Cons:
- Eassiy’s free version only allows you to record the Zoom meeting for up to 3 minutes. So, you have to purchase a license to capture long Zoom meetings.
Here’s How to Only Record Zoom Meetings without Any Distraction Using Eassiy?
Step 1: Install the latest version of the Eassiy Screen Recorder Ultimate on your PC and launch it. Then, click Window from the home interface.

Step 2: Navigate to Window Recorded and click the drop-down icon next to it to select the Window of the Zoom Meeting that you want to record. Once you do that, Eassiy Screen Recirder will automatically lock the Windows. Then, you can tick the checkbox next to System Sound or Microphone.
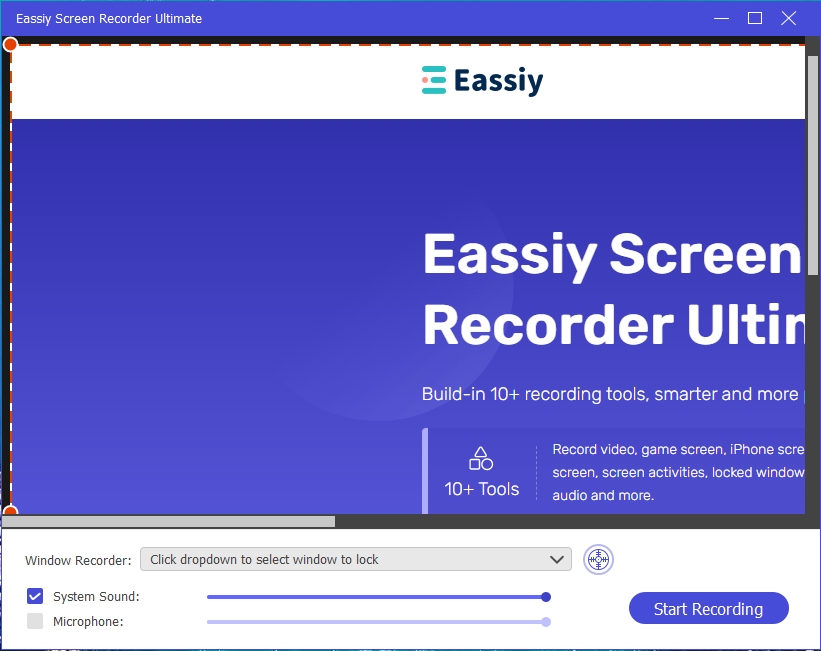
Click Start Recording to begin the screen recording operation. Since Eassiy has locked the Zoom call window, you can easily minimize the Windows and focus on other things you’re doing. This won't interrupt the zoom meeting recording.
You can also take real-time screenshots during the process using the camera icon. And if you want to add text or highlight some element in real-time, the annotation tools can come in handy.

Eassiy also allows users to set time to automatically stop the recording. With this feature, you don't necessarily need to sit in front of your PC through out the screen recording operation. To use the feature, click the clock icon next to the camera icon as shown in the screenshot. After that, tick the checkbox next to Stop Recording Automatically to set the recording length.
Step 4: The Screen recording should automatically stop if you use the auto-stop feature. But if not, you can click the Stop button to end the screen recording.
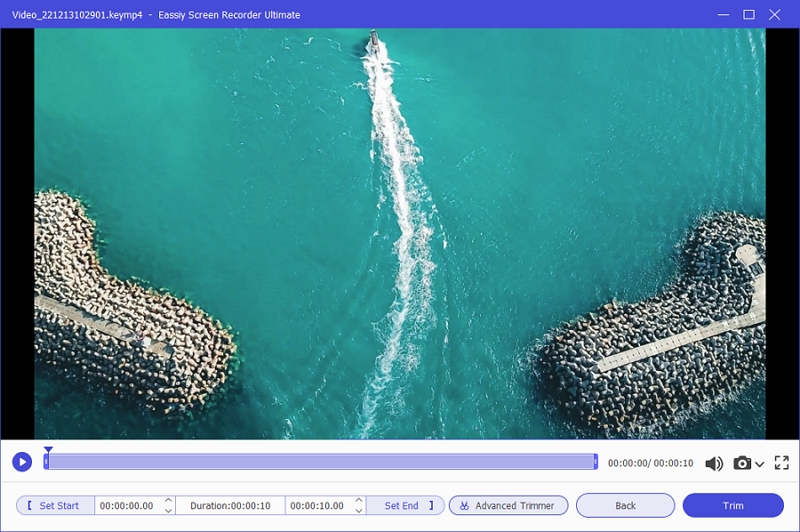
Step 5: A preview of the recorded video will be displayed on your PC screen. You can edit, trim, and cut the recorded video from there. Then, click Done to Save the video to your PC storage.
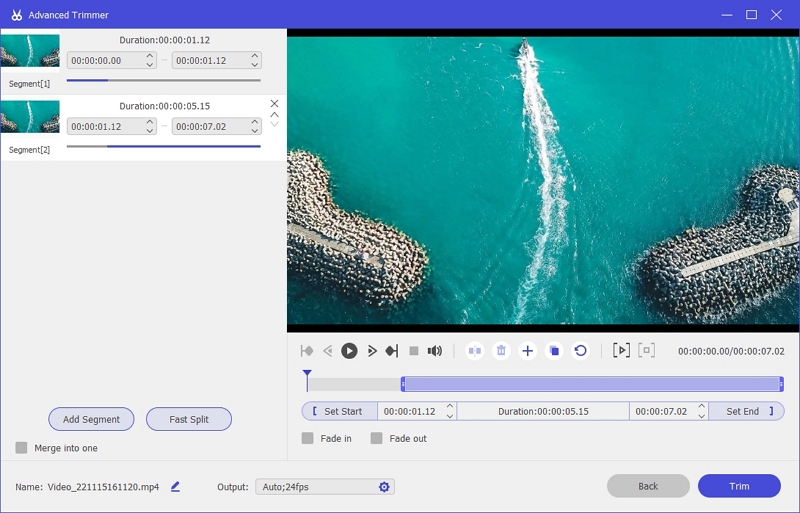
You can also share the video to social media apps using the Share icon.
Method 2. Record Zoom Meetings on iPhone with Computer
As mentioned earlier, Eassiy Screen Recorder includes multiple recording tools. So besides recording the computer screen in multiple ways, you can also record the Zoom meetings on your iPhone.
All you have to do is connect the iPhone to the computer and start the iPhone screen recording, and Eassiy will capture everything via the computer, and you can focus on the meeting via the iPhone. Again, you do not need permission from the host to record Zoom meetings on iPhone.
Even when recording the Zoom meeting on iPhone, Eassiy allows you to include both the iPhone sound and the microphone sound (via iPhone or Computer microphone). Plus, like Eassiy’s Windows Recorder, you can manage the audio levels and capture the Zoom meeting with clear and smooth recording. Eassiy includes several advanced audio management functionalities for smooth audio, like eliminating background noises and enhancing microphone sound to capture your voice as clearly as possible in the Zoom recording.
Equally important to note, Eassiy’s modern and intuitive build ensures that even the tech novices can record the screen without any trouble.
The Pros: Why Use Eassiy to Record Zoom Meetings on iPhone:
- Eassiy allows you to mirror your iPhone’s screen and record the Zoom meeting via the computer. So, if you want to attend the Zoom meeting on the iPhone and keep a copy on the computer, Eassiy has a solution.
- You do not need permission from the host to record Zoom meetings on your iPhone.
- Eassiy saves the Zoom meeting recordings to the computer, so you can store your Zoom meetings without consuming the iPhone space.
- You can record day-long Zoom meetings on your iPhone in HD without any interruptions using Eassiy.
- Include audio of the Zoom meeting and share your own thoughts via the computer or iPhone microphone.
- Advanced audio management system to manage audio levels. Limit background interferences and enhance mic sound while recording the Zoom meeting on iPhone with external sound.
The Cons:
- You will need the Premium license to record Zoom meetings on your iPhone for more than 3 minutes.
This is not really a drawback, given that Eassiy also offers lifetime plans for as low as US$ 69.79 and comes with advanced screen recording options, so you do not have to invest in any other screen recorder, like forever.
Here’s How to Record Zoom Meetings on iPhone with Computer (Without Permission):
Step 1. Download & Setup Eassiy Screen Recorder on your Computer
Download Eassiy Screen Recorder from the official website and install it on your PC. After that, launch it and click Phone from the main interface.

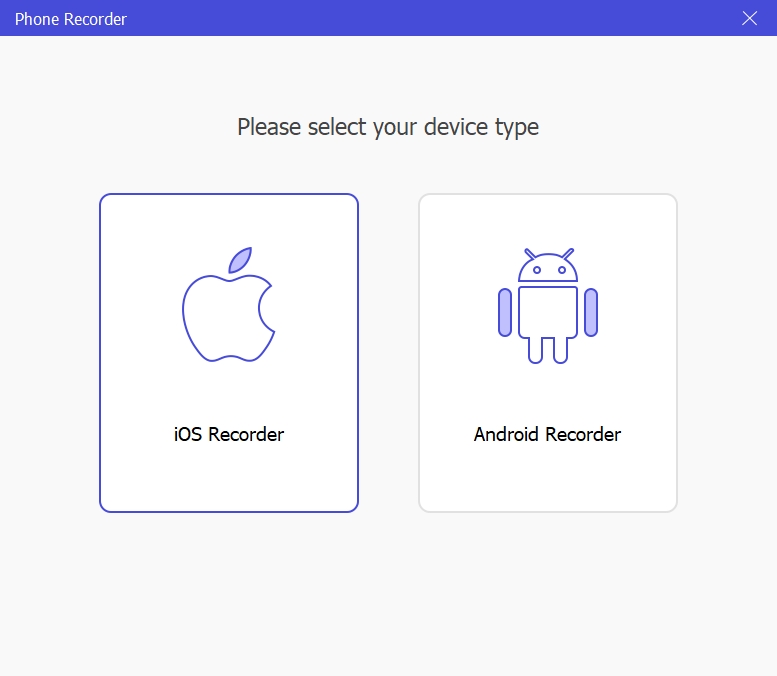
Step 2. Select iOS
Choose iOS and connect your iPhone to the computer with the same wifi network.
Step 3. Establish Connection
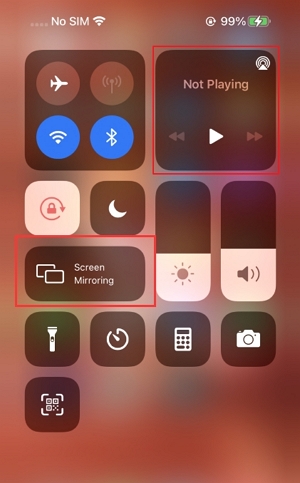
Select Screen Mirroring on the new page. Then, open the control center on your iPhone and tap Screen Mirroring. Select Eassiy Screen Recorder to establish the connection.
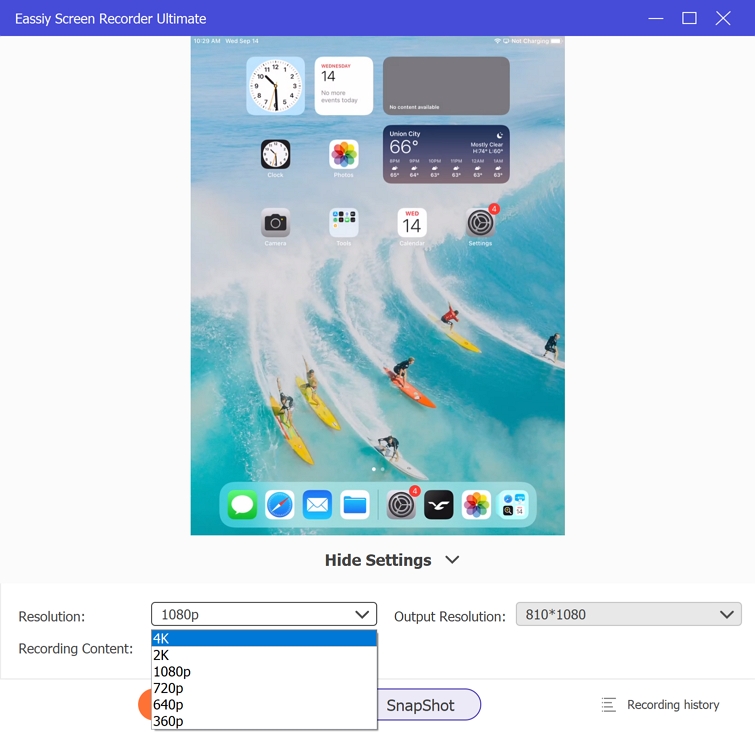
Once your iPhone screen appears on the computer screen, navigate to Resolution and choose a preferred resolution for the zoom meeting recording task. Eassiy allows you to record up to 4k quality.
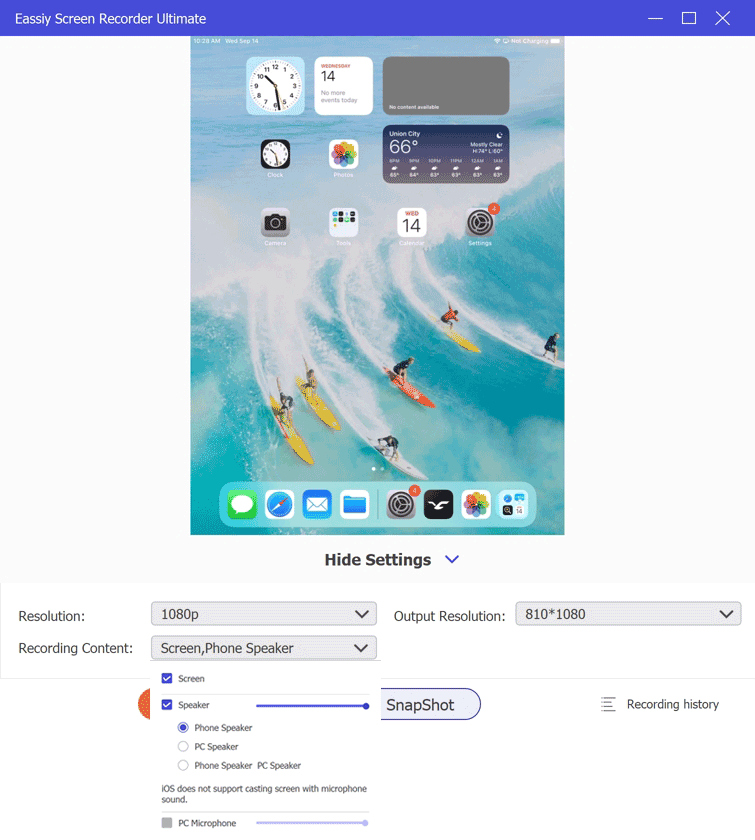
If you want to record the Zoom meeting with audio, click the drop-down icon next to Recording Content and select Speaker.
Step 4. Start Recording the iPhone screen.
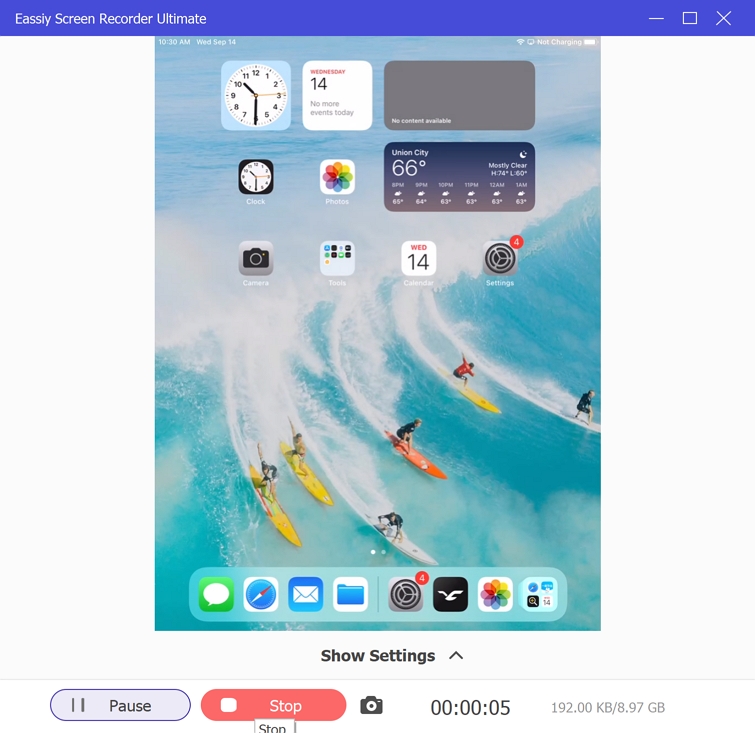
Click Start Record to begin the recording operation. You can also take real-time screenshot during the process. All you just need to do is to click the Camera icon shown in the screenshot below.
Step 5. Stop the recording.
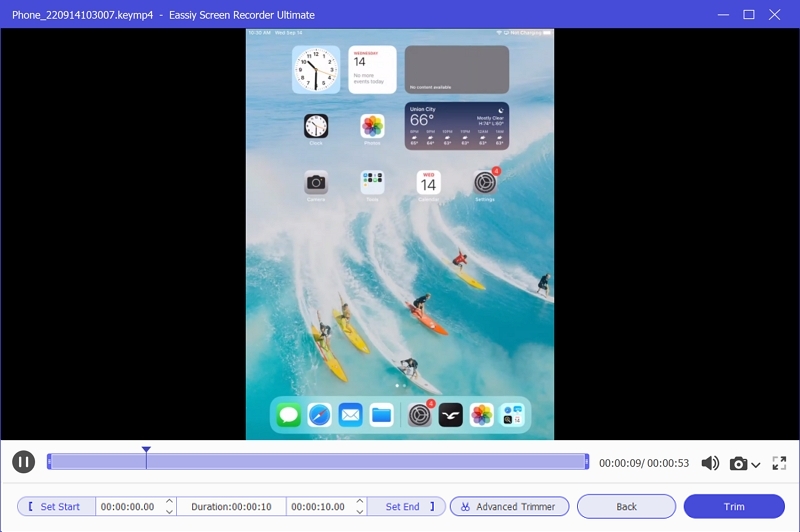
Once you're done with the recording, click the Stop button. A preview of the recorded video will appear on your screen. You can edit, trim, cut, and do lots more on the video from there. Afterward, click Done and save the video to a desired location on your PC.
Part 2. How to Record Zoom Meetings on iPhone without Permission
iOS 11 and later versions have built-in Screen Recorders. And you can use it to record a Zoom meeting without permission from the host. So, what can you do with the built-in Screen Recorder in the iPhone? Well, not much. But with this tool, you can record Zoom meetings conveniently. You can simply open the Screen Recorder and start recording. After recording the screen, you can access them via the Photos app. It is also simplistic to use. All you have to do is press a button to start and end the Zoom meeting recording.
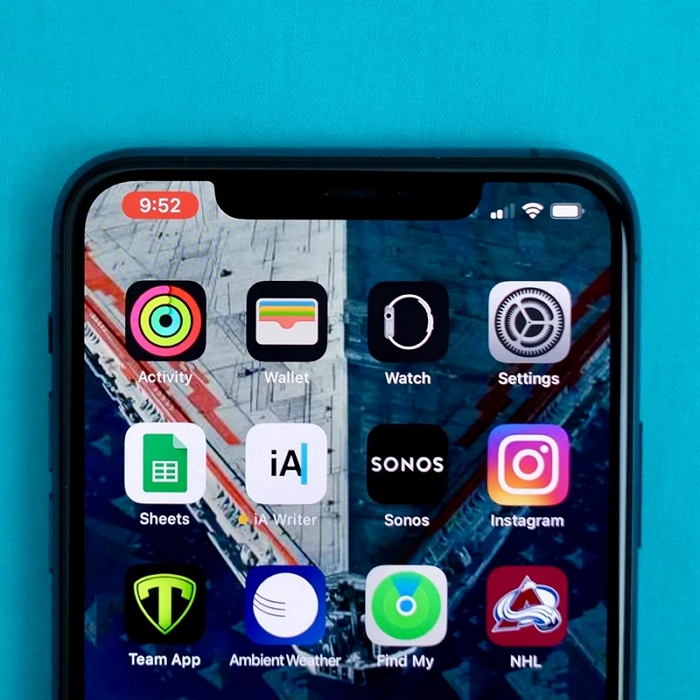
Retain that the Screen Recorder option is hidden by default, and you have to customize the Control Center settings to access it.
The Pros: Why Use the native Screen Record to Capture Zoom Meetings on iPhone?
- You do not need the host's permission to record the Zoom meetings.
- You can record Zoom meetings on your iPhone without installing any application.
- You can edit the Zoom meeting recordings via the Photos app.
The Cons:
- iPhone Screen Recorder does not record Zoom meetings in high quality.
- The Zoom meeting recordings will occupy unnecessary storage space on the iPhone.
- It is unsuitable for recording long Zoom meetings. (After 3-4 hours, it stops recording).
Here’s How to Record Zoom Meetings on iPhone Without Permission Using the Native Tool:
Step 1. Customize the Control Center.
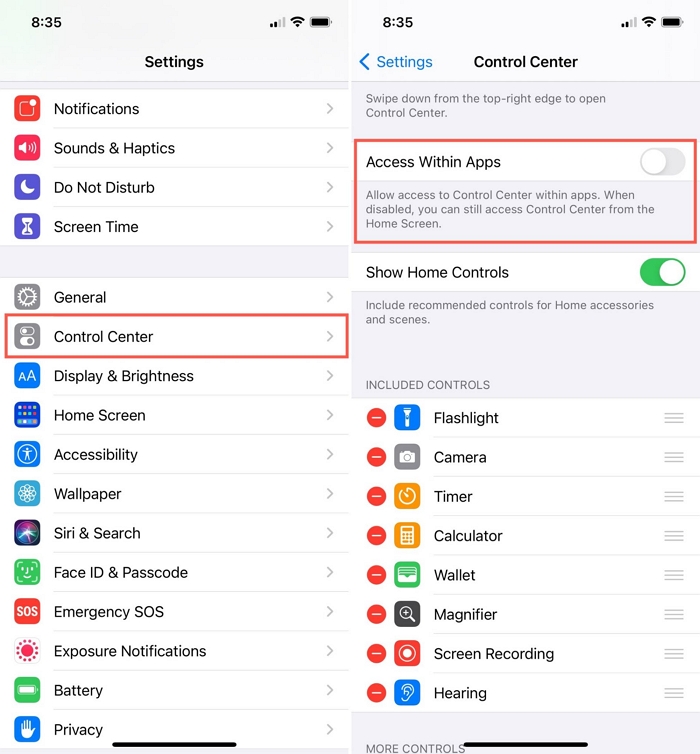
By default, Screen Recorder is not accessible on all iOS devices. You have to customize the Control Center options. To do that,
- Go to Settings.
- Navigate to Control Center (in the third group of Settings).
- Ensure to switch the toggle assigned to “Access Within Apps.” Without this, the iPhone Screen Recorder cannot access the contents in the Zoom app, i.e., it will not record. So, ensure to permit access to the screen recorder within apps.
- Navigate to the MORE CONTROLS section. And click on the “+” icon assigned to Screen Recorder.”
Once you add the Screen Recorder, you will find the option within the INCLUDED CONTROLS section. This means you can access the function via the Control Center menu.
Step 2. Record the Zoom Meeting.
Once again, you do not need host's permission to record the Zoom meeting. So, just open the Zoom app before the meeting begins, and follow these steps to record the meeting.
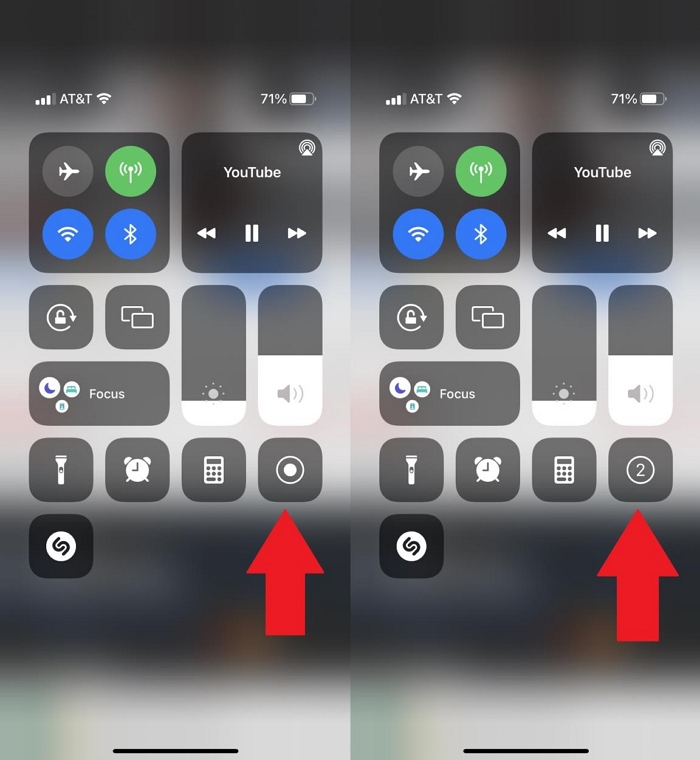
- Swipe up to access the Control Center menu before the Zoom meeting starts.
- Click on the Record button.
- Once you click the Record button, iPhone will start the three-second countdown to prepare for the screen recording.
Step 3. Stop the Zoom meeting recording on your iPhone.
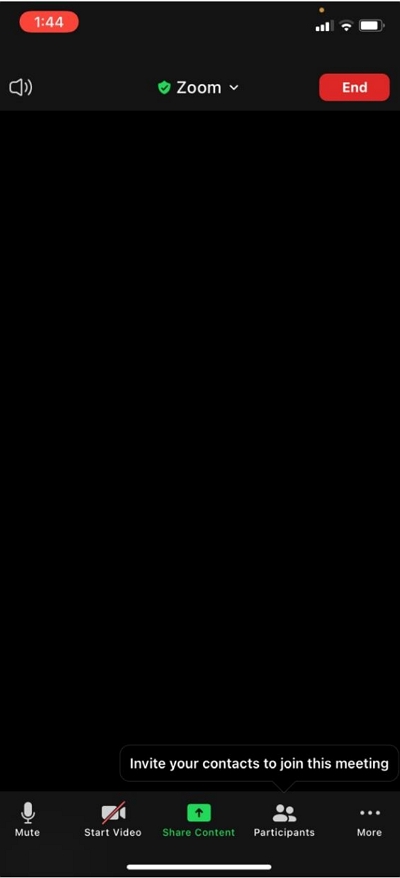
After the countdown, the iPhone Screen Recorder will start recording the Zoom meeting. You can confirm this via the Red timer button on the top-left, indicating the duration of the screen recording.
- Click on the Timer to stop the Zoom recording.
- You will see a confirmation pop-up once you click on the Timer, click Stop to end, and save the Zoom meeting recording.
That’s how to record Zoom meetings on iPhone without permission by using the native Screen Recorder on iPhone. However, ensure that you have ample iPhone space before recording the screen.
Part 3. How to Record Zoom Meetings on Cloud with Permission
Zoom Cloud is accessible only to premium users, i.e., you must have a Pro, Business, or Enterprise account, to record the Zoom meetings via the in-app function. Furthermore, you will also need the host's permission to record the meeting.
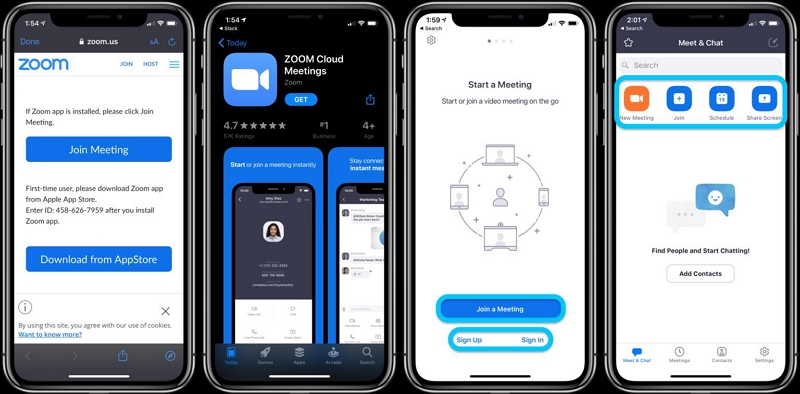
So, if you have a paid membership to Zoom and have permission from the host to record the meeting, you can conveniently record the Zoom meetings on your iPhone. The good thing is all the recordings are saved on the cloud, i.e., you do not have to save the Zoom meeting recordings on the device and consume space.
However, unlike the native Screen Recorder and Eassiy discussed earlier, Zoom Cloud does not have any editing tools, so you cannot remove any unwanted parts or manage sound levels during the recording.
Here’s How to Record Zoom Meetings on Cloud with Permission?
Step 1. Open the Zoom app.
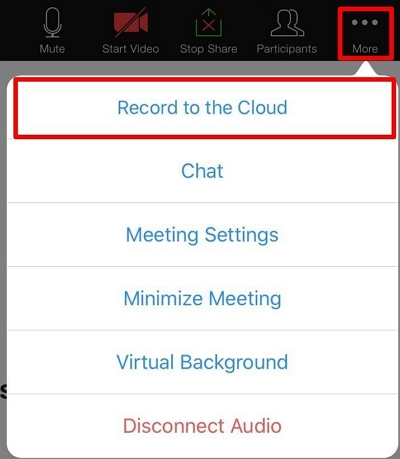
Join the meeting. And click on the three-dots (More) menu in the bottom-right corner.
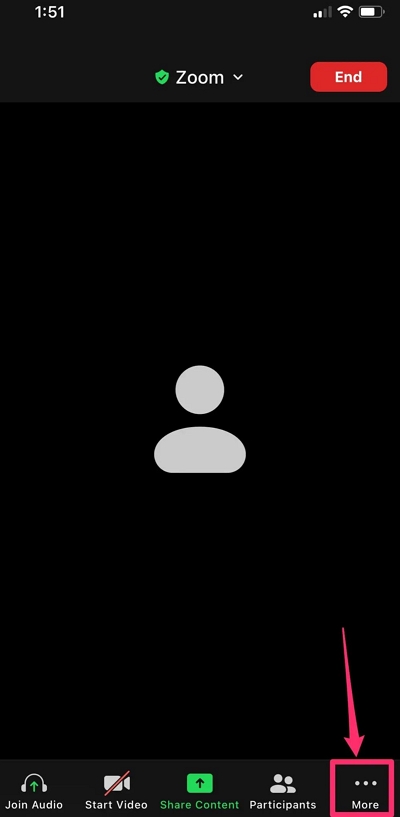
Step 2. You will see a new menu with numerous options, click Record to the Cloud.
Step 3. Stop the Zoom recording on iPhone.
Once you click on the Record to the Cloud option, a “Recording” option will appear.
- Click on the Recording option to pause or stop the recording.
- Click on the Stop and confirm to end the Zoom meeting recording on the iPhone.
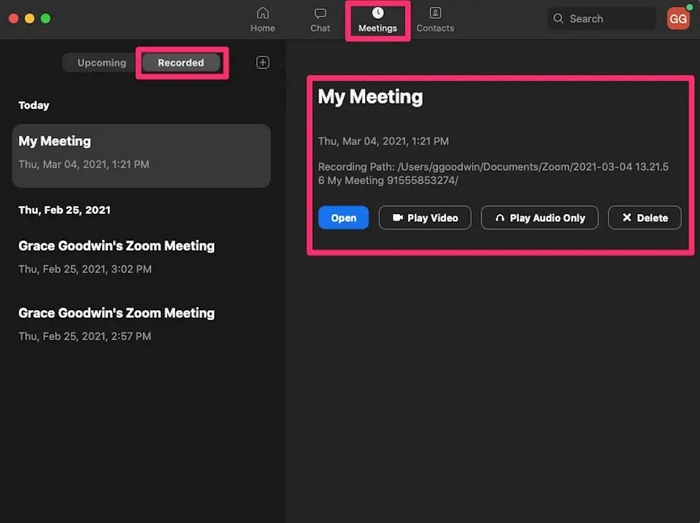
You can find the Zoom meeting recordings by logging into Zoom’s website.
The Zoom meetings recorded on the iPhone will be accessible via the “My Recordings” folder via the Zoom web application or website.
There you go! That’s how to record the Zoom meetings on iPhone with permission, and you have the upgraded version of the Zoom application. This method definitely stands out, given everything is stored in the Cloud, and you record the Zoom meetings on the iPhone seamlessly.
Part 4. Hot FAQs on Recording Zoom Meetings
1. Can I Record Zoom Meeting Without others Knowing?
Yes. Eassiy allows you to record Zoom meetings without anyone knowing whether you’re using a laptop, desktop, or phone (Android or iPhone).
If you are recording on the laptop or the computer, simply press Ctrl+Alt+R (default keyboard shortcut in Eassiy Screen Recorder) to start the screen recording while focusing on the Zoom meeting. You can press the same hotkey (i.e., Ctrl+Alt+R) to end the recording.
2. Can you record a Zoom Meeting on iPhone if You're not the host?
Yes. You can record the Zoom meetings on your iPhone if you are not the hots (or the host hasn’t given you permission) using the Eassiy Screen Recorder. Or you can use the native iPhone Screen Recorder to capture Zoom meetings. However, this method consumes space.
3. How do I record Zoom Meetings without permission?
You can use Eassiy Screen Recorder to record Zoom meetings without permission on any device, including iPhone, Android, and Windows.
Conclusion
As mentioned, we have listed all the ways to record Zoom meetings without permission or with permission. Needless to say, the in-app meeting recording functionality within the Zoom application is the best method to capture the meeting. However, you will need the host’s permission + premium membership of Zoom.
Nevertheless, if you do not have permission or the Zoom upgraded membership, then Eassiy Screen Recorder offers the same functionality. And you can use Eassiy to record Zoom meetings on iPhone via screen mirroring and saving the meeting to the computer. Don’t forget that Eassiy comes with editing tools, too, so you can also remove unwanted parts.


