Updated on 2023-03-14
21 views
5min read
Many iPhone users have been reporting an issue about iPhone attempting data recovery. When you are trying to upgrade your iOS version, this issue occurs. If iPhone stuck in attempting data recovery loop occurs, you might lose all your iPhone data. However, there are ways to fix iPhone attempting data recovery. Again if attempting data recovery iPhone failed, you can recover all your data by using any third-party software. In this article, we are introducing the best solutions to fix attempting data recovery iPhone.
Part 1: What Are The Reasons Behind iPhone Attempting Data Recovery?
The meaning of the iPhone attempting data recovery is not known by many iPhone users. All around the world, users have claimed that when they were trying to install iOS updates, their iPhone becomes stuck in the ‘attempting data recovery’ loop. Although “Attempting data recovery” can also occur during an update via iTunes, some users believe that updating via iTunes is preferable. When you attempt to update an iPhone to iOS 12, 11.2, 11.3, or 11.4, whether via OTA or iTunes, the iPhone attempting data recovery problem occurs. This issue doesn’t only delays the update but also deletes part or all of their data from their iPhone. For the problem, Apple has not provided an official explanation or solution. The notice “attempting data recovery iPhone” might indicate that your iPhone’s storage space is very low when you upgrade your iOS. Although large storage devices are also suffering the same error upon updating but this scenario is more common in small storage iPhone devices like the 16GB iPhone. There are three possible reasons behind iPhone attempting data recovery.
- If you downgrade your iOS from iOS 14 to 13 or below.
- While updating via iTunes, if the users disconnect the iPhone to the computer or Mac.
- Updating iOS device after jailbreaking.
Part 2: How to Fix iPhone Stuck on Attempting Data Recovery
There are several methods you could try to fix attempting data recovery iPhone loop based on the experiences of customers who have resolved the update error. You can try the following methods to fix iPhone attempting data recovery in any case.
Fix 1: Force Restart the iPhone
A force restart might assist you in resolving the error if your iPhone keeps displaying “attempting data recovery” with no progress. To solve lots of iPhone problems, a force restart is always an effective way. There are different steps for force restart for different iPhone models.
For iPhone X/XS/XR/11/12/8/8 Plus/SE 2:
Step 1: You have to press and fast-release the Volume Up button first.
Step 2: After that, you need to press and fast-release the Volume Down button.
Step 3: Until the Apple logo appears, press and hold the Side button.
For iPhone 7/7 Plus:
Until the Apple logo appears, you have to press the Volume Down button and Sleep/Wake button simultaneously and after that release both buttons.
For iPhone 6/6s/SE 1:
Until you see the Apple logo, press the Sleep/Wake button and Home button simultaneously and after that release the two buttons.
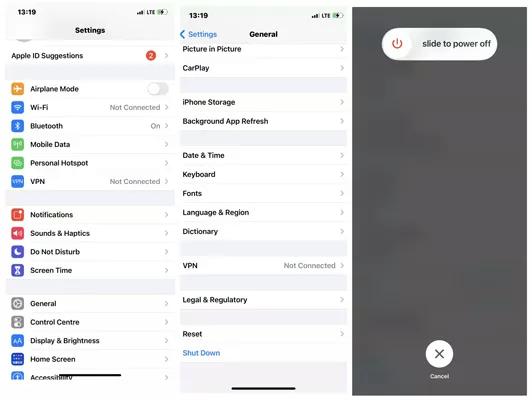
Fix 2: Put your iPhone into recovery mode
You could fix the Apple iPhone attempting data recovery issue by putting your iPhone in recovery mode if force restart can’t work. When an iOS update fails, this method is useful, and to resolve the issue, you need to put your phone in recovery mode. But this method would probably erase all the data in the iPhone.
Step 1: Connect the faulty iPhone to the computer first.
Step 2: Force restart your iPhone but when you see the Apple logo, don’t release the buttons. Until the “Connect to iTunes” screen appears, you have to wait.
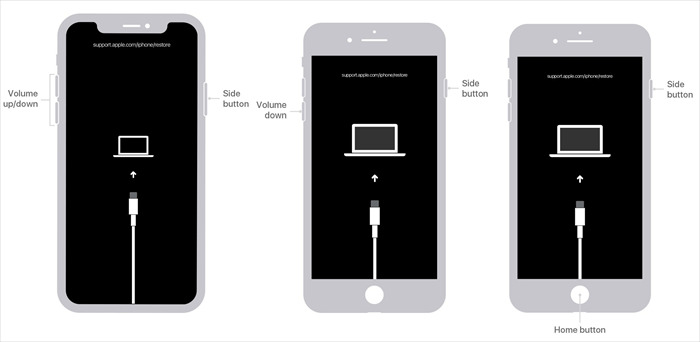
Step 3: After that launch iTunes. To show the options to Restore or Update, there will be a pop-up message. Choose "Update" and iTunes will try to reinstall the iOS without losing any data. You could repeat step 2 and select “Restore” which will erase all the data on the iPhone if the “Update” couldn’t fix the issue.
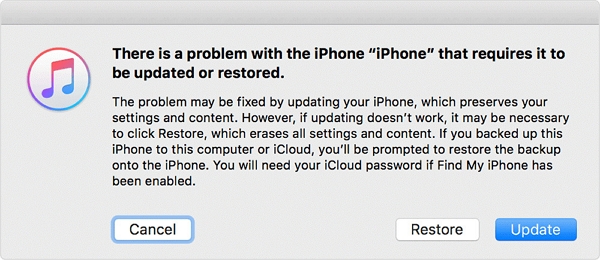
Step 4: You have to wait for the update or restore process to complete and set up your device.
Fix 3: Fix iPhone “Attempting Data Recovery” via iTunes
Via iTunes, you can fix the “iPhone attempting data recovery” loop. A major risk of data loss is involved in this method. There is a huge probability that you may end up losing all your valuable files if you use iTunes to restore your device especially when you don't have any data backups. If your device doesn't have any valuable files, you can proceed with this method. Here are the steps to fix iPhone attempting data recovery loop via iTunes:
Step 1: Download the latest iTunes on your PC and afterward install it.
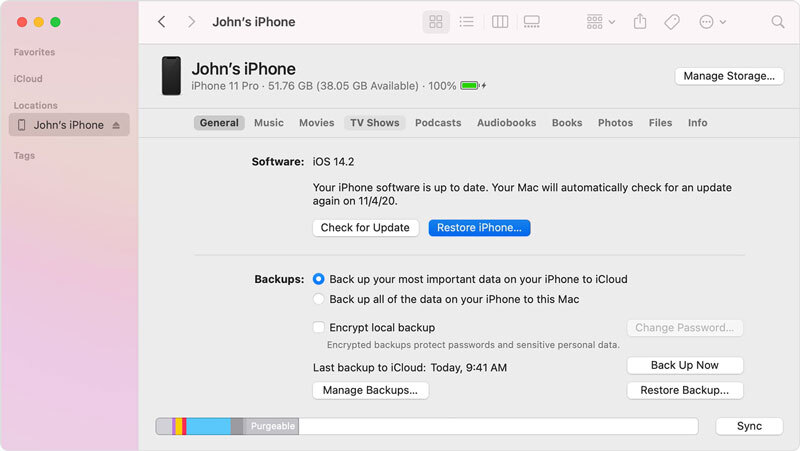
Step 2: Wait for iTunes to recognize it after connecting your iDevice to the system. The tool will automatically ask you to restore the iPhone if it’s in recovery mode once recognized.
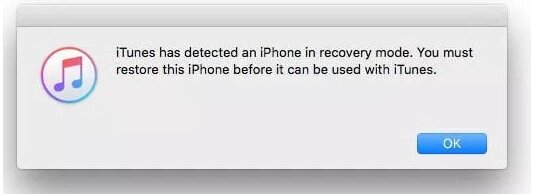
Step 3: You can manually click the “Restore iPhone” button to restore your device in case you don’t see any pop-ups.
Part 3: How to Recover Data After Fixing iPhone Stuck in Attempting Data Recovery
Sometimes attempting data recovery on iPhone might fail due to unknown reasons although the above-given methods can help you in fixing iPhone stuck in attempting data recovery loop. The most urgent thing you need to do is to rescue your lost files when your device shows the attempting data recovery iPhone failed and leads to another new problem which is data loss. If you have created backup files on iTunes or iCloud, things can be easier. But all the current data will be erased replacing the backup file you choose to restore which is not advisable. Relying on a third-party iOS data recovery software might perfectly eliminate all your concerns at this point. We would like to recommend Eassiy iPhone Data Recovery for its highest data recovery rate in different data loss cases. To scan lost or deleted data, this tool has the fastest speed. All your current files and deleted items on your iPhone will be displayed by this program and you can choose whatever you need to retrieve. This program can extract lost files either from the iOS device directly or from iTunes/iCloud backup with over 36 types of data supported. Let's take a look at the main features of this program.
Features:
- Deleted iOS files can be safely retrieved by using this program.
- Supports 36+ file types to recover with no data loss.
- Helps you to scan 1000+ deleted photos in a few seconds.
- The recovery rate is highest in the industry among similar other products.
- Before the deleted or lost data are overwritten, you can use this tool to identify them and easily recover them.
Steps to recover data after fixing iPhone stuck in attempting data recovery directly from the iOS device:
Step 1: Download and install Eassiy iPhone Data Recovery to try the free trial version. Launch the program and connect your faulty iOS device to the computer by using a USB cable. Make sure to select "Recover from iOS device”.
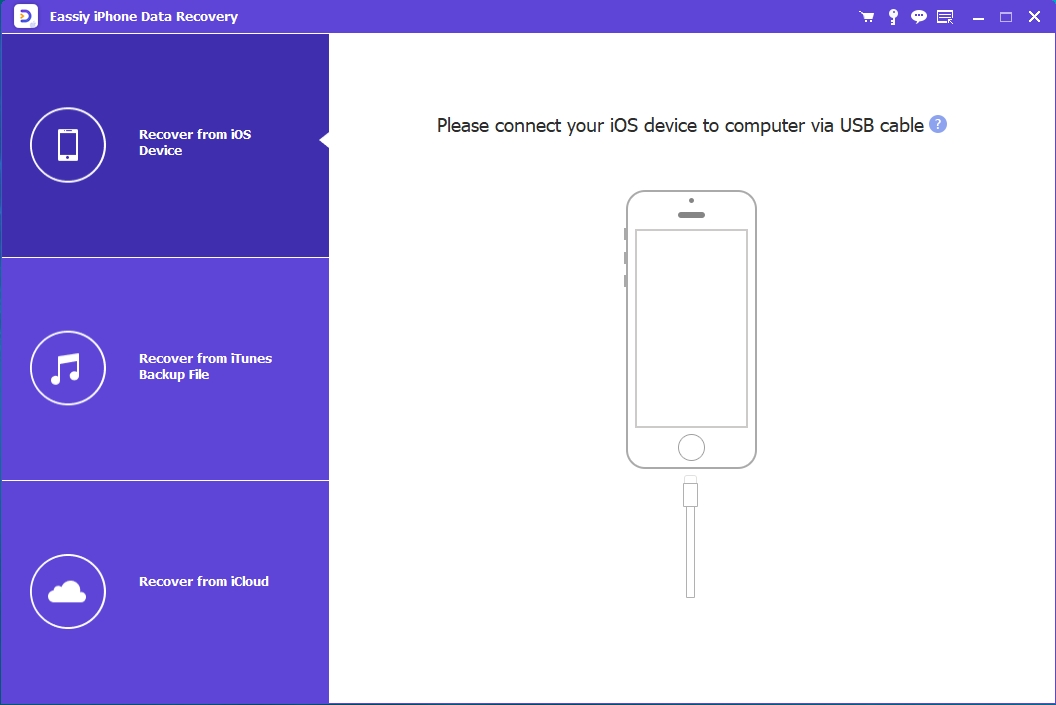
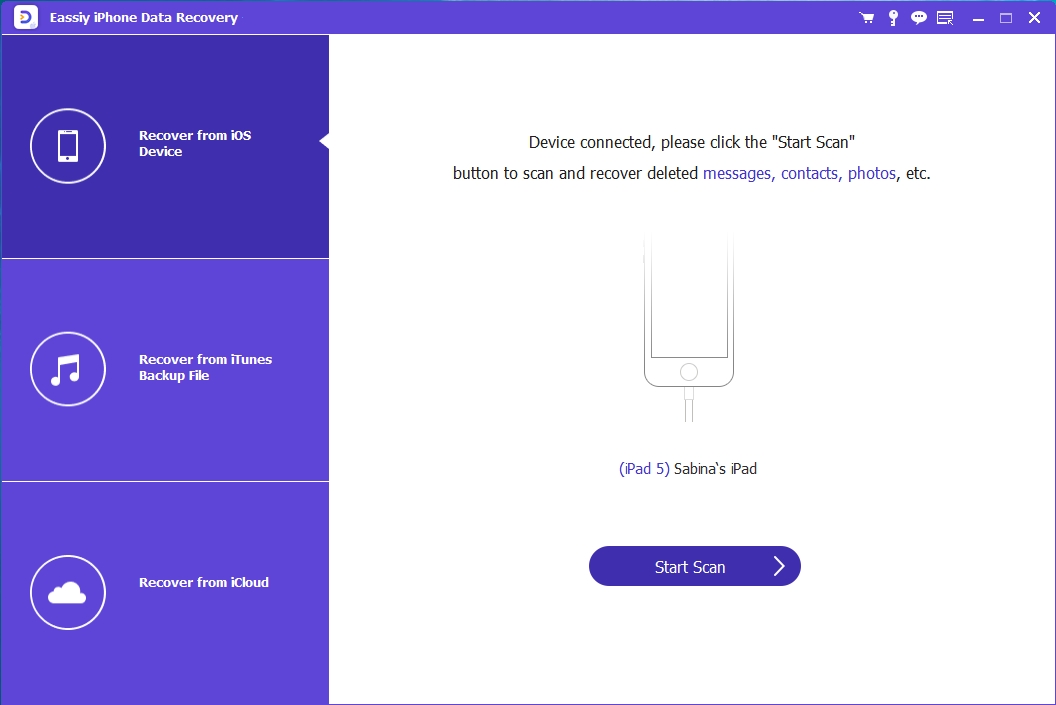
Step 2: To start scanning your lost data, click on “Start Scan” right in the middle.
Step 3: On the left side of the interface, all the scanned data will be displayed. You can preview the data before you recover them.
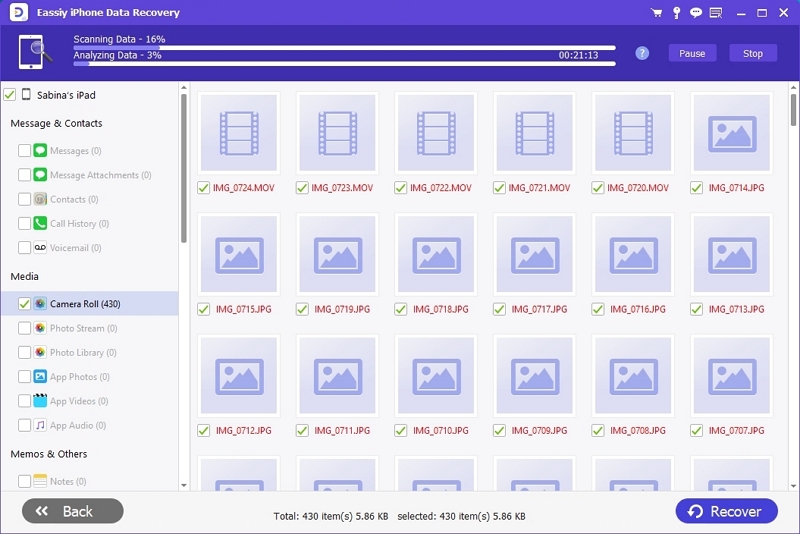
Step 4: Click on "Recover" once you select the desired data. After that, you will be able to check out the files directly on the computer.

Steps to recover data after fixing iPhone stuck in attempting data recovery selectively from iTunes backup:
Step 1: Extract Data from iTunes Backup
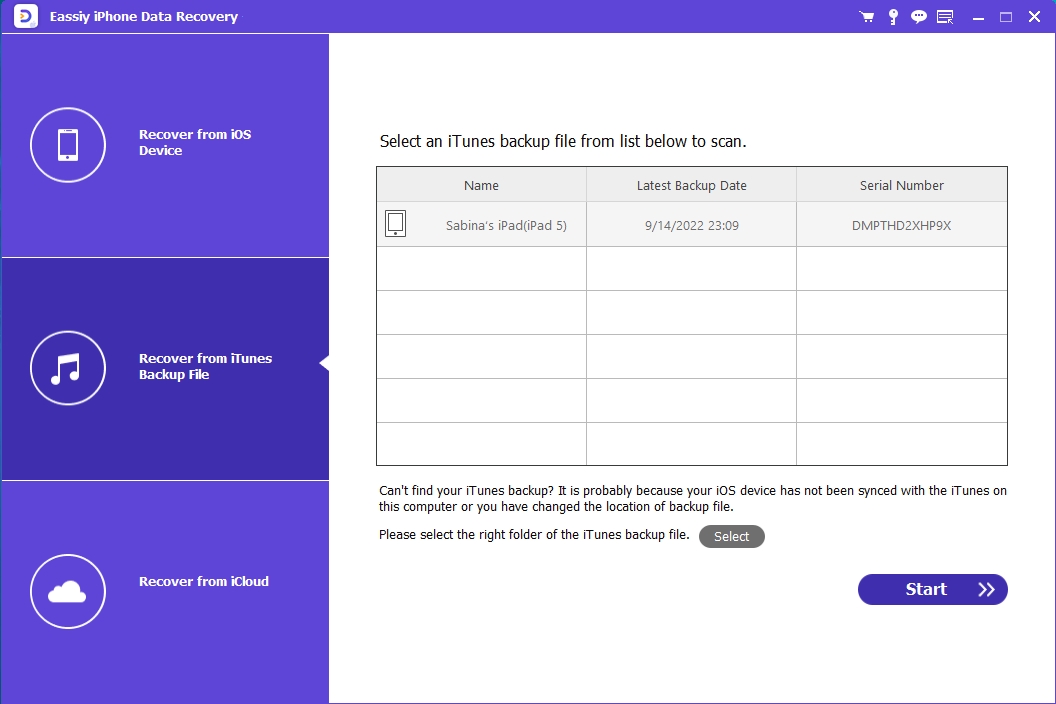
From the left of the primary window, click “Recover from iTunes Backup File”. There, you will be able to see all existing iTunes backups on the computer. Click “Start Scan” to extract it after choosing the latest one.

Step 2: View iPhone Stuck on Attempting Data Recovery Data
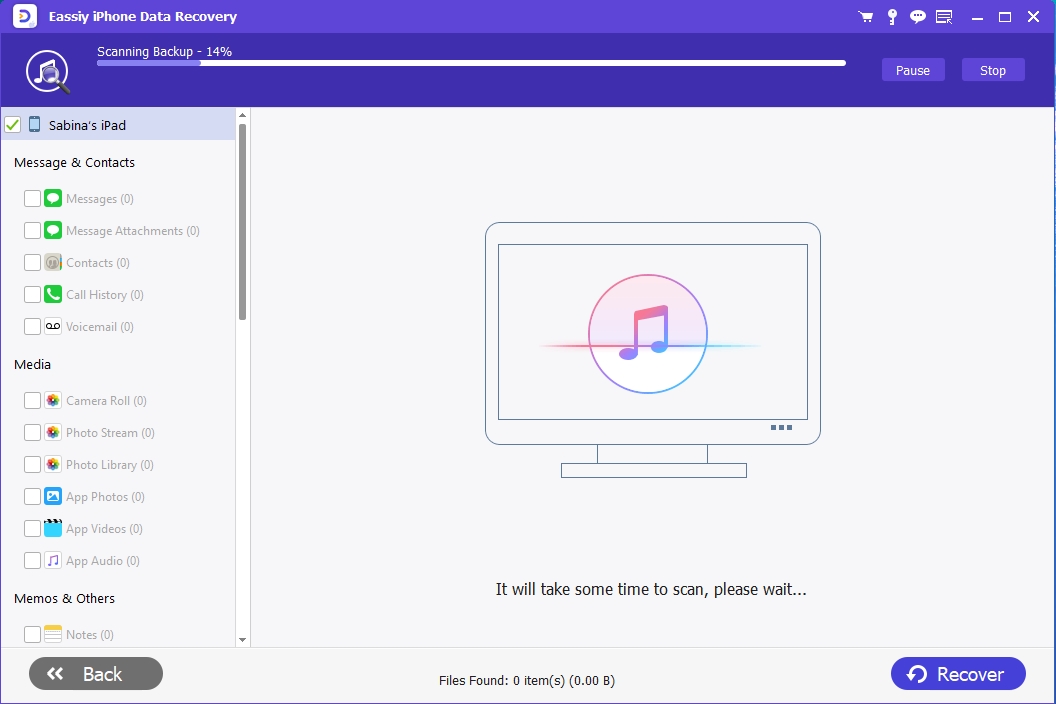
A scan report will show you how much iPhone data was found in the backup once the scan has finished. To view all your data from the stuck-in attempting data recovery iPhone, click on Camera Roll, Messages, Contacts, Notes, etc. You can mark down any item you want while previewing.
Step 3: Recover & Backup Data for iPhone Stuck in Attempting Data Recovery
To recover your iPhone data to the computer, click “Recover” at the bottom of the right corner.
Steps to recover data after fixing iPhone stuck in attempting data recovery selectively from iCloud Backup:
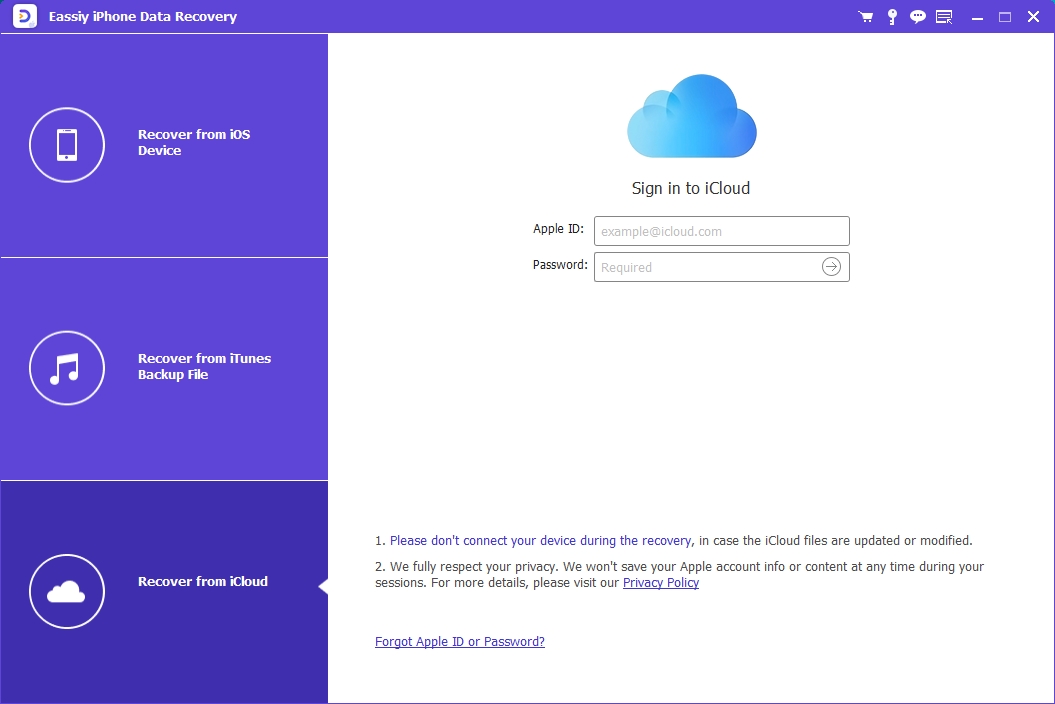
Step 1: Select “Recover from iCloud" after launching the program. After that with your Apple ID and password, sign in to iCloud.
Step 2: All your iCloud backup files will be found once you enter your iCloud account on the program. In the state column, click the “Download” button after choosing the contents you want.
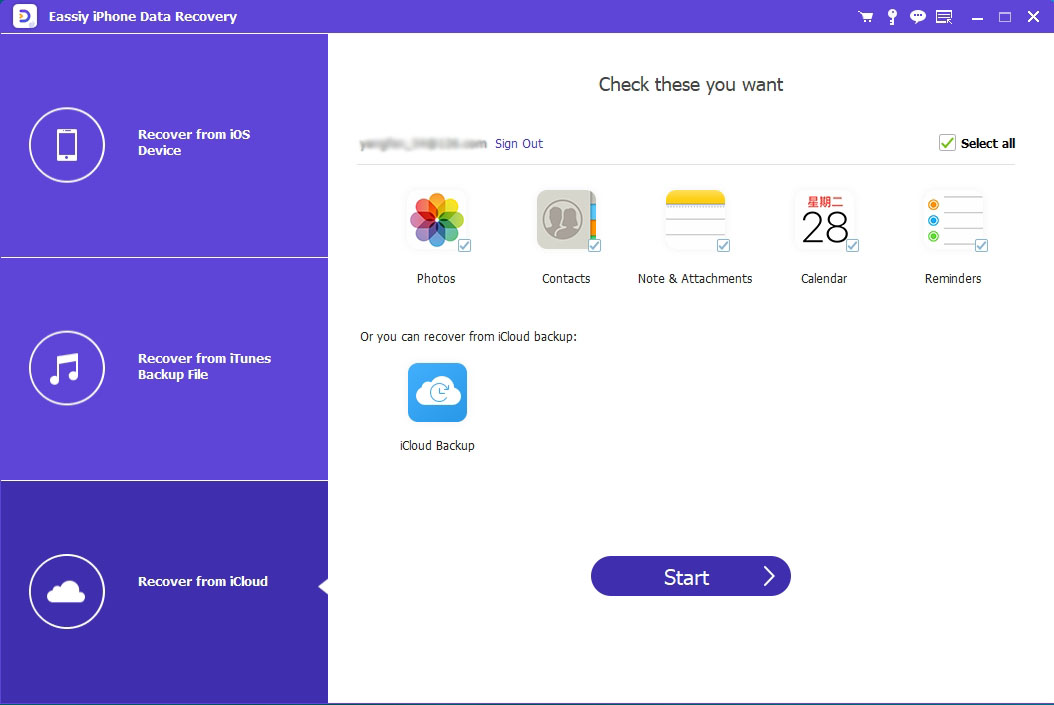
Step 3: The program will scan the data found in the backup spontaneously after downloading. You can view the scanning results like contacts, photos, messages, notes, videos, etc. a few seconds later. Select what you want to restore and to recover them to your computer, click “Recover”.

Part 4: FAQs
1. What does attempting data recovery iPhone mean?
When you update your iPhone iOS version, you might receive this message. The device's free space may be low when your iPhone is stuck at this message for a long time. For the update, you might need to release more space.
2. How can I get out of recovery mode?
To get out of recovery mode, follow the given steps:
Step 1: Until the device is powered off, hold the Sleep/Wake/Side button.
Step 2: Until the Apple logo appears, hold that button again.
Step 3: Your iPhone will reboot normally after you release the button.
3. Will I lose everything if I restore my iPhone?
All content including pictures, videos, contacts, notes, etc. will be deleted by restoring an iPhone. You will be able to retrieve everything easily if you have created a dedicated backup before restoring the device.
Conclusion:
In this article, we have introduced the best solutions to fix attempting data recovery iPhone. You should know which way is better for you to fix your iPhone stuck at attempting data recovery easily after reading this article. If the iPhone attempting data recovery failed, you will lose all your important data from your iPhone. For this, we would highly recommend you use Eassiy iPhone Data Recovery. It is one of the best choices for you to perform data recovery. With no data loss, it will help you to get back all your lost data.


