Updated on 2024-04-10
33 views
5min read
We all know that factory resets can help fix software issues, improve device performance, and clean up unnecessary data and applications. Whatever your reason, you have a factory reset on your Android phone, but you have not saved a backup of your photos and videos, and your precious data memories will be deleted and reset.
But don't worry, nowadays technology is so advanced that everything saved on your phone can be traced, and you can recover your lost photos through various methods. Here are 7 effective ways to do this, whether you back up your photos or not.
Part 1: Comparison of recovery photo schemes
| Tool | Eassiy Android Data Recovery | Local Backup | Google Photos | Google Drive | Dropbox | OneDrive | Social Platforms |
|---|---|---|---|---|---|---|---|
Steps required |
4 Steps |
3 Steps |
3 Steps |
4 Steps |
3 Steps |
3 Steps |
2 Steps |
Time to complete |
3mins |
10 mins |
8 mins |
8 mins |
7 mins |
9 mins |
3 mins |
Successful rate |
98.5% |
70% |
75% |
75% |
60% |
60% |
50% |
Part 2: Without Backup: Recovering Photos after Factory Reset on Android
If you are struggling with how to restore your Android album after factory reset without a backup, you can use Eassiy Android Data Recovery, which is designed for Android users to recover data. No jailbreaking, no backup, just one phone and one computer to restore all deleted data.
You can check the photos you want to recover individually to shorten the recovery time. Eassiy Android Data Recovery can recover 1,000 photos and videos in seconds, which is much faster than other recovery software on the market.
Key Feature
- More than 16 file types can be recovered with three different recovery modes (Android internal memory /SD card /SIM card).
- Compatible with multiple Android devices, including Huawei, Samsung, LG, SONY, etc.
- Ability to quickly recover Whatsapp chat history and deleted files.
- Adapt to various data loss scenarios, including virus attacks, SIM card not working, forget backup, operating system crash, etc.
Steps to restore Android deleted photos without backup.
Step 1: On your Android phone, open Settings > Developer Options >USB debugging mode. Install and open Eassiy Android Data Recovery. Then connect your phone to your computer.
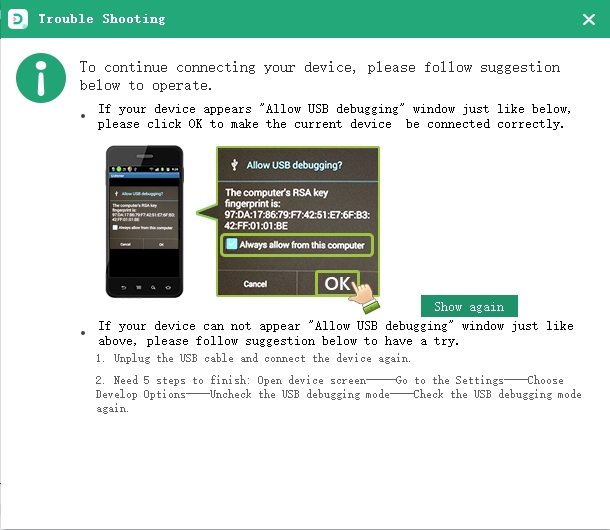
Note: If you don't have "Developer Options" in your Android phone's Settings, go to Settings > About Phone > Software Info > Click the version number 7 times to find the Developer options.
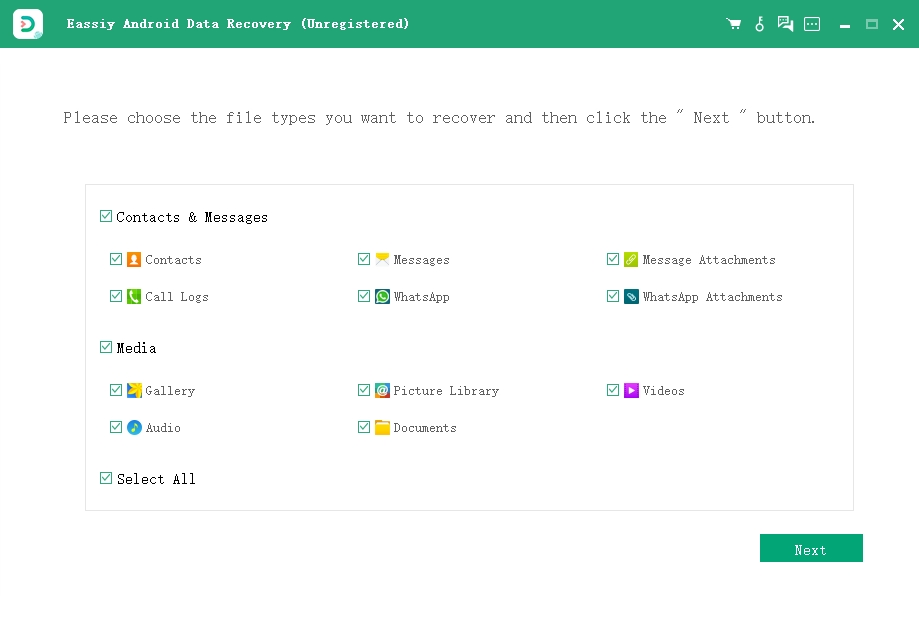
Step 2: You will be able to preview all the data types that can be recovered. Please select the Gallery and click the Next button.
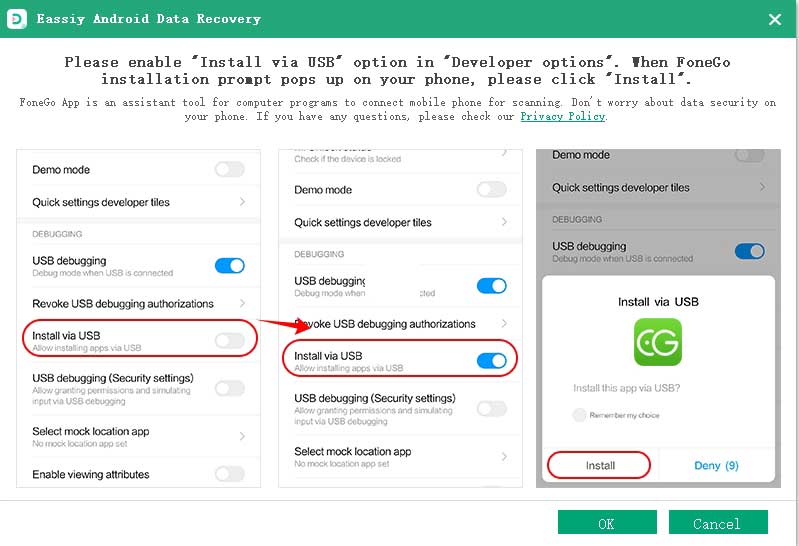
Step 3: Following this, your device will prompt you to install the Eassiy App. Once installed, Eassiy will promptly check if your device has been rooted. In the event of root access, Eassiy will conduct a deep data scan. For non-rooted devices, the quick scan mode will be utilized.
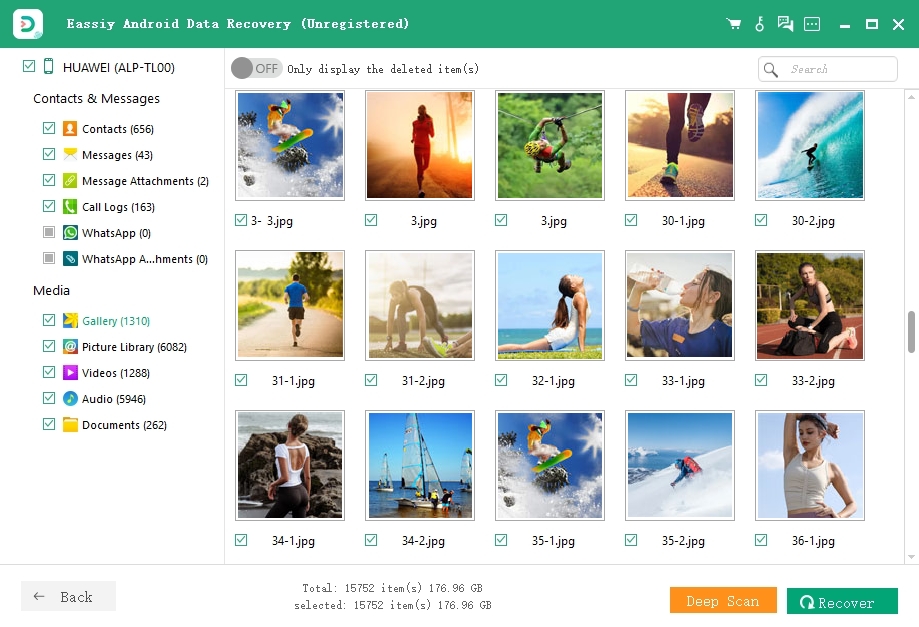
Step 4: Eassiy Android Data Recovery will immediately display all the photos before the factory reset, you can select the photos you need to re-download to your Android phone by clicking the "Recover" button. If you are not satisfied with the Scan result, you can select Deep Scan to rescan.
Part 3: How to Recover Photos after Factory Reset on Android Devices?
If you had backup data before the factory reset. There are several other options you can try. These solutions are also as secure and reliable as Eassiy Android Data Recovery.
Method 1: Retrieve Deleted Photos from Local Backup
If you backed up your phone's data before a factory reset. Well congratulations, recovering deleted photos is very easy.
Step1: Open your phone's "Settings" > "Backup and restore / reset" > "Local backups".
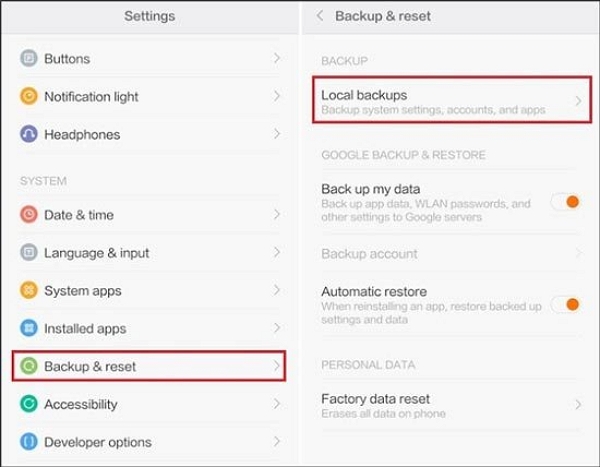
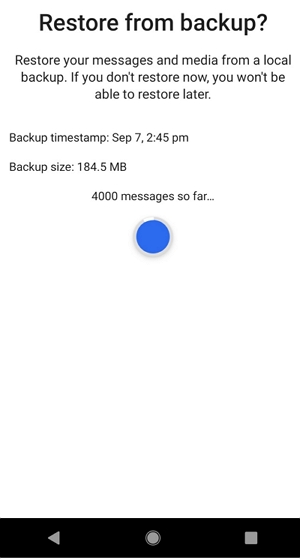
Step 2: Check the files you want to restore.
Step 3: Click "Restore" to recover your deleted photos to your gallery.
Method 2: Restore Deleted Photos via Google Photos
If you use Google Photos a lot to save your photos. Then you may be able to find the photo you want from Google's cloud space and restore it. This method only works for retrieving deleted photos within 30 days.
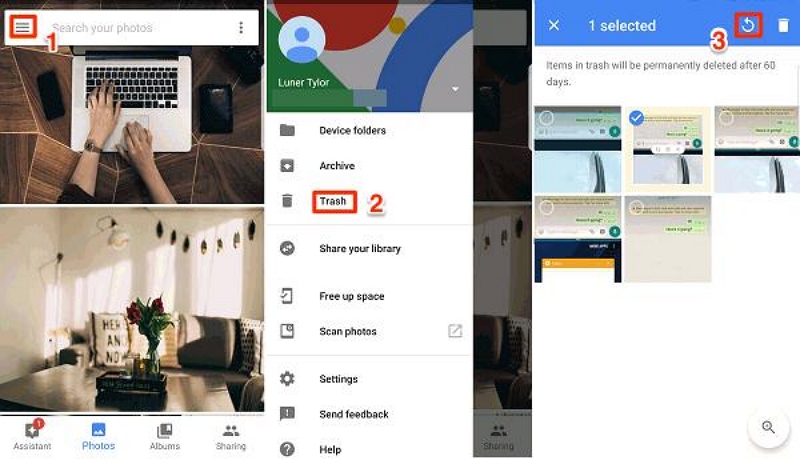
Step 1: Sign in and open Google Photos on your phone.
Step 2: Navigate to the three-bar icon in the top left corner, which is the "Menu". Then select "Trash" to view the photos and videos deleted in the last 30 days.
Step 3: Long press to check the photo you want to recover, and then click the "Recover" button. These photos will reappear in Google Photos.
Note: If you want to save it in Android's built-in albums, you can download it from Google Photos.
Method 3: Utilize Google Drive for Photo Recovery
Google Drive is a cloud-based file storage and syncing service developed by Google. Google Drive offers users a lot of free storage. Google Drive's file sync feature ensures that changes made to files on one device are automatically updated to all devices connected to the same Google account. This seamless synchronization allows users to access their files from anywhere, no matter what device they are using.
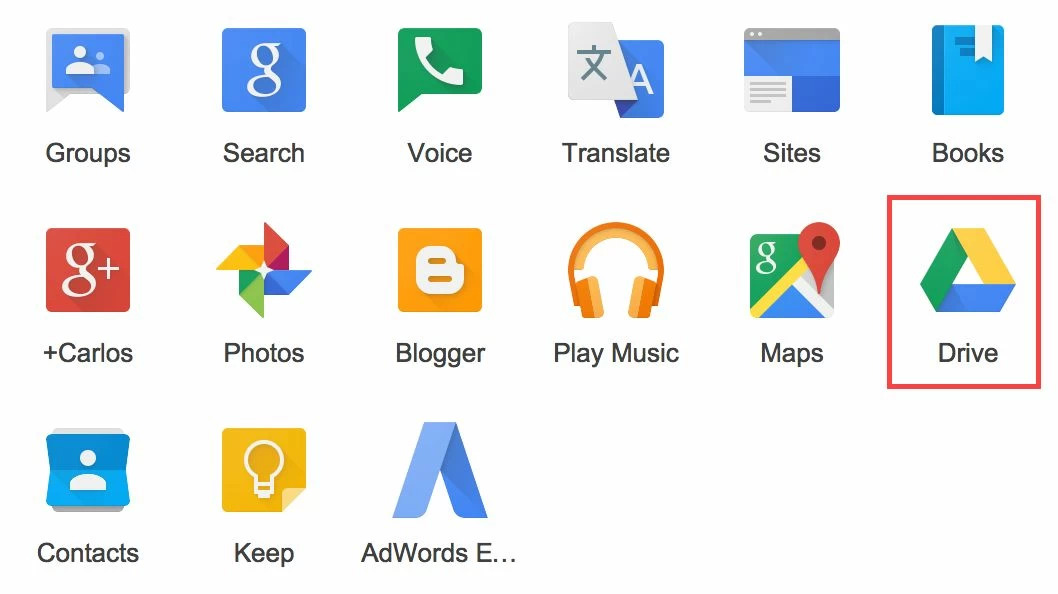
Step 1: Access Google Drive in your device.
Step 2: Select the photo you want.
Step 3: Click the "More" button in the upper right corner.
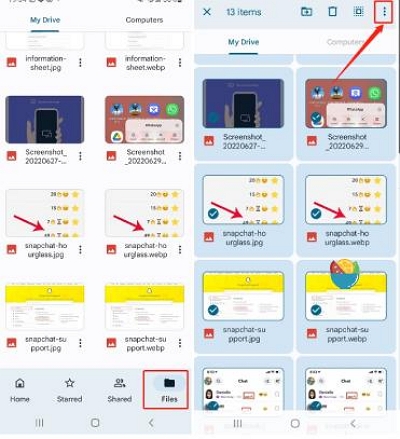
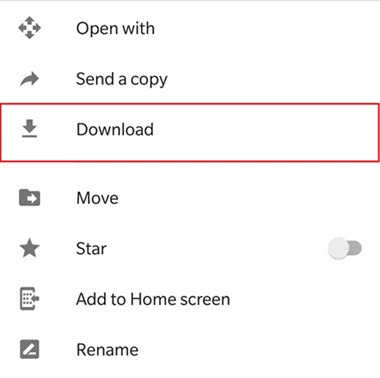
Step 4: Select Download and the photos will reappear in your Android album.
Method 4: Restore Deleted Photos with Dropbox
Dropbox is a widely used cloud storage service that allows users to store and share files online. Dropbox's core function is to sync files across multiple devices. Users can upload documents, photos, videos, and more to their Dropbox account, which then syncs across their devices, including computers, smartphones, and tablets.
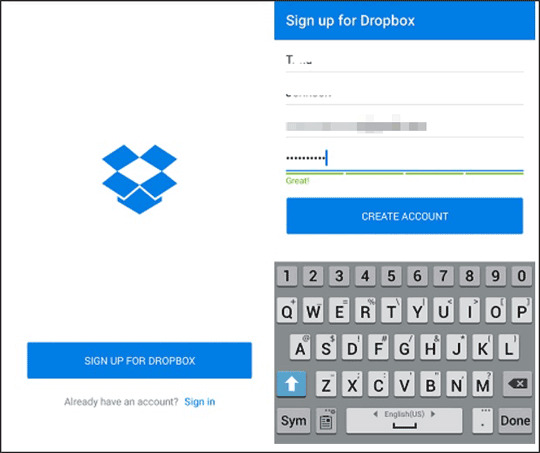
Step 1: Log into your existing Dropbox account on your Android phone.
Step 2: Select "Camera Uploads" in the left menu bar and you will see all the pictures and videos that Dropbox has backed up for you.
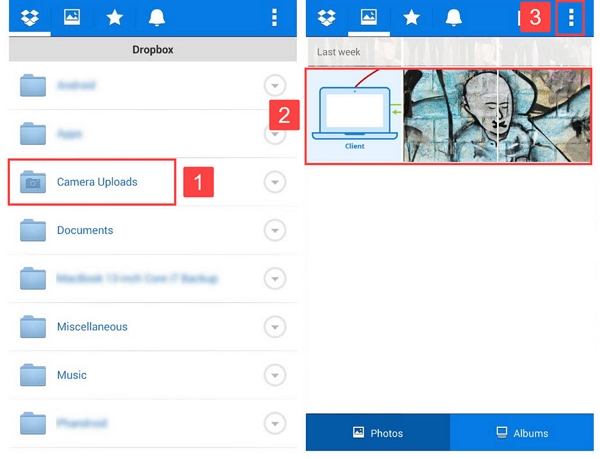
Step 3: Select the photo you want to re-save to your phone, then click the "three dots" in the top right corner and select "Save".
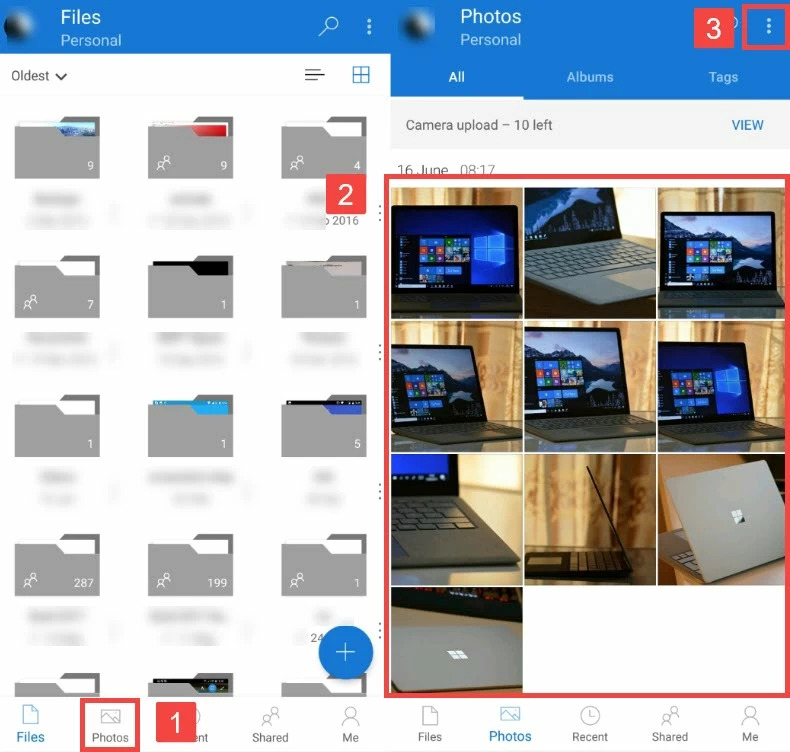
Method 5: Retrieve Deleted Photos Using OneDrive
For those utilizing OneDrive, you can leverage its cloud storage service to attempt photo recovery. Any images uploaded to OneDrive are accessible for retrieval and download from any device by logging into your OneDrive account.
Step 1: Log into the OneDrive app on your phone.
Step 2: In the bottom menu, tap Photo Options > Long-press to select the photo you want to restore to your Android phone.
Step 3: Tap the three dots in the top right corner and select "Save".
Method 6: Recover Deleted Photos by Checking Social Platforms
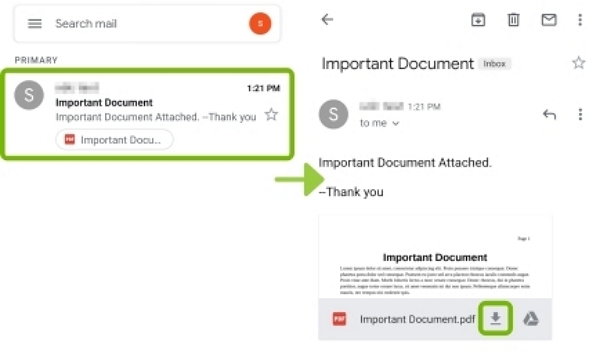
If you are looking for photos you have to send to other people to see. You can start by asking the person if they still have those photos.
Second, if you get a disappointed answer, you can check your email, if you sent pictures by attachment or mail, then the photos you are looking for may still be in your inbox, you just need to download them again and save them back to your album.
Part 4: How to Back up Photos and Videos on Android Device
It is never too late to mend. In order to prevent you from losing the photos and videos you need again, we will teach you how to back up your photos and videos safely on Android. Here's how you can do it:
1. Use Google Photos:
Step 1: Download and install the Google Photos app from the Google Play Store.
Step 2: Open the Google Photos app and sign in with your Google account.
Step 3: Tap on your profile picture or initials in the top right corner, then select "Photos settings" or "Settings."
Step 4: Under "Backup & sync," toggle the switch to enable it. This will automatically back up your photos and videos to your Google account whenever your device is connected to Wi-Fi.
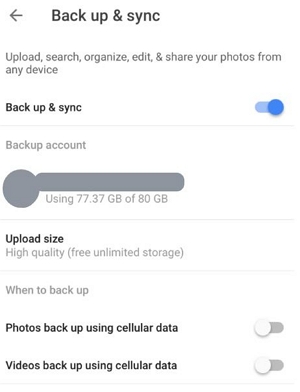
Step 5: You can choose whether to back up photos and videos in high quality (free unlimited storage) or original quality (uses Google account storage).
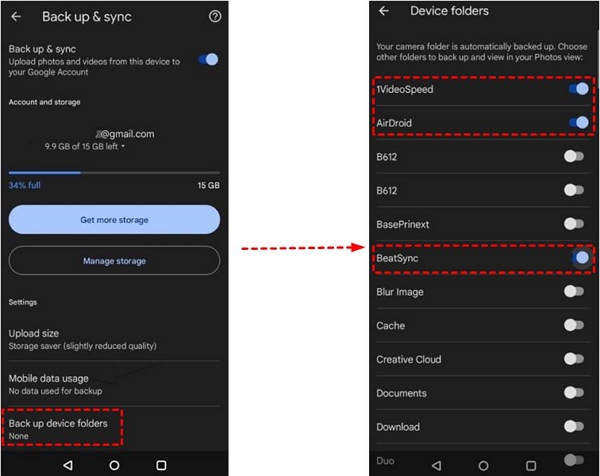
Step 6: You can also select specific folders or albums to back up by tapping on "Back up device folders."
2. Samsung Cloud (Samsung Devices):
Step 1: Open the Settings app on your Samsung device.
Step 2: Scroll down and tap on "Accounts and backup."
Step 3: Tap on "Backup and restore" or "Samsung Cloud."
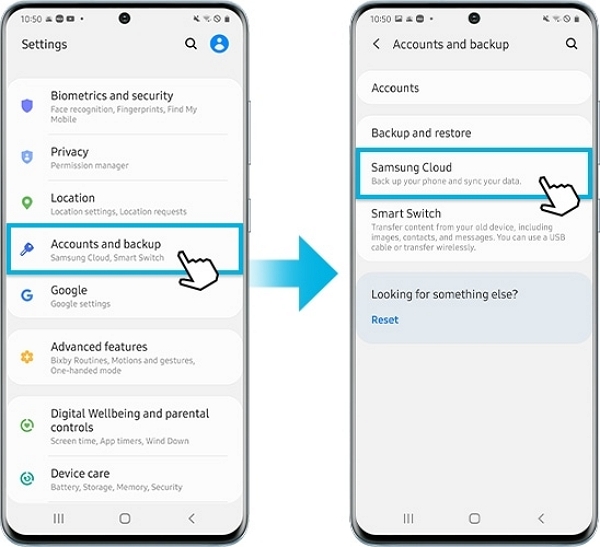
Step 4: Sign in with your Samsung account or create one if you haven't already.
Step 5: Tap on "Back up data" and select the types of data you want to back up, including photos and videos.
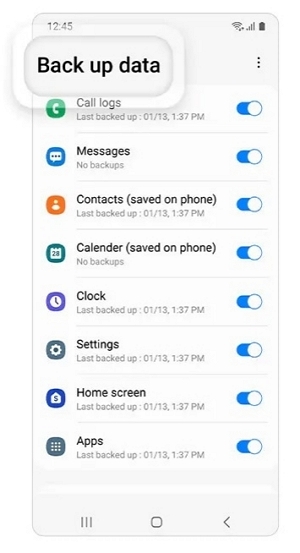
Step 6: Once enabled, your photos and videos will be automatically backed up to Samsung Cloud.
3. Other Cloud Storage Services:
Many other cloud storage services, such as Dropbox, OneDrive, and Amazon Drive, offer Android apps that allow you to back up photos and videos.
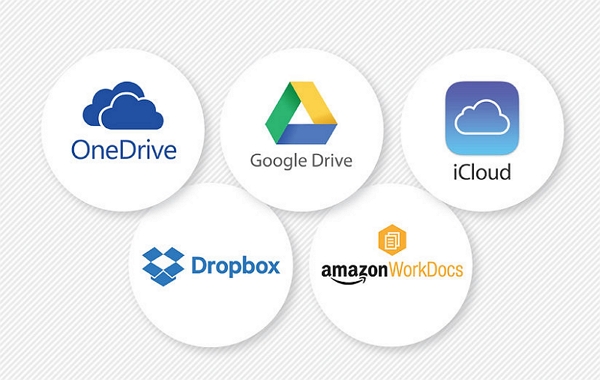
Step 1: Download and install the app for the cloud storage service of your choice from the Google Play Store.
Step 2: Sign in to your account or create a new one if needed.
Step 3: Follow the instructions in the app to enable photo and video backup. Typically, you'll find settings related to automatic backup and sync.
4. Manufacturer's Backup Solutions:
Some Android device manufacturers provide their own backup solutions. For example, Huawei devices often come with Huawei Cloud.
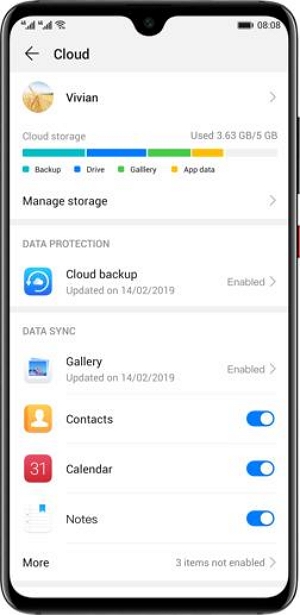
Step 1: Open the Settings app on your device and look for options related to backup or cloud services provided by your device manufacturer.
Step 2: Follow the on-screen instructions to enable photo and video backup.
By adhering to these steps, you can guarantee the safe backup and accessibility of your photos and videos, even in the event of unforeseen incidents affecting your Android device. It's important to periodically review your backup settings to confirm that backups are functioning as intended.
Conclusion:
In today's digital world, keeping our precious memories safe is crucial. Losing all photos after a factory reset can be scary, but there are ways to recover them. By comparing recovery methods carefully, we see that being prepared is key to avoiding data loss. Even without backups, there are strategies to recover photos on Android devices. Whether it's using local backups, cloud services like Google Photos, Google Drive, OneDrive, or Dropbox, or checking social platforms, there are options available. Regularly backing up photos and videos on Android devices is important for protecting our memories. By following these practices and staying alert about managing our data, we can tackle the challenges of digital preservation confidently.


